

3216 Exploring Fresh Pasta
About Fresh Pasta
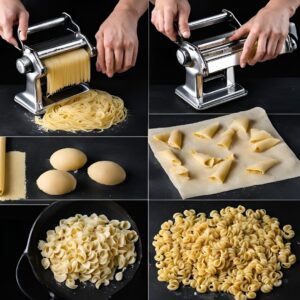
Fresh pasta is made from a simple dough of eggs and flour, occasionally with added water, oil, or salt. It is known for its delicate texture and quick cooking time compared to dried pasta. The key to excellent fresh pasta lies in the quality of ingredients and the technique of kneading and shaping the dough to the desired form.
Types of Fresh Pasta
Egg Pasta (Pasta all’uovo)
Description: Egg pasta, or “pasta all’uovo,” is made with a mixture of eggs and flour. It is rich in flavor and has a delicate texture. The addition of eggs gives the pasta a golden color and a tender bite.
Best for:
- Lasagna
- Tagliatelle
- Fettuccine
- Pappardelle
Benefits:
- Rich Flavor: The eggs add a richness and depth of flavor to the pasta.
- Tender Texture: The dough is smooth and tender, making it ideal for various shapes and preparations.
- Versatility: Can be used in a variety of dishes, from simple butter and sage sauces to hearty meat ragùs.

Homemade Egg Pasta Recipe
Ingredients:
2 cups all-purpose flour
3 large eggs
Pinch of salt
Instructions:
- Form a Dough: On a clean work surface, make a mound with the flour and create a well in the center. Crack the eggs into the well and add a pinch of salt.
- Mix: Use a fork to gently whisk the eggs, gradually incorporating the flour from the edges of the well until a dough forms.
- Knead: Knead the dough for about 10 minutes until it is smooth and elastic. If the dough is too sticky, add a little more flour.
- Rest: Wrap the dough in plastic wrap and let it rest for at least 30 minutes.
- Roll and Cut: Roll out the dough using a pasta machine or rolling pin to your desired thickness. Cut into desired shapes such as tagliatelle or fettuccine.
- Cook: Bring a large pot of salted water to a boil. Cook the pasta for 2-3 minutes until al dente. Serve with your favorite sauce
Semolina Pasta (Pasta di Semola)
Description: Semolina pasta is made with semolina flour and water. This type of pasta has a firmer texture and is often used for shapes that need to hold up well during cooking.
Best for:
- Orecchiette
- Cavatelli
- Trofie
Benefits:
- Firm Texture: Holds its shape well, making it ideal for hearty sauces.
- Distinct Flavor: Semolina adds a slightly nutty flavor to the pasta.
- Durability: Can withstand longer cooking times without becoming mushy.
Homemade Semolina Pasta Recipe
Ingredients:
2 cups semolina flour
1/2 to 3/4 cup water
Pinch of salt
Instructions:
- Form a Dough: In a large bowl, mix the semolina flour and salt. Gradually add water, mixing with your hands until a dough forms.
- Knead: Knead the dough for about 10 minutes until it is smooth and elastic.
- Rest: Cover the dough with a damp cloth and let it rest for 30 minutes.
- Shape: Divide the dough into small pieces and shape into your desired form, such as orecchiette or cavatelli.
- Cook: Bring a large pot of salted water to a boil. Cook the pasta for 5-7 minutes until al dente. Serve with your favorite sauce.
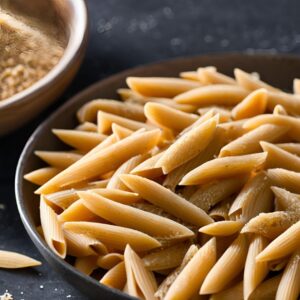
Whole Wheat Pasta
Description: Whole wheat pasta is made with whole wheat flour, giving it a nuttier flavor and a coarser texture compared to regular pasta. It is often considered a healthier alternative due to its higher fiber content.
Best for:
- Spaghetti
- Penne
- Fusilli
Benefits:
- Healthier Option: Higher in fiber and nutrients compared to regular pasta.
- Nutty Flavor: Adds a distinct taste to dishes.
- Hearty Texture: Pairs well with robust sauces.
Homemade Whole Wheat Penne Recipe
Ingredients:
1 1/2 cups whole wheat flour
1/2 cup all-purpose flour
3 large eggs
Pinch of salt
Instructions:
- Form a Dough: On a clean work surface, make a mound with the flours and create a well in the center. Crack the eggs into the well and add a pinch of salt.
- Mix: Use a fork to gently whisk the eggs, gradually incorporating the flour from the edges of the well until a dough forms.
- Knead: Knead the dough for about 10 minutes until it is smooth and elastic.
- Rest: Wrap the dough in plastic wrap and let it rest for at least 30 minutes.
- Roll and Cut: Roll out the dough using a pasta machine or rolling pin to your desired thickness. Cut into desired shapes such as spaghetti or penne.
- Cook: Bring a large pot of salted water to a boil. Cook the pasta for 2-3 minutes until al dente. Serve with your favorite sauce.
Gluten-Free Pasta
Description: Gluten-free pasta is made using alternative flours such as rice, corn, or quinoa flour. It is suitable for those with gluten intolerance or celiac disease.
Best for:
- All pasta shapes, depending on the blend of flours used.
Benefits:
- Suitable for Gluten-Intolerant Individuals: Provides a pasta option for those who cannot consume gluten.
- Variety of Flavors: Depending on the flours used, it can offer different flavors and textures.
Homemade Gluten-Free Pasta Recipe
Ingredients:
1 cup rice flour
1/2 cup potato starch
1/2 cup tapioca flour
3 large eggs
Pinch of salt
Instructions:
- Form a Dough: On a clean work surface, mix the flours and create a well in the center. Crack the eggs into the well and add a pinch of salt.
- Mix: Use a fork to gently whisk the eggs, gradually incorporating the flour from the edges of the well until a dough forms.
- Knead: Knead the dough for about 10 minutes until it is smooth and elastic.
- Rest: Wrap the dough in plastic wrap and let it rest for at least 30 minutes.
- Roll and Cut: Roll out the dough using a pasta machine or rolling pin to your desired thickness. Cut into desired shapes.
- Cook: Bring a large pot of salted water to a boil. Cook the pasta for 2-3 minutes until al dente. Serve with your favorite sauce.
Specialty and Regional Pasta
- Examples: Orecchiette, cavatelli, and pici.
- Method:
- Orecchiette:
- Ingredients: 200 grams semolina flour, 100 ml water, a pinch of salt.
- Mixing and Kneading: Combine ingredients and knead until smooth.
- Shaping: Roll into small logs, cut into small pieces, and press with your thumb to form ear-shaped discs.
- Cavatelli:
- Ingredients: 200 grams semolina flour, 100 ml water, a pinch of salt.
- Mixing and Kneading: Combine ingredients and knead until smooth.
- Shaping: Roll into small logs, cut into small pieces, and use a cavatelli board or fork to shape.
- Pici:
- Ingredients: 200 grams flour, 100 ml water, a pinch of salt.
- Mixing and Kneading: Combine ingredients and knead until smooth.
- Shaping: Roll into long, thick spaghetti-like strands by hand.
- Orecchiette:
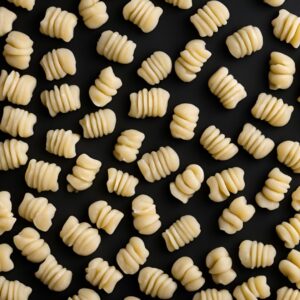
Gnocchi
Ingredients:
500 grams potatoes (preferably starchy potatoes like russets)
150 grams flour
1 large egg
A pinch of salt
Method:
- Cooking Potatoes: Boil potatoes in their skins until tender. Peel while still warm and pass through a potato ricer.
- Combine Ingredients: Mix the riced potatoes with the flour, egg, and salt to form a dough.
- Shaping: Roll the dough into logs about 1 inch thick. Cut into 1-inch pieces and press with a fork to create indentations.
- Cooking: Boil gnocchi in salted water until they float to the surface, about 2-3 minutes. Drain and serve with desired sauce.
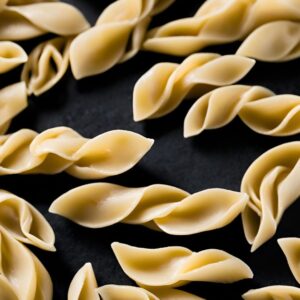
Trofie
Features: Small, twisted pasta from Liguria, ideal for pesto.
Ingredients:
200 grams flour (semolina or all-purpose)
100 ml water
Method:
- Combine Ingredients: Mix flour with water to form a dough.
- Kneading: Knead until smooth and elastic.
- Shaping: Roll small pieces of dough into thin, elongated shapes and twist each piece.
- Cooking: Boil in salted water for 3-5 minutes until tender.

Chitarra
Features: Named after the guitar-like instrument used to cut it, producing spaghetti-like noodles.
Ingredients:
200 grams “00” flour
2 large eggs
Method:
- Combine Ingredients: Place flour on a clean work surface, make a well, and add eggs.
- Mixing and Kneading: Mix and knead as described for egg pasta.
- Resting: Let the dough rest for 30 minutes.
- Cutting: Roll the dough into sheets and press through the chitarra frame to cut into noodles.
- Cooking: Boil in salted water for 2-4 minutes until al dente.
Tips for Making Fresh Pasta
- Rest the Dough: Allow the pasta dough to rest for at least 30 minutes before rolling. This helps the gluten relax and makes the dough easier to work with.
- Consistent Thickness: When rolling out pasta, ensure consistent thickness to promote even cooking.
- Avoid Overcooking: Fresh pasta cooks much quicker than dried pasta, often in just 2-4 minutes.
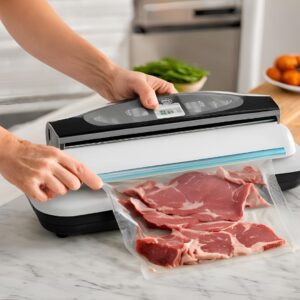
- Use Immediately: Fresh pasta is best used immediately after making. If you must store it, dust it with flour and keep it refrigerated for up to a day, or freeze for longer storage.
- Generously Salt the Water: Salt pasta water generously to enhance the pasta’s flavor.
- Stir Gently: When cooking, stir fresh pasta gently to prevent sticking without breaking the delicate noodles.
Basic Pasta Sauces
Pasta sauces are the heart of many Italian dishes and can transform simple pasta into a rich and flavorful meal. Understanding the basics of preparing various types of pasta sauces will enhance your culinary repertoire and provide endless delicious options. Here’s how to prepare five fundamental types of pasta sauces:
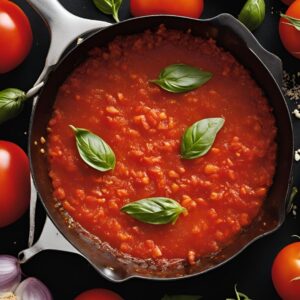
Tomato-Based Sauce
Ingredients:
- 1 can (28 oz) of high-quality canned tomatoes or 2 lbs fresh ripe tomatoes
- 2 tablespoons olive oil
- 1 large onion, finely chopped
- 3 cloves garlic, minced
- Salt and pepper to taste
- Fresh basil or oregano, chopped
Method:
- Sauté Aromatics: Heat olive oil in a pan over medium heat. Add finely chopped onions and garlic, sautéing until translucent, about 5 minutes.
- Add Tomatoes: Crush the tomatoes by hand or use canned crushed tomatoes. Add to the pan with salt, pepper, and other seasonings.
- Simmer: Let the sauce simmer on low heat for at least 30 minutes to develop the flavors. Stir occasionally to prevent sticking.
- Finish with Herbs: Add fresh basil or oregano towards the end of cooking for a fresh flavor.
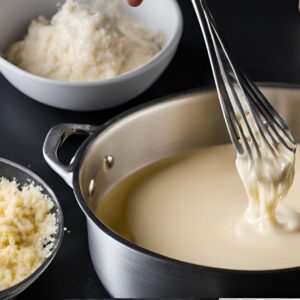
Cream-Based Sauce
Ingredients:
- 1 cup heavy cream
- 2 tablespoons butter
- 2 cloves garlic, minced
- 1 cup grated Parmesan cheese
- Salt and pepper to taste
- Optional: mushrooms, peas, or cooked chicken
Method:
- Melt Butter: In a pan, melt butter over medium heat. Add minced garlic and cook until fragrant, about 1 minute.
- Add Cream: Pour in the heavy cream, stirring continuously. Let it simmer gently to thicken, about 5-7 minutes.
- Add Cheese: Stir in grated Parmesan cheese until melted and integrated into the sauce.
- Season: Adjust the seasoning with salt and pepper. Optionally, add cooked mushrooms, peas, or cooked chicken for a more substantial sauce.
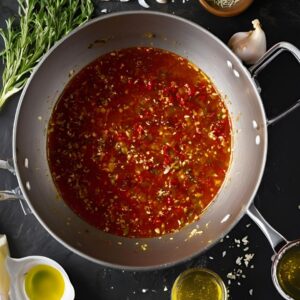
Oil-Based Sauce
Ingredients:
- 1/2 cup extra virgin olive oil
- 4 cloves garlic, thinly sliced
- 1/2 teaspoon chili flakes
- Optional: 2 anchovy fillets
Method:
- Heat Oil: Heat olive oil over low heat. Add thinly sliced garlic and optional anchovies, cooking until the garlic is golden but not burnt, about 3-4 minutes.
- Add Flavors: Incorporate chili flakes for a bit of heat.
- Combine with Pasta: Toss the cooked pasta directly in the pan with the oil mixture, allowing it to coat the pasta evenly. Add pasta water if needed to make the sauce silky.
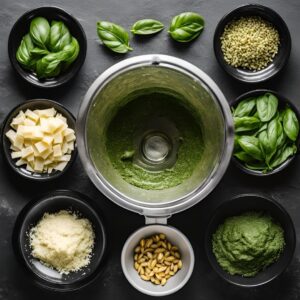
Pesto Sauce
Ingredients:
- 2 cups fresh basil leaves
- 1/4 cup pine nuts
- 1/2 cup grated Parmesan cheese
- 2 cloves garlic, chopped
- 1/2 cup olive oil
- Salt to taste
Method:
- Blend Ingredients: In a food processor, combine basil leaves, pine nuts, chopped garlic, and grated Parmesan. Pulse until finely chopped.
- Add Olive Oil: With the processor running, slowly add olive oil until the mixture forms a thick paste.
- Season: Season with salt and blend until smooth. Pesto can be used immediately or stored in the refrigerator with a layer of olive oil on top.
Vegetable Sauce
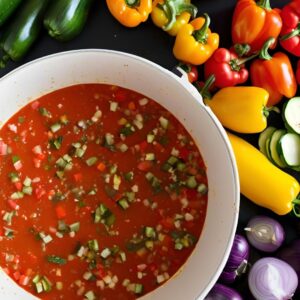
Ingredients:
- 2 bell peppers, chopped
- 1 zucchini, chopped
- 1 eggplant, chopped
- 2 tomatoes, chopped
- 2 tablespoons olive oil
- Salt, pepper, and herbs (such as thyme or rosemary) to taste
Method:
- Roast or Sauté Vegetables: Depending on preference, either roast the vegetables in the oven with olive oil until tender (about 20-25 minutes at 400°F) or sauté them in a pan.
- Blend or Chop: For a smoother sauce, blend the cooked vegetables until desired consistency. For a chunkier sauce, chop them finely.
- Simmer with Seasonings: Return the vegetables to a pan, add herbs and spices, and simmer to integrate the flavors, about 10 minutes.
General Tips for Pasta Sauce
- Fresh Ingredients: Use the freshest ingredients possible for the best flavor.
- Simmer Slowly: Allow sauces to simmer slowly to develop more depth.
- Adjust Consistency: Use pasta cooking water to adjust the consistency of your sauces as needed.
- Season Carefully: Taste as you go and adjust seasoning to ensure a well-balanced flavor.
Techniques for Making Pasta Sauces
Creating the perfect pasta dish involves more than just cooking pasta and topping it with sauce. The art of sauce making and pairing can elevate a simple dish to a memorable meal. Here are key techniques for making pasta sauces, including how to properly emulsify, blend, and match sauces with pasta shapes and flavors.
Simmering Pasta Sauces
Purpose: Simmering allows flavors to meld and intensifies the depth of the sauce. It also reduces the sauce to a thicker consistency, which clings better to pasta.
Technique:
- Sauté Aromatics: Start by heating olive oil in a pan. Add finely chopped onions, garlic, or other base ingredients and sauté until they are soft.
- Add Liquid Ingredients: Add tomatoes, broth, or cream to the pan and bring to a gentle simmer.
- Simmer: Continue to cook on low heat, stirring occasionally to prevent sticking and burning, until the sauce has reduced to your desired thickness.
Emulsifying Pasta Sauces
Purpose: Emulsification combines oil and water-based liquids into a smooth and cohesive sauce. It’s crucial for creamy or buttery sauces to ensure they are silky and evenly coated on the pasta.
Technique:
- Reserve Pasta Water: After cooking pasta, reserve some of the pasta water.
- Add Fat: Add a fat source like butter or olive oil to your sauce, then slowly pour in the reserved pasta water while continuously stirring or whisking.
- Create Emulsion: The starch in the pasta water helps the oil and water to mix, creating a smooth emulsion that binds the sauce to the pasta.
Blending Pasta Sauces
Purpose: Blending is used to achieve a smooth texture, particularly for vegetable or tomato sauces.
Technique:
- Cook Ingredients: Cook all ingredients until they are tender.
- Blend: Use a blender or food processor to puree the sauce until smooth. For a more rustic texture, use a hand blender or masher.
- Adjust: Return the sauce to heat and adjust consistency and seasonings.
Pairing Sauces with Pasta
Importance: Matching the right sauce with the right type of pasta can enhance the dining experience by ensuring proper sauce adhesion and flavor balance.
Guidelines:
- Rich, Meaty Sauces: Pair with wider noodles like pappardelle or tagliatelle which can hold more sauce.
- Light, Creamy, or Oil-Based Sauces: Best with long, thin pasta like spaghetti or linguine.
- Chunky Vegetable Sauces: Work well with pasta shapes that have nooks and crannies such as penne or fusilli, which capture the pieces of vegetables.
Matching Sauce with Pasta Shape
Purpose: The texture and shape of pasta impact how it holds onto sauces.
Technique:
- Tube-Shaped Pastas: Such as rigatoni, are great for thick, hearty sauces because the sauce can fill the tubes.
- Delicate Pastas: Such as angel hair, should be paired with delicate sauces like a light tomato basil sauce.
Complementing Pasta and Sauce Flavors
Objective: The flavor of the sauce should complement the pasta and not overpower it.
Approach:
- Balance Flavors: A simple butter and herb sauce might be perfect for fresh pasta, which has a mild, egg-rich flavor.
- Adjust Seasoning: Based on the intensity of the pasta’s flavor. Whole wheat and other flavored pastas may require stronger or more robust sauces.
Tips for Pasta Sauces
Creating exceptional pasta sauces involves more than just combining ingredients; it’s about technique, the right ingredients, and little culinary tricks that elevate your dish. Here are some essential tips to enhance your pasta sauce-making skills, focusing on seasoning, ingredient quality, and the strategic use of pasta water.
Seasoning Pasta Sauces
Layer Flavors: Build layers of flavor by starting with a base of aromatics like onion, garlic, or shallots, cooked until they are soft but not browned. Add herbs early for hearty sauces or at the end for fresh, delicate sauces.
Salt Wisely: Season your sauce gradually throughout the cooking process to develop depth and balance. Taste as you go and adjust accordingly. Remember, you can always add more salt, but you can’t take it away.
Acid Balance: Often overlooked, acid is crucial in balancing rich or very sweet sauces. A splash of vinegar or a squeeze of lemon juice can brighten flavors immensely, especially in tomato-based sauces.
Heat Element: For an added dimension, consider a pinch of red pepper flakes or a dash of black pepper. This can enhance the sauce’s complexity without overwhelming the palate.
Using Quality Ingredients for Pasta Sauces
Tomatoes: If your sauce is tomato-based, the quality of tomatoes can make or break your dish. Use ripe, fresh tomatoes in season, or high-quality canned San Marzano tomatoes for a rich, sweet base.
Herbs and Spices: Fresh herbs should look vibrant and smell fragrant. Dried herbs and spices should be used within six months to a year for the best flavor, as they lose potency over time.
Oils and Fats: The type of oil or fat can influence the flavor of your sauce. Extra virgin olive oil is ideal for Mediterranean dishes, while butter can be used for richer, cream-based sauces.
Cheeses: Incorporate high-quality cheeses, such as real Parmigiano-Reggiano or Pecorino Romano, for finishing sauces. Their depth of flavor is far superior to pre-grated cheeses and can enhance your sauce beautifully.
Reserving Pasta Water
Why Reserve Pasta Water: The starchy water in which pasta has been cooked is a key “secret ingredient” in sauces. It helps emulsify and thicken your sauce, allowing it to coat the pasta more effectively.
How to Use: Before draining your pasta, save a cup or two of the pasta water. Add a little of this starchy water to your sauce as you combine it with the pasta. The water’s temperature and starch content will help to integrate the sauce and pasta, giving a silky texture.
Adjusting Consistency: You can adjust the thickness of your sauce on the fly by adding small amounts of pasta water until you reach the desired consistency. It’s particularly useful for sauces that might seem too thick or rich.
Pairing Pasta Shapes with Sauces
Matching the right sauce with the right type of pasta can enhance the dining experience by ensuring proper sauce adhesion and flavor balance.
Long, Thin Pastas (e.g., Spaghetti, Linguine)
Long, thin pasta like spaghetti, linguine, and vermicelli are ideal for light, smooth sauces that coat the noodles without overwhelming them. Their delicate texture and slender shape don’t hold chunky ingredients well, so oil-based, light tomato or simple cream sauces work best. This type of pasta is also ideal for sauces that rely on emulsification, such as Aglio e Olio or Cacio e Pepe, where oil, pasta water, and cheese combine into a silky texture.
Best Sauce Pairings:
- Aglio e Olio (Garlic and Olive Oil): The thin strands of spaghetti or linguine allow the garlic-infused oil to cling without pooling, delivering consistent flavor. Additions like chili flakes and fresh parsley enhance the pasta’s subtle flavor, while grated Parmesan or Pecorino Romano can add a creamy element.
- Tomato-Based Sauces: Basic tomato sauces, like Marinara or Pomodoro, are perfect for long pasta, as the sauce coats each strand with a layer of fresh, acidic tomato flavor. The smooth texture of the sauce works with the pasta’s shape, making every bite balanced.
- Seafood-Based Sauces (e.g., Vongole): Light seafood sauces, like Linguine alle Vongole (clam sauce), are also excellent with long, thin pasta. The pasta absorbs the seafood-infused broth, creating a balance between the pasta and the briny flavors of clams or shrimp.
- Cream Sauces (Light): A thin coating of cream, as found in lighter cream sauces or lemon-cream sauces, can work well with spaghetti or linguine. The cream blends with the pasta’s starchy water, creating a delicate texture that sticks to the pasta without overwhelming its shape.
Tips for Success:
- Use Tongs for Coating: When tossing long pasta in these sauces, use tongs to lift and turn the noodles, allowing for even distribution.
- Reserve Pasta Water: Add a small amount of reserved pasta water to help the sauce stick, creating a lightly emulsified coating on the pasta.
- Finish in the Sauce: For the best flavor and texture, cook the pasta until just shy of al dente, then finish cooking it in the sauce for a few minutes to help the flavors meld.
Ribbon Pastas (e.g., Fettuccine, Pappardelle)
Wide, flat ribbon pasta like fettuccine and pappardelle are sturdy enough to support rich, thick sauces, such as cream-based or meat sauces. Their broad surface area and thicker consistency hold heavier sauces well, allowing the flavors to spread across each bite.
Best Sauce Pairings:
- Alfredo Sauce: The richness of Alfredo sauce, made from butter, cream, and Parmesan, pairs excellently with fettuccine. The wide noodles capture the creamy sauce evenly, delivering a luxurious bite.
- Ragù (Meat Sauce): Hearty meat sauces, such as Bolognese, work particularly well with pappardelle. The sauce clings to the wide noodles, ensuring each bite is packed with flavor from the meat and sauce.
- Mushroom Cream Sauce: Earthy mushroom sauces add depth to ribbon pasta. The wide noodles catch the mushroom pieces and cream sauce, creating a satisfying, hearty dish.
Tips for Success:
- Coat Evenly: Use a ladle to add sauce gradually and toss well, ensuring each ribbon is evenly coated.
- Al Dente Texture: Cooking ribbon pasta al dente is key to avoiding sogginess, especially with heavier sauces.
- Layered Serving: For extra visual appeal and balanced flavor, layer the sauce over the pasta in portions rather than mixing it all at once.
Tube Pastas (e.g., Penne, Rigatoni)
Tube pasta, such as penne and rigatoni, are hollow with a ridged surface, making them ideal for hearty, chunky sauces with meat, vegetables, or beans. The sauce fills the tubes and clings to the ridges, providing a flavorful, satisfying bite.
Best Sauce Pairings:
- Arrabbiata Sauce: A spicy, chunky tomato sauce with red pepper flakes, Arrabbiata works well with penne. The pasta holds the sauce within its tube and along the ridges, maximizing flavor.
- Meat-Based Sauces: Heavier sauces with ground meat, like a classic Bolognese or sausage ragù, complement rigatoni well. The sauce seeps into the pasta tubes, making each bite hearty and rich.
- Vegetable-Infused Sauces: Chunky vegetable sauces with zucchini, bell peppers, or eggplant cling to penne’s ridges, ensuring the flavors are distributed evenly.
Tips for Success:
- Toss Gently: The ridges help capture chunky sauce, so toss gently to avoid breaking up the ingredients.
- Serve with Grated Cheese: The tubes hold grated cheese well, adding another layer of texture.
- Cook Al Dente: Cooking the pasta al dente ensures it holds up under heavier sauces.
Shells (e.g., Conchiglie)
Shells, such as conchiglie, have a cup-like shape that traps smaller ingredients and sauces, making them perfect for sauces with small, flavorful chunks, such as vegetables or small pieces of meat.
Best Sauce Pairings:
- Cheese-Based Sauces: The concave shape of shells makes them ideal for thick, creamy sauces like cheese sauce, allowing the cheese to coat the pasta and settle inside each shell.
- Vegetable Sauces: Shells pair well with vegetable-based sauces containing peas, diced tomatoes, or bell peppers, as these small pieces nestle within the shell.
- Baked Dishes: Shells hold up well in baked dishes, such as a cheesy pasta bake, where sauce and cheese blend into each shell during baking.
Tips for Success:
- Fill with Sauce: Toss well to fill each shell with sauce, ensuring a flavorful bite.
- Use in Bakes: Shells are ideal for baking, as they retain structure and hold sauce and cheese even after prolonged cooking.
- Serve Hot: Shells hold heat well, so serve immediately to enjoy the sauce-filled bites.
Twisted Pastas (e.g., Fusilli, Rotini)
Twisted pasta like fusilli and rotini have spiral shapes that effectively capture sauces with small chunks or bits, making them versatile for a variety of sauces, especially those with ingredients that need to cling.
Best Sauce Pairings:
- Pesto Sauce: Twisted pasta captures pesto beautifully, with the sauce filling the spirals for even distribution. Basil, garlic, and olive oil in pesto are well-suited to fusilli’s texture.
- Meat or Vegetable Sauces: Chunky sauces with ground meat, diced vegetables, or small beans get trapped in the twists, ensuring a burst of flavor in each bite.
- Tomato-Based Sauces: Basic marinara or Pomodoro sauces cling to the twists, creating a satisfying texture where each bite is coated with sauce.
Tips for Success:
- Toss Thoroughly: Toss twisted pasta well to allow the sauce to get into all the ridges.
- Ideal for Hearty Ingredients: This shape pairs well with heavier sauces or ingredients, as the twists support the weight without losing structure.
- Serve with Parmesan: The twists hold grated cheese well, enhancing the dish’s flavor.
Stuffed Pastas (e.g., Ravioli, Tortellini)
Stuffed pasta like ravioli and tortellini come with fillings such as cheese, meat, or vegetables. Light sauces complement these pastas, allowing the filling flavors to shine through without overpowering them.
Best Sauce Pairings:
- Butter Sage Sauce: Melted butter with fresh sage leaves is an ideal match for stuffed pasta, adding flavor without masking the filling.
- Light Tomato Cream Sauce: A delicate tomato cream sauce enhances flavors in stuffed pasta, balancing acidity and richness.
- Pesto or Light Herb Sauces: Pesto or simple herb sauces like parsley or basil pesto work well, as they add flavor without overpowering.
Tips for Success:
- Avoid Heavy Sauces: Use lighter sauces to let the filling stand out.
- Gently Toss: Handle stuffed pasta with care to avoid breaking.
- Serve Freshly Garnished: Add a sprinkle of fresh herbs or grated Parmesan before serving.

 Business 3300 – Chef de Partie
 Business 2300 – Commis
 Business 1300
 Business 4300 – Sous Chef
 Business 6300 – Executive Chef
 Food Safety 2100 – Brown Belt – Commis