Introduction to Pastry Arts
Welcome to the fascinating world of pastry arts! This foundational guide will introduce you to the essential concepts, techniques, and tools needed to create a wide variety of baked goods and pastries. Whether you’re an aspiring pastry chef or a passionate home baker, mastering the basics of pastry arts is the first step towards creating delicious, professional-quality treats at home.
What Are Pastry Arts?
Pastry arts involve the creation of both sweet and savory baked goods, such as cakes, cookies, pies, tarts, breads, and pastries. This craft combines creativity, precision, and technical skills to transform basic ingredients into delectable masterpieces. From mixing doughs to decorating cakes, pastry arts require both a scientific approach and an artistic flair.
History and Evolution
The origins of pastry arts date back to ancient civilizations where early forms of baked goods were developed. Over centuries, pastry making evolved, influenced by diverse cultures and innovations. Learn how the rich history of pastry arts has shaped the modern techniques and recipes we use today.
Basic Pastry Equipment
Equipping your kitchen with the right tools is essential for success in pastry arts. Here’s a comprehensive list of basic pastry equipment you’ll need, along with descriptions of their uses.
1. Mixing Bowls
- Description: Mixing bowls are essential for combining ingredients. They come in various sizes and materials, such as stainless steel, glass, and plastic.
- Use: Used for mixing doughs, batters, and other ingredients.
2. Measuring Cups and Spoons
- Description: Accurate measuring tools are crucial for baking. Measuring cups are used for dry and liquid ingredients, while measuring spoons are used for smaller quantities.
- Use: Ensures precise measurement of ingredients, which is critical for successful baking.
3. Whisk
- Description: A whisk is a handheld tool with looped wires, used for incorporating air into ingredients.
- Use: Ideal for beating eggs, mixing batters, and emulsifying dressings.
4. Peeler and Grater
- Description: A peeler is used to remove the skin from fruits and vegetables, while a grater is used to shred or grate ingredients.
- Use: Essential for preparing fruits, vegetables, and cheese.
5. Can Opener
- Description: A can opener is a tool used to open metal cans.
- Use: Useful for opening canned fruits, vegetables, and other ingredients.
6. Colander
- Description: A colander is a bowl with holes used for draining liquids from food.
- Use: Ideal for draining pasta, washing fruits and vegetables, and straining liquids.
7. Saucepans and Skillets
- Description: Saucepans have deep sides and are used for cooking liquids, while skillets are shallow and used for frying or sautéing.
- Use: Essential for cooking custards, sauces, and fillings.
8. Rolling Pin
- Description: A rolling pin is a cylindrical tool used to roll out dough evenly.
- Use: Essential for rolling out pie crusts, puff pastry, and cookie dough.
9. Piping Bags and Tips
- Description: Piping bags are used to pipe frosting, batter, or dough, and tips come in various shapes for different designs.
- Use: Ideal for decorating cakes, filling pastries, and creating intricate designs.
10. Pastry Cutter
- Description: A pastry cutter, also known as a pastry blender, is used to cut butter into flour for making dough.
- Use: Essential for creating flaky pie crusts and biscuits.
11. Baking Sheets and Pans
- Description: Baking sheets and pans come in various sizes and shapes, such as cookie sheets, cake pans, muffin tins, and loaf pans.
- Use: Used for baking cookies, cakes, muffins, bread, and other baked goods.
12. Oven Thermometer
- Description: An oven thermometer is a tool used to check the accuracy of your oven’s temperature.
- Use: Ensures your oven is at the correct temperature for baking, which is crucial for consistent results.
13. Silicone Baking Mats or Parchment Paper
- Description: Silicone baking mats are reusable, non-stick mats, while parchment paper is disposable.
- Use: Line baking sheets to prevent sticking and make cleanup easier.
14. Cooling Racks
- Description: Cooling racks are wire racks used to cool baked goods evenly.
- Use: Allows air to circulate around baked goods, preventing them from becoming soggy.
15. Sifter or Sieve
- Description: A sifter or sieve is used to aerate and remove lumps from dry ingredients like flour and powdered sugar.
- Use: Ensures a smooth, even texture in batters and doughs.
16. Pastry Mat
- Description: A pastry mat is a non-stick surface used for rolling out dough.
- Use: Provides a clean, even surface for rolling out pastry and dough.
17. Bench Scraper
- Description: A bench scraper is a flat, rectangular tool used to scrape surfaces and cut dough.
- Use: Ideal for dividing dough, scraping excess flour, and cleaning work surfaces.
18. Pastry Brush
- Description: A pastry brush is used to apply liquids like egg wash, butter, or glazes to baked goods.
- Use: Essential for adding shine, moisture, and flavor to pastries.
19. Decorating Turntable
- Description: A rotating stand used to decorate cakes easily.
- Use: Allows for smooth, even icing and decorating of cakes.
Having the right tools is fundamental to successful baking and pastry making. By equipping your kitchen with these basic pastry tools, you’ll be well-prepared to tackle a variety of recipes and techniques. These tools will help you achieve consistent results and enhance your baking skills as you progress in the pastry arts.
Specialty Equipment in Pastry Arts
For more advanced pastry techniques and production, certain specialty equipment can make a significant difference in efficiency and quality. Here’s an overview of three essential pieces of specialty equipment: the chocolate temperer, dough sheeter, and laminator.
Chocolate Temperer
A chocolate temperer is a specialized machine used to melt and temper chocolate to achieve the ideal consistency for dipping, molding, and decorating. Tempering is the process of carefully heating and cooling chocolate to specific temperatures to stabilize the cocoa butter crystals, which gives the final product a smooth, glossy appearance and a crisp, satisfying snap.
-
Uses of a Chocolate Temperer
- Melting and Tempering: Ensures chocolate is tempered correctly, which is crucial for making chocolate bars, truffles, and dipped confections.
- Consistent Results: Provides a steady, controlled environment for maintaining the ideal temperature, making it easier to achieve consistent results.
- Large Batches: Ideal for producing large quantities of tempered chocolate efficiently.
Advantages of Using a Chocolate Temperer
- Precision: Maintains the chocolate at the exact temperature needed for tempering, ensuring a flawless finish.
- Ease of Use: Automates the process, reducing the risk of errors associated with manual tempering methods.
- Time-Saving: Speeds up production and ensures uniform quality, making it an invaluable tool for professional chocolatiers and bakers.
Dough Sheeter
A dough sheeter is a machine used to roll out large quantities of dough to a uniform thickness. It consists of rollers that flatten the dough as it passes through.
Laminator
A laminator, also known as a pastry brake, is a machine designed specifically for the lamination process, where layers of dough and butter are folded and rolled to create a laminated structure.
Uses:
- Laminated Pastries: Essential for producing high-quality laminated doughs such as puff pastry, croissants, and Danish pastry.
- Precision Folding: Automates the process of folding and rolling the dough, ensuring even layers and consistent results.
- Large-Scale Production: Ideal for bakeries and pastry shops that require large-scale production of laminated doughs.
Advantages:
- Precision: Ensures uniform thickness and even distribution of butter layers, crucial for the flakiness and rise of laminated pastries.
- Efficiency: Automates the labor-intensive process of laminating dough, significantly reducing production time.
- Consistency: Provides consistent results, enhancing the quality and uniformity of the final product.
Specialty equipment like the chocolate temperer, dough sheeter, and laminator are invaluable tools for advanced pastry techniques and high-volume production. These machines not only enhance the precision and consistency of your products but also save time and effort, allowing you to focus on creativity and innovation in your pastry creations. By incorporating these specialty tools into your kitchen, you can elevate the quality and efficiency of your pastry production, whether you’re a professional pastry chef or an ambitious home baker.
Fundamental Ingredients in Baking and Pastry
Understanding the different types of flour and their uses is essential for success in baking and pastry arts. Each type of flour has unique properties that affect the texture, flavor, and structure of baked goods.
Types of Flour
All-Purpose Flour
All-purpose flour is a versatile, medium-protein flour that is suitable for a wide range of baked goods. It is a blend of hard and soft wheat, which makes it adaptable for different recipes and an essential staple in most kitchens.
- Protein Content: Typically around 10-12%, which gives it the balance between tenderness and structure, making it suitable for various types of baking.
- Uses:
- Ideal for cookies, cakes, muffins, quick breads, and general-purpose baking.
- Can also be used for thickening sauces, gravies, and even as a coating for fried foods.
- Benefits:
- Versatility: Its medium protein content allows it to provide both the tenderness needed in cakes and the structure required in breads, making it the most flexible option for a wide range of recipes.
- Availability: Readily available in most grocery stores, making it convenient for any baking project.
- Adaptability: Works well in recipes calling for other types of flour when no other option is available, although texture may vary slightly.
Cake Flour
Cake flour is a finely milled, low-protein flour that produces tender and delicate baked goods. It is made from soft wheat and is known for its soft texture and light consistency, which contributes to the fluffy structure of cakes.
- Protein Content: Typically around 7-9%, which means it contains less gluten, resulting in a finer, softer crumb.
- Uses:
- Best for cakes, particularly those with a fine crumb such as sponge cakes, angel food cakes, and cupcakes.
- Ideal for other delicate baked goods like chiffon cakes, cake rolls, and certain types of cookies that require a softer texture.
- Can also be used in muffins and scones when a more tender crumb is desired.
- Benefits:
- Tenderness: The low protein content produces less gluten, leading to a softer and more tender texture in baked goods.
- Light and Fluffy: The finely milled nature of cake flour contributes to a lighter, fluffier structure, which is key for cakes that require a delicate crumb.
- Moisture Absorption: Cake flour has a high starch content, which helps retain moisture, keeping cakes tender and soft.
Pastry Flour
Pastry flour is a low-protein flour that falls between all-purpose and cake flour, providing a balance of tenderness and structure. It is designed for recipes that require a delicate, tender crumb but still need some structural integrity.
- Protein Content: Typically around 8-9%, which makes it an ideal balance between softness and strength for pastries and baked goods that are tender but not overly crumbly.
- Uses:
- Perfect for pastries, pie crusts, tarts, and cookies that require a tender texture but need enough structure to hold their shape.
- Ideal for making biscuits, scones, and muffins when a soft, flaky texture is desired.
- Useful for making quick breads that benefit from a finer crumb but still need more strength than cake flour can provide.
- Benefits:
- Tender Texture: The protein level is low enough to create a tender, delicate texture, making it perfect for baked goods that should be flaky or light.
- Good Balance: Provides a good balance between softness and structural integrity, making it versatile for a variety of recipes that require both.
- Consistent Results: Using pastry flour helps achieve consistently tender and flaky pastries, as opposed to using all-purpose flour, which can result in a tougher product.
Bread Flour
Bread flour is a high-protein flour designed to produce a strong gluten network, giving bread its chewy texture and good rise. It is milled from hard wheat varieties, which makes it excellent for recipes that require elasticity and a firm structure.
- Protein Content: Typically around 12-14%, which is higher than all-purpose flour, leading to a greater gluten development during mixing and kneading.
- Uses:
- Yeast Breads: Ideal for yeast-based breads such as sandwich loaves, artisan breads, sourdough, and baguettes, which need a strong gluten network for rise and structure.
- Pizza Dough: The high gluten content in bread flour gives pizza dough its characteristic chewy texture.
- Bagels and Pretzels: Great for making bagels, pretzels, and other baked goods that require a dense and chewy texture.
- Dinner Rolls: Useful in dinner rolls, providing a nice balance of softness and structure.
- Benefits:
- Strong Gluten Network: The higher protein content forms a robust gluten network, which is crucial for trapping the carbon dioxide produced by yeast. This gives bread flour its superior rise and chewy texture.
- Elasticity: Bread dough made with bread flour is more elastic, which allows for better gas retention during proofing, resulting in a higher loaf.
- Excellent Texture: Provides the chewy, structured texture that is highly desirable in yeast breads and pizza crusts.
Whole Wheat Flour
- Description: Whole wheat flour is made from the entire wheat kernel, including the bran and germ, providing a higher fiber content and a nutty flavor.
- Protein Content: Typically around 13-14%.
- Uses: Suitable for whole grain breads, muffins, pancakes, and cookies. Often mixed with all-purpose flour to improve texture and rise.
Specialty Flours
Specialty flours encompass a wide range of flours made from various grains, seeds, nuts, and legumes. Each type offers unique flavors, textures, and nutritional benefits, and they can be used to create distinctive baked goods or enhance the properties of traditional recipes.
Almond Flour
Made from finely ground almonds, almond flour is rich in protein and healthy fats, and it has a slightly sweet, nutty flavor.
- Uses: Commonly used in gluten-free baking, for making macarons, cookies, cakes, and as a coating for meat and fish.
- Texture: Provides a moist, tender texture to baked goods.
Coconut Flour
Made from dried, ground coconut meat, coconut flour is high in fiber and has a mild coconut flavor.
- Uses: Used in gluten-free baking, for making pancakes, muffins, and cookies. It absorbs a lot of liquid, so recipes often require additional eggs or liquids.
- Texture: Can make baked goods dense if not used properly.
Rye Flour
Made from ground rye grains, rye flour has a distinctive, slightly tangy flavor and is rich in nutrients.
- Uses: Traditional in bread making, especially for rye bread, pumpernickel, and sourdough. Can be combined with wheat flour for a lighter texture.
- Texture: Produces dense, hearty bread with a chewy texture.
Spelt Flour
Spelt is an ancient grain with a nutty, slightly sweet flavor. Spelt flour can be used as a substitute for wheat flour in many recipes.
- Uses: Ideal for bread, muffins, pancakes, and pasta. Can be used in combination with other flours for improved texture.
- Texture: Provides a tender crumb and slightly denser texture compared to wheat flour.
Buckwheat Flour
Despite its name, buckwheat is not related to wheat and is gluten-free. Buckwheat flour has a rich, earthy flavor.
- Uses: Used in pancakes, crepes, soba noodles, and as a component in gluten-free baking.
- Texture: Adds a hearty texture to baked goods.
Oat Flour
Made from finely ground oats, oat flour is high in fiber and has a mild, slightly sweet flavor.
- Uses: Commonly used in cookies, muffins, pancakes, and gluten-free baking. Can be used as a partial substitute for wheat flour.
- Texture: Adds moisture and a tender texture to baked goods.
Chickpea (Garbanzo Bean) Flour
Made from ground chickpeas, this flour is high in protein and has a slightly nutty flavor.
- Uses: Used in flatbreads, fritters, and as a thickener in soups and sauces. Popular in Indian and Mediterranean cuisine.
- Texture: Provides a dense, slightly grainy texture.
Teff Flour
Teff is a tiny, nutrient-rich grain with a mild, nutty flavor. Teff flour is gluten-free and commonly used in Ethiopian cuisine.
- Uses: Ideal for making injera (Ethiopian flatbread), and can be used in gluten-free baking for breads, cookies, and pancakes.
- Texture: Adds a slightly gritty texture and a rich flavor.
Sorghum Flour
Sorghum is an ancient grain that is gluten-free and has a mild, sweet flavor.
- Uses: Used in gluten-free baking, for making breads, muffins, and pancakes. Often combined with other gluten-free flours for better texture.
- Texture: Adds a light, fluffy texture to baked goods.
Quinoa Flour
Made from ground quinoa seeds, quinoa flour is high in protein and has a slightly bitter, nutty flavor.
- Uses: Used in gluten-free baking for breads, muffins, and pancakes. Can be combined with other flours to improve texture.
- Texture: Adds moisture and density to baked goods.
Millet Flour
Millet is a small, round grain that is gluten-free. Millet flour has a mild, slightly sweet flavor.
- Uses: Used in gluten-free baking, for making breads, muffins, and pancakes. Often combined with other flours.
- Texture: Provides a tender crumb and light texture.
Amaranth Flour
Amaranth is a highly nutritious, gluten-free grain with a slightly earthy, nutty flavor.
- Uses: Used in gluten-free baking, for making breads, muffins, and pancakes. Often combined with other flours for better texture.
- Texture: Adds a dense, slightly sticky texture.
Self-Rising Flour
Self-rising flour is all-purpose flour with added baking powder and salt.
- Protein Content: Typically around 8-9%.
- Uses: Convenient for making quick breads, biscuits, and pancakes without needing to add leavening agents separately.
Fats and Oils in Baking and Pastry
Fats and oils play a crucial role in baking and pastry making, contributing to the flavor, texture, and overall quality of the finished products. Understanding the different types of fats and their specific functions can help you achieve the desired results in your baking endeavors.
Butter
Butter is a dairy product made by churning cream. It is prized for its rich flavor and creamy texture.
- Types: Unsalted butter is typically used in baking for better control over the salt content. Salted butter can also be used but may alter the flavor of the finished product.
- Uses: Commonly used in cookies, cakes, pastries, and pie crusts. It adds flavor, tenderness, and flakiness.
- Properties: Butter has a melting point around 90-95°F (32-35°C), which helps in creating tender and flaky textures.
Shortening
Shortening is a hydrogenated vegetable oil that is solid at room temperature. It has no water content and a neutral flavor.
- Uses: Often used in pie crusts, biscuits, and pastries for its ability to create a tender, flaky texture without adding moisture.
- Properties: Shortening has a higher melting point than butter, which helps maintain dough structure and prevent spreading during baking.
Margarine
Margarine is a butter substitute made from vegetable oils and water. It can be found in both stick and tub forms.
- Uses: Can be used in place of butter in most baking recipes, although it may not provide the same flavor or texture.
- Properties: Margarine contains water, which can affect the texture of baked goods. Choose stick margarine for baking, as tub margarine usually has a higher water content.
Lard
Lard is rendered pork fat. It has been used traditionally in baking for its unique properties and flavor.
- Uses: Ideal for pie crusts, biscuits, and some traditional pastries. Lard creates very flaky and tender baked goods.
- Properties: Lard has a high melting point and a unique fat composition that contributes to its ability to produce flaky textures.
Oils
Oils are liquid fats extracted from various plants, nuts, and seeds. Common types include vegetable oil, canola oil, olive oil, and sunflower oil.
- Uses: Used in cakes, muffins, quick breads, and some pastries. Oils add moisture and tenderness.
- Properties: Oils do not solidify at room temperature, which makes them ideal for adding moisture but not for creating flaky textures.
Coconut Oil
Coconut oil is extracted from coconut meat and is solid at room temperature but melts at around 76°F (24°C).
- Uses: Can be used as a substitute for butter or shortening in baking. It adds a subtle coconut flavor to baked goods.
- Properties: Coconut oil can provide similar texture benefits to butter and shortening, making it suitable for pastries and pie crusts.
Importance of Fats in Pastry Making
Fats are essential in pastry making for several reasons:
- Flavor: Fats like butter and lard impart a rich flavor to baked goods that is difficult to replicate with other ingredients.
- Texture: Fats contribute to the tenderness, flakiness, and moistness of pastries. They coat the flour proteins, preventing them from forming too much gluten, which keeps the pastry tender.
- Leavening: In creamed mixtures, fats trap air when beaten, which helps to leaven baked goods and create a light, airy texture.
- Mouthfeel: Fats enhance the mouthfeel of baked goods, giving them a pleasant, melt-in-your-mouth quality.
- Shelf Life: Fats can help extend the shelf life of baked goods by retaining moisture and preventing staleness.
Understanding the different types of fats and oils, and their specific roles in baking and pastry making, is essential for achieving desired textures and flavors in your baked goods. Each type of fat offers unique properties that can enhance your recipes, whether you’re aiming for a tender cake, a flaky pie crust, or a rich pastry. By selecting the appropriate fat for your recipe, you can ensure the best possible results in your baking projects.
Sugars and Sweeteners in Baking and Pastry
Sugars and sweeteners are essential ingredients in baking and pastry making, providing sweetness, flavor, moisture, and contributing to the texture and color of baked goods. Here’s an overview of the different types of sugars and sweeteners and their uses.
Granulated Sugar (White Sugar)
Granulated sugar is the most common type of sugar used in baking. It is refined and crystallized from sugar cane or sugar beets.
- Uses: Used in a wide range of baked goods, including cookies, cakes, and pastries. It also helps in creaming butter, which adds air to batters for light and fluffy textures.
- Properties: Dissolves well in both batters and doughs, providing sweetness and contributing to the structure and browning of baked goods.
Powdered Sugar (Confectioners’ Sugar)
Powdered sugar is finely ground granulated sugar mixed with a small amount of cornstarch to prevent clumping.
- Uses: Ideal for icings, frostings, and dusting finished baked goods. Also used in some cookie and candy recipes.
- Properties: Dissolves easily and creates smooth, creamy textures in frostings and glazes.
Brown Sugar
Brown sugar is granulated sugar with added molasses, which gives it a distinct flavor and moisture content. It comes in light and dark varieties.
- Uses: Commonly used in cookies, cakes, muffins, and sauces. Adds moisture, a rich flavor, and a chewy texture to baked goods.
- Properties: Higher moisture content than granulated sugar, contributing to a softer texture in baked goods. The molasses also adds a caramel-like flavor.
Caster Sugar (Superfine Sugar)
Caster sugar is a finer granulated sugar that dissolves more quickly and evenly.
- Uses: Ideal for meringues, whipped creams, and fine-textured cakes. Often used in recipes where quick dissolving is necessary.
- Properties: Provides a smooth texture and can be used to create finer, more delicate baked goods.5. Raw Sugars
Raw Sugar
Raw sugars are minimally processed sugars with larger crystals and a natural golden color. Types include turbinado and demerara sugar.
- Uses: Often used as a topping for baked goods to add crunch and a caramel-like flavor. Can be used in place of granulated sugar in some recipes.
- Properties: Adds texture and a hint of molasses flavor to baked goods. Crystals do not dissolve as easily as granulated sugar, which can contribute to a crunchy texture when used as a topping.
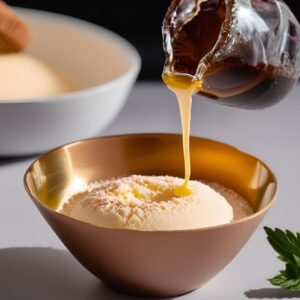
Honey
Honey is a natural sweetener produced by bees from flower nectar. It has a distinctive flavor that varies depending on the floral source.
- Uses: Used in cakes, cookies, bread, and glazes. Can also be used as a substitute for granulated sugar in many recipes.
- Properties: Adds moisture and a unique flavor to baked goods. It also contributes to browning and has humectant properties, helping to keep baked goods moist.
Maple Syrup
Maple syrup is a natural sweetener made from the sap of sugar maple trees. It has a rich, distinctive flavor.
- Uses: Used in pancakes, waffles, cookies, cakes, and frostings. Can also be used as a sweetener in bread and muffins.
- Properties: Adds moisture, a unique flavor, and a rich color to baked goods. It also helps with browning due to its sugar content.
Molasses
Molasses is a thick, dark syrup produced as a byproduct of refining sugarcane or sugar beets into sugar. There are different types, including light, dark, and blackstrap.
- Uses: Commonly used in gingerbread, cookies, cakes, and savory dishes. Adds a deep, rich flavor and color to baked goods.
- Properties: Adds moisture, a robust flavor, and enhances the browning of baked goods. Blackstrap molasses has a very strong flavor and is less sweet than light or dark molasses.
Alternative Sweeteners in Baking and Pastry
Alternative sweeteners are used as substitutes for traditional sugars in baking and pastry, often to reduce calories, provide a lower glycemic index, or cater to dietary restrictions such as diabetes or vegan diets. Here’s an overview of various alternative sweeteners and their uses in baking.
Stevia
Stevia is a natural sweetener extracted from the leaves of the Stevia rebaudiana plant. It is much sweeter than sugar and has no calories.
- Uses: Ideal for sweetening beverages, baked goods, and desserts. It can be used in place of sugar in many recipes, but due to its intense sweetness, only a small amount is needed.
- Properties: Stevia does not caramelize or provide bulk like sugar, which can affect the texture and browning of baked goods. It often requires the addition of bulking agents or other adjustments in recipes.
Erythritol
Erythritol is a sugar alcohol derived from fruits and fermented foods. It has about 70% of the sweetness of sugar but with almost no calories.
- Uses: Can be used in baking, candy making, and as a tabletop sweetener. It is often used in combination with other sweeteners to balance sweetness and texture.
- Properties: Erythritol has a cooling effect on the tongue and does not caramelize. It has a similar bulk to sugar and can replace sugar in a 1:1 ratio, but adjustments may be needed for moisture and texture.
Xylitol
Xylitol is a sugar alcohol derived from corn or birch wood. It has the same sweetness as sugar with fewer calories.
- Uses: Suitable for baking, cooking, and as a sweetener for beverages. It is commonly used in sugar-free gum and candies.
- Properties: Xylitol retains moisture well and has a similar bulk to sugar, making it a good substitute in a 1:1 ratio. However, it can be toxic to pets, so caution is needed.
Monk Fruit Sweetener
Monk fruit sweetener is derived from the monk fruit (luo han guo) and is much sweeter than sugar, with no calories.
- Uses: Used in baking, beverages, and desserts. It can replace sugar, but due to its intense sweetness, it is often blended with other sweeteners.
- Properties: Monk fruit sweetener does not caramelize or provide bulk. It often requires adjustments in recipes to account for its different properties.
Agave Nectar
Agave nectar is a sweet syrup derived from the agave plant. It is sweeter than sugar and has a lower glycemic index.
- Uses: Can be used in baking, cooking, and as a sweetener for beverages. It is often used as a vegan alternative to honey.
- Properties: Agave nectar adds moisture and a slight caramel flavor to baked goods. It can replace honey or sugar in recipes, but adjustments to liquid ratios may be necessary.
Coconut Sugar
Coconut sugar is made from the sap of coconut palm flowers. It has a caramel-like flavor and a lower glycemic index than regular sugar.
- Uses: Suitable for baking, cooking, and as a sweetener for beverages. It can replace brown sugar or granulated sugar in a 1:1 ratio.
- Properties: Coconut sugar provides a similar bulk to regular sugar and enhances the flavor of baked goods with its rich, caramel taste.
Date Sugar
Date sugar is made from ground dried dates. It has a rich, caramel-like flavor and is high in fiber.
- Uses: Used in baking and cooking as a substitute for brown sugar. It can be used in cookies, cakes, and muffins.
- Properties: Date sugar does not dissolve as well as granulated sugar and can add a grainy texture to baked goods. It also retains the fiber and nutrients of whole dates.
Yacon Syrup
Yacon syrup is derived from the root of the yacon plant. It has a sweet, molasses-like flavor and a low glycemic index.
- Uses: Used in baking, cooking, and as a sweetener for beverages. It can replace honey or molasses in recipes.
- Properties: Adds moisture and a rich flavor to baked goods. It has prebiotic properties, which can benefit digestive health.
Alternative sweeteners offer various benefits for those looking to reduce sugar intake, manage blood sugar levels, or follow specific dietary preferences. Understanding the properties and uses of each alternative sweetener allows bakers to make informed choices and adjust recipes accordingly. By experimenting with these sweeteners, you can create delicious and healthier baked goods that cater to a wide range of dietary needs.
Use of Eggs in Baking and Pastry
Eggs are a fundamental ingredient in baking and pastry, contributing to the structure, texture, flavor, and color of baked goods. Understanding the various functions and types of eggs can help bakers achieve the desired results in their recipes.
Structure and Leavening with Eggs in Baking and Pastry
Eggs provide structure to baked goods by coagulating during baking, which helps to set the shape and texture. They also contribute to leavening by trapping air during mixing.
- Function: Eggs help create a stable structure in cakes, cookies, and bread. When whipped, egg whites can incorporate air, adding volume and lightness to recipes like meringues and soufflés.
Emulsification of Eggs in Baking and Pastry
Eggs act as emulsifiers, helping to blend ingredients that typically don’t mix well, such as oil and water.
- Function: Egg yolks contain lecithin, an emulsifying agent that creates a smooth, stable mixture. This is crucial in recipes like mayonnaise, custards, and cake batters.
Emulsifiers with Eggs in Baking and Pastry
Emulsifiers in eggs, particularly in egg yolks, help to stabilize mixtures and improve texture.
- Function: In addition to lecithin, egg yolks contain other proteins and fats that enhance emulsification, ensuring that baked goods have a uniform texture and preventing separation of ingredients.
Moisture and Richness of Eggs in Baking and Pastry
Eggs add moisture and richness to baked goods due to their high water and fat content.
- Function: The moisture from eggs helps keep baked goods tender and prevents them from drying out. The fat in egg yolks adds richness and enhances the overall flavor and mouthfeel.
Color and Flavor of Eggs in Baking and Pastry
Eggs contribute to the color and flavor of baked goods.
- Function: The yellow color of egg yolks can enhance the appearance of cakes and pastries, giving them a golden hue. Eggs also add a subtle flavor that complements other ingredients.
Types of Eggs Used in Pastry Making
Different types of eggs can be used in baking and pastry, including chicken eggs, duck eggs, and quail eggs.
- Function: While chicken eggs are the most common, other eggs can be used for unique flavors and textures. Duck eggs, for example, have larger yolks and a richer taste.
Whole Eggs in Baking and Pastry
Whole eggs are used in many recipes for their combined properties of whites and yolks.
- Function: Whole eggs provide structure, leavening, moisture, and color. They are versatile and used in cakes, cookies, custards, and bread.
Use of Egg Yolks in Baking and Pastry
Egg yolks are rich in fat and emulsifiers.
- Function: Yolk adds richness, moisture, and helps to create a smooth, velvety texture in custards, ice creams, and sauces. They are also crucial for emulsification in recipes like hollandaise and mayonnaise.
Use of Egg Whites in Baking and Pastry
Egg whites are high in protein and have no fat.
- Function: When whipped, egg whites can trap air and create a foam that adds volume and lightness to meringues, soufflés, and angel food cakes. They are also used to provide structure and stability.
Considerations When Using Eggs in Baking and Pastry
There are several factors to consider when using eggs, such as freshness, temperature, and size.
- Function: These factors can affect the outcome of baked goods, influencing texture, volume, and stability.
Freshness of Eggs in Baking and Pastry
Fresh eggs have a higher water content and more cohesive whites.
- Function: Fresh eggs are ideal for recipes requiring volume and stability, such as meringues. Older eggs can be better for hard-boiling as they are easier to peel.
Temperature of Eggs in Baking and Pastry
The temperature of eggs can impact their behavior in recipes.
- Function: Room temperature eggs mix more easily with other ingredients, ensuring a smoother batter. Cold eggs can cause batters to curdle or set improperly.
Size of Eggs in Baking and Pastry
Egg size can affect the proportions of a recipe.
- Function: Most recipes are developed using large eggs. Using eggs of a different size can alter the balance of liquids and solids, impacting the texture and structure of the finished product. Adjustments may be necessary if using medium or extra-large eggs.
Eggs are a versatile and essential ingredient in baking and pastry, contributing to the structure, texture, flavor, and appearance of baked goods. Understanding the various functions of whole eggs, egg yolks, and egg whites, as well as factors like freshness, temperature, and size, allows bakers to achieve consistent and high-quality results in their recipes. By mastering the use of eggs, you can enhance your baking and pastry creations and ensure they meet the desired standards.
Leavening Agents in Baking and Pastry
Leavening agents are essential in baking and pastry making, as they produce the gases that cause doughs and batters to rise, creating a light and airy texture. Understanding the different types of leavening agents and their functions is crucial for achieving the desired results in your baked goods.
Chemical Leaveners in Baking and Pastry
Chemical leaveners react with moisture and heat to produce carbon dioxide gas, which helps doughs and batters rise.
Baking Soda (Sodium Bicarbonate) in Baking and Pastry
Baking soda is a pure chemical leavener that requires an acidic ingredient to activate.
- Uses: Used in recipes with acidic components such as buttermilk, yogurt, vinegar, or citrus juice. Commonly found in cookies, quick breads, and pancakes.
- Function: Reacts with acid to produce carbon dioxide gas, which helps the batter rise and become light and fluffy.
Baking Powder in Baking and Pastry
Baking powder is a combination of baking soda, an acid (usually cream of tartar), and a moisture-absorbing agent (such as cornstarch).
- Uses: Used in recipes that do not contain acidic ingredients. Commonly used in cakes, muffins, and biscuits.
- Function: Contains both the acid and the base, so it activates when moistened and again when heated, producing carbon dioxide gas that helps the batter rise.
Biological Leaveners in Baking and Pastry
Biological leaveners use living organisms to produce carbon dioxide gas through fermentation.
Yeast in Baking and Pastry
Yeast is a living microorganism that ferments sugars to produce carbon dioxide and alcohol.
- Types: Includes active dry yeast, instant yeast, and fresh yeast.
- Uses: Essential in bread making, pizza dough, and some pastries. Yeast-leavened products have a distinct flavor and texture.
- Function: Yeast ferments sugars in the dough, producing carbon dioxide gas that causes the dough to rise and creates a light, airy texture.
Physical Leaveners in Baking and Pastry
Physical leaveners involve the incorporation of air or steam to create lift in baked goods.
Air Infusion in Baking and Pastry
Air is incorporated into batters and doughs through methods such as creaming, whipping, and folding.
- Uses: Common in recipes for cakes, meringues, soufflés, and mousses.
- Function: Trapped air expands when heated, causing the batter to rise and become light and airy. Techniques like creaming butter and sugar or whipping egg whites are essential for incorporating air.
Use of Steam in Baking and Pastry
Steam is generated when the water in the dough or batter evaporates during baking.
- Uses: Crucial for pastries like puff pastry, choux pastry, and certain types of bread like baguettes.
- Function: Steam expands rapidly when heated, creating lift and a light, airy texture. In pastries, steam helps create layers by puffing up the dough.
Leavening agents are vital in baking and pastry making, as they provide the gases necessary for doughs and batters to rise. Understanding the different types of leavening agents—chemical, biological, and physical—allows bakers to select the appropriate one for their recipes. Each type of leavening agent contributes to the texture, flavor, and overall quality of baked goods, helping to achieve the desired lightness and airiness in the final product. By mastering the use of leavening agents, you can ensure your baked goods rise perfectly every time.
About Breads (Basic)
Bread is a staple food in many cultures around the world, made from a dough of flour and water, and typically baked. It can be leavened or unleavened and comes in various forms, flavors, and textures. Understanding the nutritional value of bread is essential for making informed dietary choices.
Nutritional Value of Bread
The nutritional content of bread can vary significantly depending on the type of flour used, additional ingredients, and the method of preparation. Here is an overview of the basic nutritional components found in bread:
Carbohydrates
Carbohydrates are the primary macronutrient in bread, providing a significant source of energy.
- Content: Most types of bread, especially those made with refined flour, are high in carbohydrates.
- Function: Carbohydrates are essential for providing energy to the body. Whole grain breads contain complex carbohydrates that provide a more sustained energy release compared to refined breads.
Proteins
Bread contains proteins, primarily from the flour and any added ingredients such as seeds or nuts.
- Content: The protein content varies depending on the type of flour used. Whole wheat and other whole grain flours typically have higher protein content than refined white flour.
- Function: Proteins are essential for building and repairing tissues, making enzymes, and supporting overall body functions.
Fats
Bread generally has a low fat content, though this can increase with the addition of ingredients like butter, oil, or seeds.
- Content: Basic breads like white and whole wheat have minimal fat, while enriched breads and those with added fats will have higher fat content.
- Function: Fats provide energy, support cell growth, and protect organs. They also contribute to the texture and flavor of bread.
Fiber
- Fiber is found in whole grain breads and is an important component for digestive health.
- Content: Whole grain breads have a higher fiber content compared to refined white bread. The bran and germ in whole grains contribute significantly to the fiber content.
- Function: Fiber aids in digestion, helps maintain bowel health, and can assist in regulating blood sugar levels. It also contributes to a feeling of fullness, which can aid in weight management.
Vitamins and Minerals
Bread can be a source of various vitamins and minerals, especially when made from whole grains or enriched flours.
- Content: Whole grain breads contain more vitamins and minerals, such as B vitamins (thiamine, riboflavin, niacin, and folate), iron, magnesium, and selenium. Enriched breads have additional nutrients added to replace those lost during processing.
- Function: Vitamins and minerals are essential for various bodily functions, including energy production, immune function, and maintaining healthy bones and skin.
Water
Water is a key ingredient in bread dough and affects the texture and moisture content of the bread.
- Content: The water content in bread can vary depending on the type of bread and the baking process.
- Function: Water is crucial for hydration and helps in the formation of gluten, which gives bread its structure.
Bread is a versatile and widely consumed food that can be part of a healthy diet. The nutritional value of bread varies depending on the type of flour and additional ingredients used. Whole grain and enriched breads generally offer more nutritional benefits compared to refined white bread. Understanding the nutritional components of bread can help you make informed choices and incorporate it into a balanced diet effectively.
Types of Breads
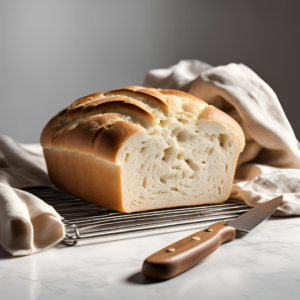
White Bread
White bread is a classic choice for many households, loved for its soft texture and mild flavor. It’s made from refined wheat flour, which has had the bran and germ removed, resulting in a lighter and softer bread compared to whole grain varieties.
 White Bread Recipe
Ingredients:
- 4 cups refined wheat flour
- 1 1/4 cups warm water
- 2 1/4 teaspoons (1 packet) active dry yeast
- 2 tablespoons sugar
- 1 teaspoon salt
- 2 tablespoons vegetable oil or melted butter
Instructions:
- Activate the Yeast: In a small bowl, combine warm water, sugar, and yeast. Stir gently and let it sit for 5-10 minutes until foamy.
- Mix the Dough: In a large bowl, combine flour and salt. Add the yeast mixture and oil. Mix until a rough dough forms.
- Knead: Turn the dough onto a lightly floured surface. Knead for 8-10 minutes until smooth and elastic.
- First Rise: Place the dough in a greased bowl, cover, and let it rise in a warm place for about 1-1.5 hours, or until doubled in size.
- Shape and Second Rise: Punch down the dough, shape it into a loaf, and place it in a greased loaf pan. Cover and let it rise again for 30-45 minutes until it has doubled in size.
- Bake: Preheat the oven to 375°F (190°C). Bake for 25-30 minutes or until the bread is golden brown and sounds hollow when tapped.
- Cool: Allow the bread to cool on a wire rack before slicing.
Nutritional Highlights
A standard slice (25g) of white bread typically contains:
- Calories: 70-80 kcal
- Carbohydrates: 13-15g (provides energy)
- Protein: 2-3g
- Fat: ~1g
- Fiber: Less than 1g
- Vitamins and Minerals: Thiamine, riboflavin, niacin, folate, and iron are often added back through enrichment.
Nutritional Considerations
- Lower Fiber: White bread has less fiber compared to whole wheat bread, as the bran and germ are removed.
- Enriched Nutrients: Many white breads are enriched with vitamins and minerals to restore some of the nutrients lost during processing.
- Glycemic Index: White bread has a higher glycemic index, which means it can cause a quicker rise in blood sugar levels compared to whole grain bread.
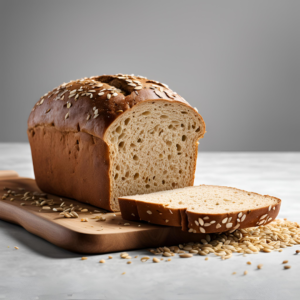
Whole Wheat Bread
Whole wheat bread is a healthier alternative to white bread, made from whole grain wheat flour that retains the bran, germ, and endosperm. This means more fiber and nutrients, providing numerous health benefits.
 Whole Wheat Bread Recipe
Ingredients:
- 4 cups whole wheat flour
- 1 1/4 cups warm water
- 2 1/4 teaspoons (1 packet) active dry yeast
- 2 tablespoons sugar or honey
- 1 teaspoon salt
- 2 tablespoons vegetable oil or melted butter
- Optional: 1/4 cup mixed seeds or nuts
Instructions:
- Activate the Yeast: In a small bowl, combine warm water, sugar (or honey), and yeast. Stir gently and let it sit for 5-10 minutes until foamy.
- Mix the Dough: In a large bowl, combine whole wheat flour and salt. Add the yeast mixture and oil. Mix until a rough dough forms.
- Knead: Turn the dough onto a lightly floured surface. Knead for 8-10 minutes until smooth and elastic.
- First Rise: Place the dough in a greased bowl, cover, and let it rise in a warm place for about 1-1.5 hours, or until doubled in size.
- Shape and Second Rise: Punch down the dough, shape it into a loaf, and place it in a greased loaf pan. Optionally, sprinkle seeds or nuts on top. Cover and let it rise again for 30-45 minutes until it has doubled in size.
- Bake: Preheat the oven to 375°F (190°C). Bake for 30-35 minutes or until the bread is golden brown and sounds hollow when tapped.
- Cool: Allow the bread to cool on a wire rack before slicing.
Nutritional Highlights
A standard slice (28g) of whole wheat bread typically contains:
- Calories: 80-90 kcal
- Carbohydrates: 12-15g (provides sustained energy)
- Protein: 3-4g
- Fat: 1-2g
- Fiber: 2-3g (aids in digestion)
- Vitamins and Minerals: Thiamine, riboflavin, niacin, folate, iron, magnesium, phosphorus, and zinc.
Nutritional Considerations
- Higher Fiber: Whole wheat bread contains significantly more fiber compared to white bread, aiding in digestion and promoting fullness.
- Nutrient-Rich: Whole wheat bread retains more vitamins and minerals naturally present in the wheat kernel.
- Lower Glycemic Index: Whole wheat bread has a lower glycemic index, leading to a slower increase in blood sugar levels.
- Heart Health: The higher fiber and nutrient density contribute to better heart health by reducing cholesterol levels and supporting cardiovascular health.
Sourdough Bread
Sourdough bread is celebrated for its unique tangy flavor and chewy texture, achieved through a natural fermentation process. Unlike breads made with commercial yeast, sourdough relies on wild yeast and lactic acid bacteria for leavening, which contributes to its distinctive taste and potential health benefits.
 Sourdough Bread Recipe
Ingredients:
- 4 cups all-purpose or whole wheat flour (or a combination)
- 1 1/2 cups warm water
- 1 cup active sourdough starter
- 2 teaspoons salt
- Optional: 1/4 cup seeds or grains for topping
Instructions:
- Mix the Dough: In a large bowl, combine flour and salt. Add the sourdough starter and water. Mix until a rough dough forms.
- Autolyse: Let the dough rest for 30 minutes. This allows the flour to hydrate and begin developing gluten.
- Knead: Gently knead the dough for 5-7 minutes until smooth and elastic.
- Bulk Fermentation: Place the dough in a greased bowl, cover, and let it ferment at room temperature for 4-6 hours, folding it every 30-60 minutes to strengthen the dough.
- Shape and Proof: Turn the dough onto a floured surface, shape it into a round or oval loaf, and place it in a floured proofing basket or bowl. Cover and let it proof for 1-2 hours, or until puffy.
- Preheat and Bake: Preheat the oven to 450°F (230°C) with a Dutch oven inside. Once hot, carefully transfer the dough to the Dutch oven, score the top with a sharp knife, and bake covered for 20 minutes. Remove the lid and bake for another 20-25 minutes until golden brown.
- Cool: Allow the bread to cool on a wire rack before slicing.
Nutritional Highlights
A standard slice (28g) of sourdough bread typically contains:
- Calories: 70-80 kcal
- Carbohydrates: 12-15g (provides sustained energy)
- Protein: 2-3g
- Fat: <1g
- Fiber: 1-2g (higher if whole grain flours are used)
- Vitamins and Minerals: Thiamine, riboflavin, niacin, folate, iron, magnesium, phosphorus, and zinc.
Nutritional Considerations
- Digestibility: The fermentation process breaks down some gluten and starches, potentially making sourdough easier to digest.
- Lower Glycemic Index: Sourdough has a lower glycemic index, leading to a slower rise in blood sugar levels.
- Nutrient Availability: Lactic acid bacteria increase the availability of certain nutrients by breaking down phytic acid, an anti-nutrient found in grains.
- Probiotics: Although most beneficial bacteria are killed during baking, the fermentation process promotes a healthy gut flora by encouraging the growth of good bacteria.
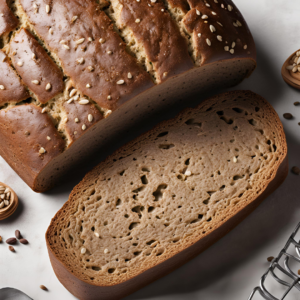
Rye Bread
Rye bread is a dense and hearty bread known for its distinctive flavor, which ranges from mildly sweet to slightly sour, depending on the fermentation process and added ingredients. Made primarily from rye flour, this bread has a darker color and robust taste, making it popular in many European countries for sandwiches and traditional dishes.
 Rye Bread Recipe
Ingredients:
- 2 cups rye flour (light, medium, or dark)
- 1 1/2 cups wheat flour (all-purpose or bread flour)
- 1 1/4 cups warm water
- 2 teaspoons active dry yeast or 1/2 cup sourdough starter
- 2 tablespoons molasses or honey
- 1 teaspoon salt
- Optional: 1 tablespoon caraway seeds or other seeds for topping
Instructions:
- Mix the Dough: In a large bowl, combine rye flour, wheat flour, and salt. Add the yeast (or sourdough starter), water, and molasses. Mix until a rough dough forms.
- Knead: Knead the dough for 5-7 minutes until it becomes smoother, though it will remain slightly sticky due to the rye flour.
- Bulk Fermentation: Place the dough in a greased bowl, cover, and let it ferment at room temperature for 1-2 hours, or until it has noticeably expanded.
- Shape and Proof: Turn the dough onto a floured surface, shape it into a round or oval loaf, and place it on a parchment-lined baking sheet or in a greased loaf pan. Cover and let it proof for 45-60 minutes, or until puffy.
- Preheat and Bake: Preheat the oven to 400°F (200°C). If desired, sprinkle caraway seeds on top. Bake for 30-35 minutes, or until the bread is golden brown and sounds hollow when tapped.
- Cool: Allow the bread to cool on a wire rack before slicing.
Nutritional Highlights
A standard slice (28g) of rye bread typically contains:
- Calories: 70-80 kcal
- Carbohydrates: 15-18g (provides sustained energy)
- Protein: 2-3g
- Fat: <1g
- Fiber: 2-3g (supports digestion)
- Vitamins and Minerals: Thiamine, riboflavin, niacin, folate, iron, magnesium, phosphorus, and zinc.
Nutritional Considerations
- High Fiber: Rye bread contains more fiber compared to white and even some whole wheat breads, aiding in digestion and promoting fullness.
- Lower Glycemic Index: Rye bread’s lower glycemic index results in a slower rise in blood sugar, beneficial for managing blood sugar levels.
- Rich in Nutrients: Rye bread retains more vitamins and minerals from the grain, particularly B vitamins, iron, and magnesium, contributing to overall health.
- Digestive Health: The high fiber content, especially from whole grain rye, supports healthy digestion and helps prevent constipation.
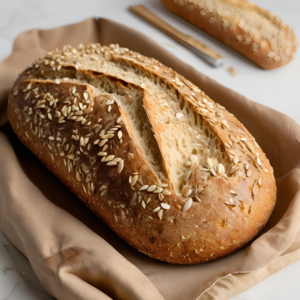
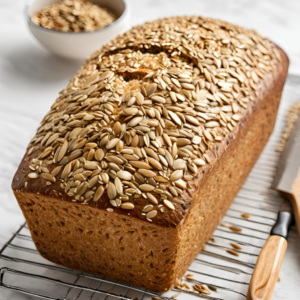
Multigrain Bread
Multigrain bread is made from two or more types of grains, offering diverse flavors, textures, and nutritional benefits. It is often considered a healthier choice due to its complex carbohydrate content and higher nutrient density compared to bread made from a single grain.
 Multigrain Bread Recipe
Ingredients:
- 2 cups whole wheat flour
- 1 1/2 cups white flour
- 1/2 cup rolled oats
- 1/4 cup flaxseed
- 1/4 cup sunflower seeds
- 1 1/2 cups warm water
- 2 teaspoons active dry yeast
- 2 tablespoons honey or molasses
- 1 teaspoon salt
- 2 tablespoons vegetable oil or melted butter
- Optional: 1/4 cup chopped nuts or dried fruits
Instructions:
- Mix the Dough: In a large bowl, combine whole wheat flour, white flour, oats, flaxseed, sunflower seeds, and salt. Add the yeast, water, honey, and oil. Mix until a rough dough forms.
- Knead: Knead the dough for 7-10 minutes until smooth and elastic, incorporating any optional nuts or dried fruits if desired.
- Bulk Fermentation: Place the dough in a greased bowl, cover, and let it ferment at room temperature for 1-2 hours, or until doubled in size.
- Shape and Proof: Turn the dough onto a floured surface, shape it into a loaf, and place it in a greased loaf pan. Cover and let it proof for 45-60 minutes, or until puffy.
- Preheat and Bake: Preheat the oven to 375°F (190°C). Bake for 35-40 minutes, or until the bread is golden brown and sounds hollow when tapped.
- Cool: Allow the bread to cool on a wire rack before slicing.
Nutritional Highlights
A standard slice (28g) of multigrain bread typically contains:
- Calories: 80-100 kcal
- Carbohydrates: 15-20g (provides sustained energy)
- Protein: 3-4g
- Fat: 2-3g
- Fiber: 2-4g (promotes healthy digestion)
- Vitamins and Minerals: Thiamine, riboflavin, niacin, folate, iron, magnesium, phosphorus, zinc, selenium, and manganese.
Nutritional Considerations
- High Fiber: Multigrain bread often contains more fiber compared to single-grain breads, supporting healthy digestion and regulating blood sugar levels.
- Nutrient-Dense: The variety of grains and seeds provides a broad spectrum of vitamins, minerals, and antioxidants.
- Lower Glycemic Index: Multigrain bread typically has a lower glycemic index, resulting in a slower rise in blood sugar levels.
- Heart Health: The inclusion of whole grains and seeds contributes to better heart health by reducing cholesterol levels and providing essential fatty acids, such as omega-3s from seeds like flax and chia.
Basic Pastry Techniques
Mastering basic pastry techniques is essential for creating a variety of baked goods with the desired texture and flavor. Here are some key mixing methods used in baking and pastry, along with their applications.
Mixing Methods in Baking and Pastry
Creaming Method
The creaming method involves beating sugar and fat (usually butter) together until light and fluffy. This incorporates air into the mixture, which helps leaven the baked goods.
- Uses: Commonly used for cakes, cookies, and some quick breads.
- Steps:
- Beat Butter and Sugar: Use a stand mixer or hand mixer to beat butter and sugar together until the mixture is pale and fluffy.
- Add Eggs: Add eggs one at a time, beating well after each addition.
- Incorporate Dry Ingredients: Gradually add the dry ingredients (flour, baking powder, etc.) and mix until just combined.
Rubbing-In Method
The rubbing-in method involves rubbing fat (usually butter or shortening) into flour until the mixture resembles breadcrumbs. This creates a crumbly texture in the finished product.
- Uses: Commonly used for pastry dough, scones, and some types of biscuits.
- Steps:
- Combine Flour and Fat: Place flour and cold fat in a bowl.
- Rub Together: Use your fingertips to rub the fat into the flour until the mixture looks like coarse breadcrumbs.
- Add Liquid: Gradually add liquid (water, milk, etc.) to bring the mixture together into a dough.
Folding Method
The folding method involves gently incorporating ingredients together to preserve air and volume in the mixture.
- Uses: Commonly used for meringues, soufflés, and delicate batters.
- Steps:
- Prepare Base Mixture: Prepare the base mixture (e.g., meringue or whipped cream).
- Fold in Ingredients: Use a spatula to gently fold in additional ingredients (e.g., flour or egg yolks) without deflating the mixture.
Sifting Method
The sifting method involves passing dry ingredients through a sieve to remove lumps and aerate the mixture.
- Uses: Commonly used for cakes, cookies, and any recipe requiring a light texture.
- Steps:
- Prepare Sieve: Place a sieve over a bowl.
- Sift Ingredients: Add the dry ingredients to the sieve and shake or tap it to sift them into the bowl.
- Combine: Gently combine the sifted ingredients with the wet ingredients.
Whisking Method
The whisking method involves beating eggs or egg whites to incorporate air and create volume.
- Uses: Commonly used for sponge cakes, meringues, and soufflés.
- Steps:
- Beat Eggs: Use a whisk or electric mixer to beat eggs or egg whites until they reach the desired consistency (soft peaks, stiff peaks, etc.).
- Fold in Ingredients: Gently fold in other ingredients to preserve the volume.
Straight Dough Method
The straight dough method involves mixing all the ingredients together at once to form a dough.
- Uses: Commonly used for bread and some types of rolls.
- Steps:
- Combine Ingredients: Place all ingredients (flour, yeast, water, salt, etc.) in a bowl.
- Mix and Knead: Mix until a dough forms, then knead until smooth and elastic.
- Proof and Bake: Allow the dough to rise (proof) before shaping and baking.
Two-Stage Mixing Method
The two-stage mixing method involves combining the dry ingredients with part of the liquid and fat, then adding the remaining liquid and fat in stages.
- Uses: Commonly used for high-ratio cakes and some types of cookies.
- Steps:
- Combine Dry Ingredients: Place the dry ingredients and part of the fat in a bowl.
- Add Liquid: Add part of the liquid and mix until combined.
- Add Remaining Ingredients: Gradually add the remaining liquid and fat, mixing until smooth.
Understanding and mastering these basic mixing methods is essential for creating a wide range of baked goods with the desired texture and flavor. Each method has specific applications and steps that contribute to the success of the final product. By practicing these techniques, you can improve your baking skills and produce consistent, high-quality results.
Rolling Dough
Rolling dough is a fundamental skill in baking and pastry making that involves flattening dough to a specific thickness. This process is crucial for achieving uniformity and the desired texture in various baked goods, such as pie crusts, cookies, tarts, and pastries.
Preparation
- Chill the Dough: Ensure that your dough is properly chilled before rolling. Cold dough is easier to work with and less likely to stick to surfaces.
- Flour the Surface and Rolling Pin: Lightly flour your work surface and rolling pin to prevent the dough from sticking. Use a fine dusting of flour to avoid incorporating too much flour into the dough, which can alter its texture.
- Divide the Dough: If working with a large batch of dough, divide it into smaller, more manageable portions. This makes rolling easier and ensures even thickness.
Technique
- Shape the Dough: Place the dough on the floured surface and shape it into a flat disk using your hands. This initial shaping makes it easier to roll out evenly.
- Roll Evenly: Begin rolling the dough from the center outward, applying even pressure with the rolling pin. Rotate the dough a quarter turn after each roll to maintain an even thickness and a circular shape.
- Check Thickness: Periodically check the thickness of the dough with a ruler or by eye to ensure uniformity. For most pastry doughs, aim for a thickness of about 1/8 inch (3 mm). For cookies and other baked goods, follow the specific thickness required by the recipe.
- Maintain Shape: If the dough starts to stick or lose its shape, gently lift it from the surface and sprinkle a little more flour underneath. Continue rolling, always working from the center outward.
Tips
- Work Quickly: Roll the dough quickly to keep it cool. Warm dough can become sticky and difficult to handle.
- Use a Light Touch: Avoid pressing too hard with the rolling pin. Heavy pressure can cause the dough to become tough.
- Flour as Needed: Add more flour to the surface and rolling pin as needed to prevent sticking, but use sparingly to avoid altering the dough’s consistency.
- Even Thickness: Ensure the dough is rolled to an even thickness to prevent uneven baking. Use rolling pin guides or bands if needed.
- Resting the Dough: If the dough resists rolling and keeps springing back, let it rest for a few minutes. This allows the gluten to relax and makes rolling easier.
Rolling dough is a crucial step in baking that affects the texture and appearance of the final product. Proper preparation, technique, and tips help ensure that the dough is rolled evenly and efficiently. By mastering these basics, bakers can achieve professional results in their pastries, pies, cookies, and other baked goods.
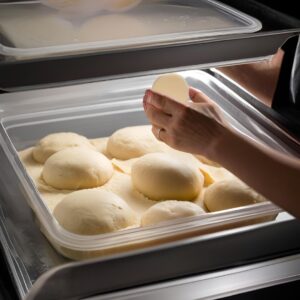
Shaping Dough
Shaping dough is a critical step in the baking process that influences both the appearance and texture of the final product. Proper shaping techniques ensure that baked goods have a uniform structure, even baking, and an appealing presentation.
Preparation
- Ensure Proper Dough Consistency: The dough should be the right consistency for shaping—not too sticky or too dry. If necessary, adjust by adding a bit of flour or water.
- Chill Dough if Necessary: For certain pastries and cookies, chilling the dough can make it easier to handle and shape.
Technique
For Pies and Tarts
- Roll Out Dough: Roll the dough into a circle slightly larger than your pie or tart pan, about 1/8 inch thick.
- Transfer Dough: Gently roll the dough around the rolling pin and unroll it over the pan, or fold it into quarters and unfold it in the pan.
- Fit Dough: Carefully press the dough into the bottom and sides of the pan without stretching it. Trim any excess dough, leaving a slight overhang if desired.
- Crimp Edges: For a decorative edge, crimp the dough using your fingers or a fork.
For Cookies and Scones
- Roll Out Dough: Roll the dough to the desired thickness on a floured surface. For cookies, this is usually 1/4 inch; for scones, about 3/4 to 1 inch.
- Cut Shapes: Use cookie cutters for cookies or a knife for scones to cut the dough into the desired shapes.
- Re-Roll Scraps: Gather the dough scraps, gently knead them together, and re-roll to cut more shapes.
- Transfer to Baking Sheet: Place the cut shapes on a baking sheet lined with parchment paper or a silicone mat, spacing them evenly.
Additional Techniques for Specific Pastries
For Braided Bread
- Divide Dough: Divide the dough into equal parts and roll each part into a long rope.
- Braid Dough: Lay the ropes side by side and pinch them together at one end. Braid the ropes, tucking the ends under when finished.
- Proof and Bake: Allow the braided dough to rise before baking according to the recipe.
For Dinner Rolls
- Portion Dough: Divide the dough into equal portions, typically about the size of a golf ball.
- Shape Rolls: Roll each portion into a smooth ball, tucking the edges under to create a taut surface.
- Proof and Bake: Place the rolls on a baking sheet, allow them to rise, then bake according to the recipe.
Tips for Shaping Dough
- Work on a Lightly Floured Surface: This prevents sticking and makes the dough easier to handle.
- Use Light, Quick Motions: Avoid overworking the dough, which can make it tough.
- Keep Dough Cool: If the dough becomes too warm and sticky, chill it briefly in the refrigerator.
- Ensure Even Thickness: When rolling out dough, aim for an even thickness to ensure uniform baking.
- Practice Makes Perfect: Shaping dough can be tricky at first. Practice helps you develop a feel for the right techniques.
Shaping dough correctly is essential for producing baked goods with the desired texture, appearance, and consistency. Whether you’re making pies, tarts, cookies, scones, braided bread, or dinner rolls, following proper techniques and tips will help ensure successful results. By mastering these shaping methods, you can enhance your baking skills and create beautiful, delicious baked goods.
Baking
Baking is a crucial stage in the creation of baked goods, where proper technique ensures that your products are cooked evenly, achieve the desired texture, and develop the right flavors. Here are some essential aspects to consider for successful baking.
Preheating the Oven
Preheating the oven means bringing it to the required temperature before placing your baked goods inside.
- Importance: Preheating ensures that the oven is at the correct temperature from the start of baking, which is crucial for achieving the right texture and rise in baked goods.
- Tips:
- Start Early: Turn on your oven 15-20 minutes before baking to ensure it reaches the desired temperature.
- Use an Oven Thermometer: Check the actual temperature of your oven with an oven thermometer, as oven dials can sometimes be inaccurate.
Oven Racks Positioning
The position of the oven racks can affect how evenly your baked goods cook.
- Importance: Proper rack positioning ensures even heat distribution, preventing over-browning or undercooking.
- Guidelines:
- Middle Rack: Generally, use the middle rack for most baking tasks, such as cookies, cakes, and pastries, for even heat circulation.
- Top Rack: Use the top rack for broiling or when you need the tops of your items to brown more quickly.
- Bottom Rack: Use the bottom rack for items that need more bottom heat, like pizza or crusty bread.
- Multiple Racks: When baking multiple sheets of cookies, use both the middle and bottom racks, and rotate the sheets halfway through baking for even cooking.
Baking Times and Temperatures
Different baked goods require specific baking times and temperatures to achieve the best results.
- Importance: Correct baking times and temperatures ensure that your baked goods are cooked through, have the right texture, and develop the proper flavor and color.
- Guidelines:
- Follow Recipes: Always follow the recommended times and temperatures in your recipe.
- Check for Doneness: Use visual cues and tools like toothpicks or cake testers to check if your baked goods are done. For example, a cake is usually done when a toothpick inserted in the center comes out clean.
- Adjust for Your Oven: Every oven is different, so you may need to adjust baking times and temperatures slightly based on your oven’s performance.
Using Steam
Introducing steam into the oven can affect the crust and texture of certain baked goods.
- Importance: Steam helps to create a shiny, crisp crust and can help baked goods like bread achieve better oven spring (rise).
- Techniques:
- Steam Injection: Some ovens have a steam injection feature. Use it according to the manufacturer’s instructions.
- Adding Water: Place a pan of hot water at the bottom of the oven, or spray water onto the oven walls with a spray bottle when you put the bread in.
- Covered Baking: Use a covered baking vessel like a Dutch oven to trap steam released by the dough during baking.
Successful baking requires attention to detail in several key areas, including preheating the oven, positioning the oven racks correctly, adhering to appropriate baking times and temperatures, and sometimes using steam to enhance crust development. By following these guidelines, you can ensure that your baked goods turn out perfectly every time, with the desired texture, flavor, and appearance.
Cooling
Proper cooling is essential in baking to ensure that your baked goods achieve the right texture and flavor after they come out of the oven. Cooling allows the structure to set, excess moisture to evaporate, and flavors to develop fully.
Cooling Racks
Cooling racks are wire racks designed to elevate baked goods off the countertop, allowing air to circulate around them.
- Importance: Cooling racks prevent condensation from forming on the bottoms of baked goods, which can make them soggy.
- Usage:
- Transfer Immediately: Transfer baked goods from the baking sheet or pan to a cooling rack shortly after removing them from the oven.
- Spacing: Arrange baked goods in a single layer with space between them to ensure even cooling.
Cooling Times
Cooling times refer to the duration baked goods need to sit at room temperature to cool completely.
- Importance: Proper cooling times prevent baked goods from being too soft or crumbly and help flavors to mature.
- Guidelines:
- Cookies: Usually require 5-10 minutes on the baking sheet before transferring to a cooling rack for an additional 10-15 minutes.
- Cakes: Generally need to cool in the pan for about 10-15 minutes before being turned out onto a cooling rack to cool completely, which can take 1-2 hours.
- Bread: Should cool completely on a rack, usually taking at least 1-2 hours, to ensure the interior sets properly and flavors develop.
- Pastries: Often need to cool for at least 15-30 minutes to avoid becoming soggy.
Chilling Baked Goods
Some baked goods benefit from chilling after they have cooled at room temperature.
- Importance: Chilling can enhance the texture and flavor of certain desserts and make them easier to handle or slice.
- Guidelines:
- Cheesecakes: Typically need to chill in the refrigerator for several hours or overnight to set properly.
- Bars and Brownies: Benefit from chilling to firm up before cutting into neat squares or slices.
- Pies: Can be chilled to improve their texture and make slicing easier, especially custard or cream pies.
Storage
Proper storage of baked goods ensures they stay fresh and maintain their desired texture and flavor for as long as possible.
- Importance: Incorrect storage can lead to stale, dry, or soggy baked goods, reducing their shelf life and quality.
- Guidelines:
- Room Temperature: Many baked goods can be stored at room temperature in an airtight container or wrapped in plastic wrap.
- Cookies and Brownies: Store in an airtight container for up to a week.
- Bread: Store in a breadbox or a paper bag to maintain the crust, for up to 3 days.
- Cakes: Can be kept covered at room temperature for up to 2-3 days. If the cake contains perishable ingredients like cream cheese frosting, store it in the refrigerator.
- Refrigeration: Some baked goods with perishable ingredients need to be refrigerated.
- Cheesecakes and Cream Pies: Store in the refrigerator, covered, for up to 5 days.
- Cakes with Perishable Frostings: Store in an airtight container in the refrigerator for up to a week.
- Freezing: Freezing can extend the shelf life of many baked goods.
- Bread and Rolls: Wrap tightly in plastic wrap, then foil, and freeze for up to 3 months. Thaw at room temperature or warm in the oven.
- Cookies and Cookie Dough: Freeze baked cookies in a single layer before transferring to a bag, or freeze cookie dough in scoops for easy baking later.
- Cakes and Pastries: Wrap individual slices or whole cakes in plastic wrap and then foil before freezing. Thaw in the refrigerator or at room temperature.
Cooling and storing baked goods properly is crucial to maintaining their quality and extending their shelf life. Using cooling racks ensures even cooling and prevents sogginess, while proper cooling times allow the structure to set and flavors to develop. Chilling certain baked goods can enhance their texture and make handling easier. Finally, appropriate storage methods, whether at room temperature, in the refrigerator, or in the freezer, help keep baked goods fresh and delicious. By following these guidelines, you can enjoy your baked creations at their best for longer periods.


 Business 3300 – Chef de Partie

 Business 4300 – Sous Chef
 Business 6300 – Executive Chef