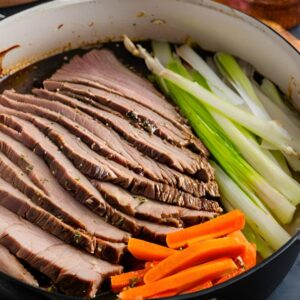
3205.0103 Frying
Frying is a cooking technique where food is cooked in hot fat or oil, typically resulting in a crispy exterior and tender interior. It is a popular method across various cuisines due to its ability to add texture and depth to a wide range of dishes. Understanding the different types of frying and mastering the technique can greatly enhance your cooking repertoire.
Types of Frying
Frying is a versatile cooking technique that involves cooking food in hot oil or fat. Different frying methods can be used depending on the type of food and the desired outcome. Here are various types of frying methods along with recipes for each:
Deep Frying
Deep frying is a popular cooking method that involves submerging food in hot oil to cook it quickly and evenly. This technique creates a crispy exterior while keeping the interior moist and tender, making it ideal for a wide range of dishes, from French fries to fried chicken. Here’s a detailed guide to understanding and mastering deep frying.
The Basics of Deep Frying
1. The Right Equipment:
- Deep Fryer or Heavy Pot: A deep fryer is designed specifically for frying, but a heavy pot or Dutch oven can also be used. Ensure the pot is deep enough to hold a substantial amount of oil with enough space to prevent overflow.
- Thermometer: Maintaining the correct oil temperature is crucial in deep frying. A candy or deep-fry thermometer helps monitor the oil’s temperature, ensuring it stays within the optimal range.
- Spider Strainer or Slotted Spoon: These tools are essential for safely lowering food into the hot oil and removing it when done.
- Wire Rack or Paper Towels: After frying, place the food on a wire rack or paper towels to drain excess oil.
2. Choosing the Right Oil:
- High Smoke Point: The oil used for deep frying should have a high smoke point, typically above 375°F (190°C). Common oils for deep frying include:
- Canola Oil: Neutral flavor and high smoke point (400°F / 204°C).
- Peanut Oil: Popular for its flavor and high smoke point (450°F / 232°C).
- Vegetable Oil: Versatile and widely available, with a smoke point of 400°F (204°C).
- Sunflower Oil: Light flavor with a smoke point of 440°F (227°C).
3. Temperature Control:
- Optimal Temperature Range: The ideal frying temperature is usually between 350°F and 375°F (175°C – 190°C). If the temperature is too low, the food will absorb too much oil and become greasy. If it’s too high, the food will cook too quickly on the outside while remaining raw inside.
- Avoid Overcrowding: Adding too much food at once can lower the oil temperature, resulting in uneven cooking. Fry in small batches to maintain the proper temperature.
4. Preparing the Food:
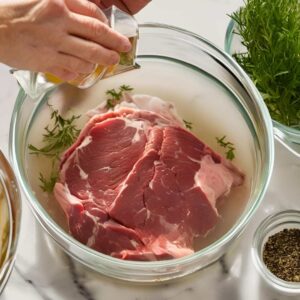
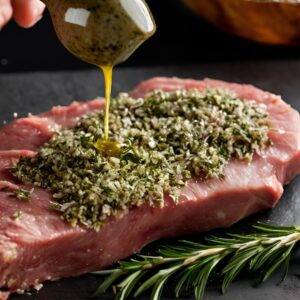
- Dry the Food: Before frying, ensure the food is as dry as possible. Excess moisture causes the oil to splatter and can prevent the food from becoming crispy.
- Coatings and Batters: Many foods are coated in flour, breadcrumbs, or batter before frying to enhance the crispy texture. These coatings also help protect the food from absorbing too much oil.
- Seasoning: Season the food either before or immediately after frying to ensure the flavors are well absorbed.
The Deep Frying Process
- Heat the Oil:
- Pour oil into the deep fryer or heavy pot, filling it no more than two-thirds full. Heat the oil to the desired temperature, checking it with a thermometer.
- Prepare the Food:
- While the oil is heating, prepare the food for frying. If using a coating or batter, ensure it’s evenly applied.
- Fry the Food:
- Carefully lower the food into the hot oil using a spider strainer or slotted spoon. Fry in small batches to avoid overcrowding the pot. Cook the food until it’s golden brown and crispy, which usually takes 3-5 minutes depending on the size and type of food.
- Drain and Rest:
- Once the food is cooked, remove it from the oil using the strainer or spoon. Place the food on a wire rack or paper towels to drain excess oil. Let it rest for a few minutes to allow the coating to crisp up further.
- Serve:
- Serve the fried food immediately for the best texture and flavor. Fried foods are best enjoyed fresh, as they can lose their crispiness over time.
Common Foods for Deep Frying
- Potatoes: French fries, potato chips, hash browns.
- Poultry: Fried chicken, chicken wings, chicken tenders.
- Seafood: Fish and chips, shrimp, calamari.
- Vegetables: Onion rings, tempura, zucchini sticks.
- Dough: Doughnuts, churros, beignets.
- Cheese: Mozzarella sticks, fried cheese curds.
Classic Fried Chicken Recipe
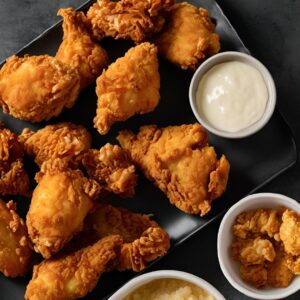
Ingredients:
- 1 whole chicken, cut into pieces (about 1.5-2 kg / 3.3-4.4 pounds)
- 480 mL (2 cups) buttermilk
- 240 grams (2 cups) all-purpose flour
- 5 grams (1 teaspoon) paprika
- 5 grams (1 teaspoon) garlic powder
- Salt and pepper to taste (about 5 grams / 0.18 oz each)
- Vegetable oil for frying
Instructions:
- Marinate the chicken pieces in buttermilk for at least 1 hour, or preferably overnight for more flavor and tenderness.
- In a separate bowl, mix together the flour, paprika, garlic powder, salt, and pepper.
- Heat the oil in a deep fryer or large pot to 175°C (350°F).
- Dredge the marinated chicken pieces in the flour mixture, ensuring each piece is evenly coated.
- Fry the chicken in batches until golden brown and cooked through, about 10-12 minutes, depending on the size of the pieces. Make sure the internal temperature reaches 74°C (165°F).
- Drain the fried chicken on paper towels to remove excess oil.
- Serve the chicken hot, and enjoy!
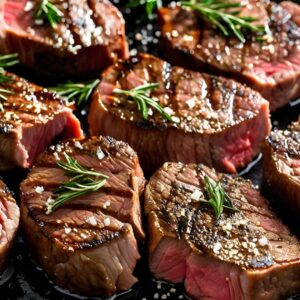
Pan Frying
Pan frying is a versatile cooking technique that involves cooking food in a shallow pan with a small amount of oil or fat over medium to high heat. This method is ideal for achieving a crisp, golden-brown exterior while keeping the interior tender and juicy. Pan frying is commonly used for cooking meats, fish, vegetables, and other ingredients that benefit from a quick, high-heat cooking method. Here’s a detailed guide to mastering pan frying.
The Basics of Pan Frying
1. The Right Equipment:
- Skillet or Frying Pan: A heavy-bottomed skillet or frying pan, preferably made of cast iron, stainless steel, or non-stick material, is ideal for pan frying. The pan should be large enough to hold the food in a single layer without overcrowding, allowing for even cooking.
- Spatula or Tongs: These tools are essential for turning food and ensuring even browning. A fish spatula is particularly useful for delicate items like fish fillets.
- Lid: A lid can be used to cover the pan while cooking thicker cuts of meat or when you need to retain moisture and heat.
2. Choosing the Right Oil or Fat:
- High Smoke Point: The oil or fat used for pan frying should have a high smoke point, as the cooking process involves relatively high heat. Common choices include:
- Canola Oil: Neutral flavor and a high smoke point (400°F / 204°C).
- Vegetable Oil: Versatile with a smoke point of 400°F (204°C).
- Grapeseed Oil: Light flavor and a smoke point of 420°F (216°C).
- Butter or Clarified Butter: Adds rich flavor, but be cautious as regular butter has a lower smoke point (350°F / 177°C). Clarified butter (also known as ghee) has a higher smoke point (450°F / 232°C).
3. Preparing the Food:
- Dry the Food: Before pan frying, ensure the food is dry by patting it with paper towels. Excess moisture can cause the oil to splatter and prevent the food from browning properly.
- Seasoning and Coating: Season the food with salt and pepper, and if desired, coat it lightly with flour, breadcrumbs, or batter. Coatings help create a crisp exterior and protect delicate foods like fish.
The Pan Frying Process
- Preheat the Pan:
- Place the skillet or frying pan over medium to medium-high heat. Allow the pan to heat up for a few minutes before adding oil. A properly heated pan ensures even cooking and prevents food from sticking.
- Add Oil or Fat:
- Add just enough oil or fat to coat the bottom of the pan. Swirl the pan to ensure an even layer of oil. The oil should shimmer but not smoke, indicating it’s ready for frying.
- Add the Food:
- Carefully place the food in the pan, making sure not to overcrowd it. Overcrowding lowers the temperature and results in steaming rather than frying, which can prevent the food from achieving a crispy exterior.
- Cook Without Disturbing:
- Allow the food to cook without moving it for the first few minutes. This helps develop a golden-brown crust. Once the crust has formed, gently flip the food using a spatula or tongs.
- Finish Cooking:
- Continue cooking until the food reaches the desired doneness. Thicker cuts of meat may need to be finished in the oven, especially if they need to cook through without burning the exterior.
- Drain and Rest:
- Once the food is cooked, remove it from the pan and place it on a paper towel-lined plate to drain any excess oil. Let the food rest for a few minutes before serving to allow the juices to redistribute.
Tips for Effective Pan Frying
- Use the Right Amount of Oil: Too little oil can cause the food to stick, while too much can make it greasy. Aim for a thin, even layer that just coats the bottom of the pan.
- Control the Heat: Adjust the heat as needed to maintain a steady sizzle. If the pan gets too hot, lower the heat to avoid burning the food.
- Avoid Overcrowding: Fry in batches if necessary to ensure each piece of food has enough space to cook evenly and develop a crispy crust.
- Test for Doneness: Use a meat thermometer to check the internal temperature of meats, ensuring they’re cooked to a safe and appropriate level. For example, chicken should reach an internal temperature of 165°F (74°C).
- Finish in the Oven (if needed): Thicker cuts of meat, like chicken breasts or pork chops, can be started on the stovetop and finished in the oven to ensure they cook through without burning the exterior.
Common Foods for Pan Frying
- Meat: Pork chops, chicken breasts, steak, sausages.
- Fish: Fillets of salmon, cod, tilapia.
- Vegetables: Zucchini, eggplant, asparagus, bell peppers.
- Tofu: Crispy tofu cubes or slices.
- Eggs: Fried eggs, omelets.
- Potatoes: Hash browns, potato cakes.
Safety Tips for Pan Frying
- Handle Hot Oil Carefully: Be cautious when working with hot oil, as it can splatter and cause burns. Use a splatter guard if necessary.
- Watch for Smoke: If the oil begins to smoke, it’s too hot. Remove the pan from the heat and let it cool slightly before continuing.
- Keep a Lid Handy: In case of a grease fire, cover the pan with a lid to smother the flames. Never use water to extinguish an oil fire.
Pan-Fried Fish Fillets Recipe
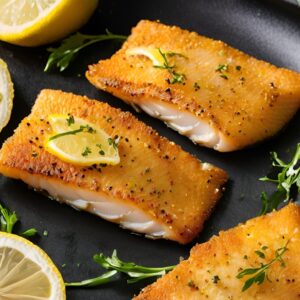
Ingredients:
- 4 fish fillets (such as cod or tilapia, approximately 150–200 grams / 5-7 oz each)
- Salt and pepper to taste (about 5 grams / 0.18 oz each)
- 120 grams (1 cup) all-purpose flour
- 2 eggs, beaten
- 120 grams (1 cup) breadcrumbs
- 30 mL (2 tablespoons) olive oil
- Lemon wedges for serving
Instructions:
- Season the fish fillets on both sides with salt and pepper.
- Dredge each fillet in the flour, shaking off any excess.
- Dip the floured fillets in the beaten eggs, ensuring they are fully coated.
- Coat the egg-dipped fillets with breadcrumbs, pressing gently to ensure an even coating.
- Heat the olive oil in a skillet over medium heat.
- Once the oil is hot, carefully add the fillets to the skillet. Fry for about 3-4 minutes per side, or until the fillets are golden brown and cooked through. The fish should flake easily with a fork.
- Remove the fillets from the skillet and drain them on paper towels to remove excess oil.
- Serve the pan-fried fish fillets hot with lemon wedges on the side.
Shallow Frying
Shallow frying is a cooking technique that involves frying food in a small amount of oil, typically enough to cover the bottom of the pan and reach halfway up the sides of the food. This method is used to create a crispy exterior while cooking the food thoroughly. Shallow frying is ideal for foods that benefit from quick, high-heat cooking but do not require full immersion in oil, such as cutlets, fritters, and fillets.
The Basics of Shallow Frying
1. The Right Equipment:
- Skillet or Frying Pan: A heavy-bottomed skillet or frying pan, preferably non-stick or cast iron, is best for shallow frying. The pan should be wide enough to hold the food in a single layer without overcrowding.
- Tongs or Spatula: Use these tools for turning the food and ensuring even browning. A slotted spatula is particularly useful for delicate items.
- Paper Towels: Keep these on hand to drain excess oil from the food after frying.
2. Choosing the Right Oil:
- High Smoke Point: Select an oil with a high smoke point for shallow frying, as the cooking process involves medium to high heat. Common choices include:
- Canola Oil: Neutral flavor with a high smoke point (400°F / 204°C).
- Vegetable Oil: Versatile and widely used, with a smoke point of 400°F (204°C).
- Sunflower Oil: Light flavor with a high smoke point (440°F / 227°C).
- Olive Oil: While its smoke point is lower (around 375°F / 190°C), olive oil can still be used for shallow frying, especially for foods cooked at slightly lower temperatures.
3. Preparing the Food:
- Dry the Food: Before frying, pat the food dry with paper towels to remove any excess moisture. This prevents oil splatter and helps achieve a crispier finish.
- Coatings and Breading: Many foods are coated in flour, breadcrumbs, or batter before shallow frying. This coating helps create a crispy exterior and protects the food from absorbing too much oil.
The Shallow Frying Process
- Preheat the Pan:
- Place the skillet or frying pan over medium heat and allow it to warm up. This step is crucial for ensuring even cooking and preventing the food from sticking.
- Add Oil:
- Pour enough oil into the pan to cover the bottom and reach about halfway up the sides of the food. Heat the oil until it shimmers but doesn’t smoke, indicating it’s ready for frying.
- Add the Food:
- Carefully place the food in the hot oil. Arrange it in a single layer without overcrowding the pan, which can cause the food to steam rather than fry.
- Cook Until Golden Brown:
- Allow the food to cook undisturbed for a few minutes, letting a golden-brown crust form. Once the bottom is crispy, carefully flip the food using tongs or a spatula.
- Finish Cooking:
- Continue cooking until the food is evenly browned on all sides and cooked through. This typically takes 3-5 minutes per side, depending on the thickness of the food.
- Drain and Serve:
- Once cooked, transfer the food to a plate lined with paper towels to drain any excess oil. This step helps keep the food crispy. Serve immediately while hot.
Tips for Effective Shallow Frying
- Maintain a Consistent Temperature: Adjust the heat as needed to keep the oil at a steady temperature. If the oil is too hot, the food may burn on the outside before cooking through. If it’s too cool, the food can become greasy.
- Test the Oil: To check if the oil is hot enough, drop a small piece of bread or a breadcrumb into the oil. It should sizzle and turn golden brown within a few seconds.
- Don’t Overcrowd the Pan: Fry in batches if necessary to ensure each piece of food has enough space to cook evenly. Overcrowding the pan can lower the oil temperature and result in soggy food.
- Use Fresh Oil: If you’re frying multiple batches, you may need to replace the oil if it becomes too dark or begins to smoke. Fresh oil ensures a cleaner flavor and better frying results.
- Keep a Lid Handy: If the oil begins to splatter, you can partially cover the pan with a lid to minimize mess, but be careful not to trap too much steam, which can affect the crispiness of the food.
Common Foods for Shallow Frying
- Meat: Chicken cutlets, pork schnitzel, lamb chops.
- Fish: Fish fillets, fish cakes, crab cakes.
- Vegetables: Eggplant slices, zucchini fritters, potato pancakes.
- Tofu: Crispy tofu slices or cubes.
- Cheese: Halloumi slices, mozzarella sticks.
- Bread: French toast, croquettes, arancini.
Safety Tips for Shallow Frying
- Be Cautious with Hot Oil: Hot oil can cause serious burns, so handle it with care. Use tongs or a slotted spatula to turn food and avoid splattering.
- Watch for Smoke: If the oil starts to smoke, it’s too hot. Remove the pan from the heat to let it cool slightly before continuing.
- Prevent Oil Spills: Never fill the pan more than halfway with oil to avoid spills. If oil spills over the sides, it can cause dangerous flare-ups.
Shallow-Fried Pork Cutlets Recipe
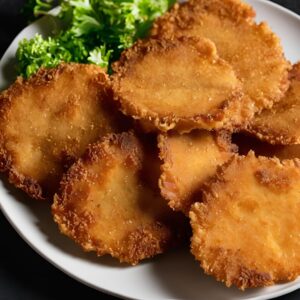
Ingredients:
- 4 pork cutlets (approximately 150-180 grams / 5-6 oz each)
- Salt and pepper to taste (about 5 grams / 0.18 oz each)
- 120 grams (1 cup) all-purpose flour
- 2 eggs, beaten
- 120 grams (1 cup) breadcrumbs
- 30 mL (2 tablespoons) vegetable oil
Instructions:
- Season the pork cutlets on both sides with salt and pepper.
- Dredge each cutlet in the flour, shaking off any excess.
- Dip the floured cutlets in the beaten eggs, ensuring they are fully coated.
- Coat the egg-dipped cutlets with breadcrumbs, pressing gently to ensure an even coating.
- Heat the vegetable oil in a skillet over medium-high heat.
- Once the oil is hot, carefully add the cutlets to the skillet. Fry for about 3-4 minutes per side, or until the cutlets are golden brown and cooked through. The internal temperature should reach 145°F (63°C).
- Remove the cutlets from the skillet and drain them on paper towels to remove excess oil.
- Serve the pork cutlets hot.
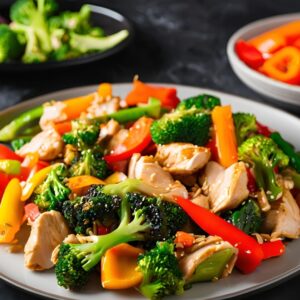
Stir Frying
Stir frying is a fast and versatile cooking technique that involves cooking food quickly over high heat while stirring constantly. This method is ideal for preparing a wide variety of ingredients, from meats and seafood to vegetables and noodles. Stir frying originated in Chinese cuisine but has become popular worldwide due to its ability to produce flavorful, nutritious meals in a short amount of time.
The Basics of Stir Frying
1. The Right Equipment:
- Wok or Skillet: A wok is the traditional pan used for stir frying, with its rounded bottom and high sides that allow for easy tossing and stirring of ingredients. If a wok is not available, a large, heavy-bottomed skillet can also be used.
- Stirring Utensil: A wooden spatula, silicone spatula, or long chopsticks are ideal for stirring and tossing ingredients without scratching the pan.
- Prep Bowls: Since stir frying is a fast process, it’s essential to have all ingredients prepped and ready to go before you start cooking. Small prep bowls help organize ingredients.
2. Choosing the Right Oil:
- High Smoke Point: Stir frying requires cooking at high temperatures, so it’s important to choose an oil with a high smoke point. Common options include:
- Peanut Oil: A traditional choice for stir frying, with a smoke point of 450°F (232°C).
- Vegetable Oil: Versatile and widely available, with a smoke point of 400°F (204°C).
- Canola Oil: Neutral flavor with a high smoke point (400°F / 204°C).
- Sunflower Oil: Light flavor and a smoke point of 440°F (227°C).
3. Preparing the Ingredients:
- Cut Ingredients Uniformly: For even cooking, all ingredients should be cut into uniform sizes. Thin slices or small pieces work best, as they cook quickly.
- Dry the Ingredients: Moisture can cause ingredients to steam rather than fry, so make sure meats, seafood, and vegetables are dry before adding them to the pan.
- Marinate for Flavor: Meats and seafood can be marinated beforehand to add extra flavor. Common marinades include soy sauce, ginger, garlic, and a bit of sugar.
The Stir Frying Process
- Heat the Wok or Skillet:
- Place the wok or skillet over high heat. Allow it to heat up for a minute or two before adding oil. A properly heated pan is crucial for achieving the characteristic sear of stir frying.
- Add Oil:
- Add a small amount of oil to the pan, swirling it around to coat the surface evenly. The oil should shimmer and slightly smoke, indicating it’s hot enough for stir frying.
- Cook the Protein:
- Start by cooking the protein (meat, seafood, tofu) first. Add it to the hot oil and stir constantly until it’s browned and just cooked through. This usually takes 2-4 minutes, depending on the size and type of protein. Remove the cooked protein from the pan and set it aside.
- Cook the Aromatics:
- Add a bit more oil if needed, then add aromatics such as garlic, ginger, and onions. Stir fry for 30 seconds to a minute until fragrant. Be careful not to burn the aromatics, as they cook quickly.
- Add Vegetables:
- Add the vegetables in order of cooking time, starting with the ones that take longer to cook (e.g., carrots, bell peppers) and finishing with more delicate ones (e.g., spinach, bean sprouts). Stir constantly to ensure even cooking. This step usually takes 2-5 minutes.
- Return the Protein and Add Sauce:
- Return the cooked protein to the pan. Pour in your stir fry sauce, which could be a mix of soy sauce, oyster sauce, hoisin sauce, or other seasonings. Stir everything together to coat the ingredients evenly with the sauce. Cook for another 1-2 minutes until the sauce is heated through and slightly thickened.
- Serve Immediately:
- Stir fried dishes are best served immediately, while the ingredients are still hot and crisp. Serve the stir fry over steamed rice or noodles for a complete meal.
Tips for Effective Stir Frying
- Prep Everything in Advance: Stir frying happens quickly, so having all your ingredients chopped, measured, and ready to go before you start cooking is essential.
- Use High Heat: High heat is key to stir frying. It cooks the food quickly, sealing in flavor and moisture while creating a nice sear.
- Keep it Moving: Stir frying requires constant movement to prevent burning and ensure even cooking. Use your spatula to keep the ingredients in motion throughout the process.
- Don’t Overcrowd the Pan: If you have a lot of ingredients, cook in batches. Overcrowding the pan can cause the temperature to drop, leading to steaming rather than frying.
- Balance the Flavors: A good stir fry balances sweet, salty, sour, and umami flavors. Taste the dish before serving and adjust the seasoning if needed.
Common Ingredients for Stir Frying
- Proteins: Chicken, beef, pork, shrimp, tofu.
- Vegetables: Broccoli, bell peppers, carrots, snow peas, mushrooms, bok choy, bean sprouts.
- Aromatics: Garlic, ginger, green onions, shallots.
- Sauces: Soy sauce, oyster sauce, hoisin sauce, fish sauce, rice vinegar, sesame oil.
- Add-ins: Cashews, peanuts, sesame seeds, fresh herbs (cilantro, basil).
Chicken Stir Fry Recipe
Ingredients:
- 450 grams (1 pound) chicken breast, cut into bite-sized pieces
- 30 mL (2 tablespoons) soy sauce
- 8 grams (1 tablespoon) cornstarch
- 30 mL (2 tablespoons) vegetable oil
- 1 bell pepper, sliced (approximately 120 grams / 4.2 oz)
- 1 broccoli head, cut into florets (approximately 150 grams / 5.3 oz)
- 2 carrots, sliced (approximately 150 grams / 5.3 oz)
- 2 cloves garlic, minced (about 6 grams / 0.2 oz)
- 1 tablespoon ginger, minced (about 6 grams / 0.2 oz)
- 30 mL (2 tablespoons) hoisin sauce
- 15 mL (1 tablespoon) sesame oil
Instructions:
- Toss the chicken pieces with soy sauce and cornstarch in a bowl until evenly coated. Let it marinate for a few minutes while you prepare the other ingredients.
- Heat the vegetable oil in a wok or large skillet over high heat until the oil shimmers.
- Add the marinated chicken to the wok and stir-fry until the chicken is cooked through and slightly browned, about 5 minutes. Remove the chicken from the wok and set aside.
- In the same wok, add the bell pepper, broccoli florets, carrots, garlic, and ginger. Stir-fry the vegetables for 3-4 minutes until they are tender but still crisp.
- Return the cooked chicken to the wok. Add the hoisin sauce and sesame oil, and stir-fry everything together for another 2 minutes until the chicken is well coated and the sauce is heated through.
- Serve the chicken stir fry hot with rice or noodles.
Flash Frying
Flash frying is a high-heat cooking method used to cook food quickly, usually within a matter of seconds to a couple of minutes. This technique is often employed to achieve a crisp, golden exterior while keeping the inside tender and moist. Flash frying is ideal for delicate foods like seafood, thin cuts of meat, and small items like herbs or vegetables that benefit from a quick burst of intense heat.
The Basics of Flash Frying
1. The Right Equipment:
- Heavy-Bottomed Pan or Deep Fryer: A heavy-bottomed pan, such as a cast iron skillet, or a deep fryer is ideal for flash frying. The pan should be deep enough to hold a few inches of oil without overflowing.
- Thermometer: An instant-read or deep-fry thermometer is essential for monitoring the oil temperature. Flash frying requires very hot oil, typically between 375°F and 400°F (190°C – 205°C).
- Spider Strainer or Slotted Spoon: These tools are useful for quickly removing food from the hot oil without carrying excess oil.
2. Choosing the Right Oil:
- High Smoke Point: Since flash frying requires high heat, it’s important to use an oil with a high smoke point to prevent burning. Suitable oils include:
- Peanut Oil: Smoke point of 450°F (232°C).
- Canola Oil: Smoke point of 400°F (204°C).
- Vegetable Oil: Smoke point of 400°F (204°C).
- Sunflower Oil: Smoke point of 440°F (227°C).
3. Preparing the Food:
- Thin or Small Cuts: Foods best suited for flash frying are typically thin or small, allowing them to cook quickly. Examples include thin slices of meat, shrimp, or small vegetables like baby corn or green beans.
- Coating: A light coating of flour, cornstarch, or breadcrumbs can help achieve a crispy exterior. The coating also helps to protect delicate foods from the intense heat.
- Dry the Food: Ensure the food is dry before frying to prevent oil splatters and to help achieve a crispy texture.
The Flash Frying Process
- Heat the Oil:
- Pour oil into your pan or deep fryer to a depth of about 2 inches (5 cm). Heat the oil to 375°F – 400°F (190°C – 205°C). Use a thermometer to ensure the oil reaches the correct temperature.
- Prepare the Food:
- While the oil is heating, prepare your food by slicing it into thin or small pieces and coating it lightly in flour, cornstarch, or breadcrumbs if desired.
- Fry the Food Quickly:
- Carefully lower the food into the hot oil using a spider strainer or slotted spoon. Fry in small batches to prevent the oil temperature from dropping. The food should cook very quickly—usually in 30 seconds to 2 minutes, depending on the thickness and type of food.
- Drain and Serve:
- Once the food is golden brown and crispy, remove it from the oil and place it on a paper towel-lined plate to drain any excess oil. Serve immediately for the best texture.
Tips for Effective Flash Frying
- Use a Thermometer: Maintaining the correct oil temperature is crucial for successful flash frying. If the oil is too cool, the food will absorb too much oil and become greasy. If it’s too hot, the food may burn on the outside before cooking through.
- Work Quickly: Flash frying is a fast process, so have all your ingredients prepped and ready before you start. Fry in small batches to ensure even cooking.
- Keep it Simple: Flash frying is ideal for foods that don’t require long cooking times. Avoid using this method for thick or dense items that need more time to cook through.
- Don’t Overcrowd the Pan: Frying too much at once can lower the oil temperature and result in uneven cooking. Fry in small batches for the best results.
Common Foods for Flash Frying
- Seafood: Shrimp, calamari, thin fish fillets.
- Meat: Thin cuts of beef or pork, chicken strips.
- Vegetables: Green beans, zucchini slices, bell pepper strips.
- Herbs: Basil, parsley, sage (often used as a garnish).
- Dough: Mini doughnuts, wontons, or small fritters.
Flash-Fried Calamari Recipe
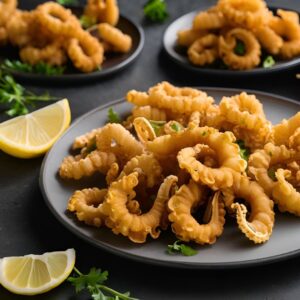
Ingredients:
- 450 grams (1 pound) calamari, cleaned and cut into rings
- 120 grams (1 cup) all-purpose flour
- Salt and pepper to taste (about 5 grams / 0.18 oz each)
- Vegetable oil for frying
- Lemon wedges for serving
Instructions:
- In a shallow dish, season the flour with salt and pepper, mixing well.
- Dredge the calamari rings in the seasoned flour, making sure each piece is evenly coated. Shake off any excess flour.
- Heat the vegetable oil in a deep skillet or wok to 375°F (190°C). Use a thermometer to ensure the oil reaches the correct temperature.
- Carefully add the calamari rings to the hot oil in small batches. Flash-fry for about 1-2 minutes, or until the calamari is golden and crispy. Be careful not to overcrowd the pan.
- Use a spider strainer or slotted spoon to remove the calamari from the oil. Place them on a paper towel-lined plate to drain any excess oil.
- Serve the flash-fried calamari hot, with lemon wedges on the side for squeezing over the top.
Key Aspects of Frying
Frying is a versatile and popular cooking method that involves cooking food in hot oil. The technique can vary from shallow frying to deep frying, but the core principles remain the same. Frying can produce a wide range of textures and flavors, from crispy and golden to tender and juicy. Understanding the key aspects of frying will help you achieve the best results in your cooking.
1. The Role of Oil
- High Smoke Point: The oil used for frying must have a high smoke point to withstand the high temperatures required without burning. Common frying oils include canola oil, peanut oil, vegetable oil, and sunflower oil.
- Neutral Flavor: A neutral-flavored oil is often preferred for frying to avoid overpowering the natural flavors of the food. However, for certain dishes, oils like olive oil or coconut oil can be used to add a distinctive taste.
- Oil Temperature: Maintaining the correct oil temperature is crucial. For deep frying, the temperature typically ranges from 350°F to 375°F (175°C to 190°C). If the oil is too hot, the food will burn on the outside before cooking through. If it’s too cool, the food will absorb too much oil, becoming greasy.
2. Preparing the Food
- Uniform Size: Cut food into uniform pieces to ensure even cooking. Smaller pieces cook faster, so consider the size and thickness of the food when frying.
- Drying the Food: Ensure that food is dry before frying. Excess moisture can cause oil to splatter and prevents the food from achieving a crispy texture.
- Coatings: Many fried foods benefit from a coating of flour, breadcrumbs, or batter. These coatings help create a crispy exterior and also protect the food from absorbing too much oil.
3. Frying Process
- Preheating the Oil: Always preheat the oil to the desired temperature before adding food. Adding food to cold or improperly heated oil can result in greasy, undercooked food.
- Batch Cooking: Avoid overcrowding the pan or fryer. Frying in small batches ensures that the oil temperature remains consistent and that each piece cooks evenly.
- Turning the Food: For shallow or pan frying, turning the food at the right time is essential for even browning. Use tongs or a spatula to carefully flip the food once it’s golden on one side.
4. Draining and Serving
- Draining Excess Oil: After frying, remove the food from the oil and place it on a paper towel-lined plate or wire rack to drain excess oil. This helps maintain the crispy texture.
- Serving Immediately: Fried foods are best served fresh and hot. They tend to lose their crispiness as they cool, so plan to serve them as soon as possible after frying.
5. Safety Considerations
- Handling Hot Oil: Always exercise caution when working with hot oil. Use long-handled utensils to avoid splashes, and never leave hot oil unattended.
- Ventilation: Frying can produce smoke and strong odors, so ensure your kitchen is well-ventilated by using an exhaust fan or opening a window.
- Fire Safety: In case of an oil fire, never use water to extinguish it. Instead, cover the pan with a metal lid or use a fire extinguisher rated for grease fires.
6. Reusing and Disposing of Oil
- Reusing Oil: Oil can be reused for frying several times if it’s filtered and stored properly. After cooling, strain the oil through a fine sieve or cheesecloth to remove food particles, and store it in an airtight container in a cool, dark place.
- Disposing of Oil: Never pour used oil down the drain, as it can clog pipes. Instead, dispose of it in a sealed container or take it to a recycling center that accepts cooking oil.
7. Common Frying Mistakes
- Overcrowding the Pan: Adding too much food at once lowers the oil temperature, leading to uneven cooking and greasy results.
- Using the Wrong Oil: Using an oil with a low smoke point can cause it to break down at high temperatures, leading to off-flavors and excessive smoke.
- Not Monitoring the Temperature: Failing to maintain the correct oil temperature can result in food that is burnt on the outside and undercooked inside, or greasy and soggy.
Use of Frying in Cooking
Frying is a fundamental cooking technique used extensively across various cuisines worldwide. It involves cooking food in hot oil or fat, which results in a characteristic texture and flavor that is often crisp, rich, and satisfying. Here’s how frying is typically utilized in culinary practices:
Achieving Crisp Texture
Texture Enhancement: Frying is renowned for its ability to produce a crispy outer layer while keeping the interior of the food moist and tender. This contrast in textures is highly appealing and can be seen in foods like French fries, fried chicken, and tempura.
Flavor Development
Maillard Reaction: Frying at high temperatures induces the Maillard reaction, where amino acids and reducing sugars combine to give fried foods a distinctive brown color and complex flavor. This is especially notable in seared meats and deep-fried foods.
Quick Cooking
Efficiency: Many frying methods, particularly stir-frying and shallow frying, allow for quick cooking of foods, making them ideal for fast-paced meal preparations. Vegetables and thin cuts of meat can be cooked in minutes, retaining more nutrients than longer cooking methods might.
Versatility
Diverse Applications: From snacks and appetizers like spring rolls and onion rings to main dishes such as stir-fried noodles and schnitzels, frying is versatile enough to be used in a multitude of culinary applications across all meal courses.
Cultural Significance
Global Cuisines: Frying techniques are pivotal in many traditional dishes around the world. In Japan, tempura uses a light batter and precise frying to create delicately crispy vegetables and seafood. In Italy, foods like calamari are often lightly fried to enhance their natural flavors.
Food Preservation
Reducing Moisture: Frying can decrease the moisture content of food, which helps in preserving it for longer periods. This is useful in preparing dried foods or snacks that require a longer shelf life.
Tips for Effective Frying
Frying is a popular cooking method that can produce delicious, crispy food when done correctly. Here are some tips for effective frying to ensure the best results and maintain safety:
1. Choose the Right Oil
- High Smoke Point: Use oils with a high smoke point like canola, peanut, vegetable, or sunflower oil. These oils can withstand the high temperatures required for frying without breaking down or burning.
- Neutral Flavor: Select a neutral-flavored oil unless you want the oil to impart a specific flavor to the food.
2. Preheat the Oil
- Proper Temperature: Always preheat the oil to the correct temperature before adding food. For most frying, the optimal temperature is between 350°F and 375°F (175°C to 190°C). Use a thermometer to ensure the oil reaches the desired heat.
- Avoid Cold Oil: Adding food to cold or improperly heated oil will cause it to absorb too much oil, resulting in greasy, soggy food.
3. Prepare the Food Correctly
- Dry the Food: Pat the food dry with paper towels before frying to remove excess moisture. This prevents oil splatters and helps achieve a crispier texture.
- Uniform Size: Cut food into uniform pieces to ensure even cooking. Smaller, thinner pieces will cook more quickly, so adjust cooking times accordingly.
4. Use Proper Coatings
- Coat Lightly: Dredge the food in flour, cornstarch, or breadcrumbs for a crispy exterior. Ensure the coating is even and shake off any excess to prevent clumping.
- Use Batters Wisely: If using a batter, dip the food just before frying to maintain the batter’s texture.
5. Avoid Overcrowding the Pan
- Fry in Batches: Overcrowding the pan or fryer lowers the oil temperature, leading to uneven cooking and greasy food. Fry in small batches to maintain consistent heat and ensure each piece cooks evenly.
6. Monitor the Temperature
- Constant Heat: Keep the oil at a steady temperature throughout the frying process. Use a thermometer to check the oil regularly and adjust the heat as needed.
- Avoid Overheating: If the oil starts to smoke, it’s too hot. Reduce the heat to avoid burning the food and creating off-flavors.
7. Use the Right Tools
- Tongs or Slotted Spoon: Use tongs, a slotted spoon, or a spider strainer to gently lower food into the hot oil and remove it once cooked. These tools allow excess oil to drain away as you remove the food.
- Paper Towels or Wire Rack: After frying, place the food on a paper towel-lined plate or wire rack to drain any excess oil. This helps maintain the crispy texture.
8. Season Immediately
- Season After Frying: Season the food with salt or other spices immediately after frying while it’s still hot. This helps the seasoning adhere better to the food.
9. Serve Fresh
- Serve Immediately: Fried foods are best enjoyed fresh and hot. They tend to lose their crispiness as they cool, so plan to serve them as soon as possible after frying.
10. Reuse and Store Oil Properly
- Strain and Store: After frying, allow the oil to cool completely. Strain it through a fine sieve or cheesecloth to remove any food particles, and store it in an airtight container in a cool, dark place for future use. Reuse the oil only if it remains clear and doesn’t smell rancid.
- Discard Properly: If the oil becomes dark, foamy, or develops an off smell, discard it in a sealed container—never pour it down the drain.
11. Ensure Safety
- Handle Hot Oil Carefully: Always be cautious when working with hot oil. Use long-handled utensils to avoid splashes, and never leave hot oil unattended.
- Prevent Oil Spills: Fill the pan or fryer no more than halfway with oil to prevent spills. If oil spills over, it can cause dangerous flare-ups.
- Ventilate the Kitchen: Frying can produce smoke, so ensure your kitchen is well-ventilated by turning on an exhaust fan or opening a window.
- Know Fire Safety: In case of an oil fire, never use water to extinguish it. Instead, cover the pan with a metal lid or use a fire extinguisher rated for grease fires.
12. Clean Up Thoroughly
- Let Oil Cool Before Cleaning: Allow the oil to cool completely before attempting to clean the pan or fryer. Use warm, soapy water to clean the pan and remove any oil residue.