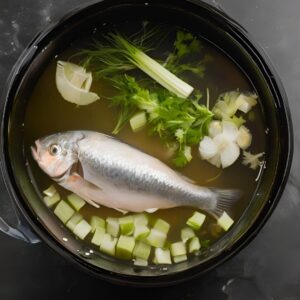
Blanching is a cooking process that involves briefly exposing food, typically vegetables and fruits, to boiling water or steam for a short period, then rapidly cooling them in ice water. This technique is used to preserve color, enhance texture, ease peeling, improve flavor, and prepare food for freezing.
Types of Blanching
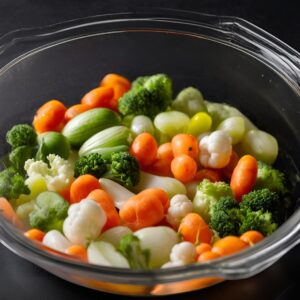
Blanching is a cooking process that involves briefly boiling food and then plunging it into ice water to halt the cooking process. This technique is used to preserve color, texture, and nutritional value while also making foods easier to peel or prepare for further cooking or freezing. Here are different types of blanching methods:
Water Blanching
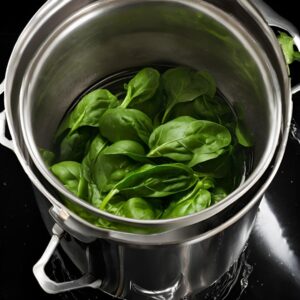
Water blanching is the most common method, involving submerging food in boiling water. It’s quick and effective for large batches and is particularly good for vegetables like green beans, broccoli, and leafy greens.
How to Water Blanching
Bring a large pot of water (approximately 4 liters / 1 gallon) to a rolling boil.
Add the vegetables to the boiling water. Use a ratio of 1 liter of water per 100 grams (3.5 oz) of vegetables to ensure even blanching.
Boil for the specified time, typically:
Green beans: 3 minutes
Broccoli: 2-3 minutes
Leafy greens (spinach, kale): 2 minutes
Quickly transfer the vegetables to an ice water bath (use enough ice water to fully submerge the vegetables) to stop the cooking process.
Leave the vegetables in the ice water bath for the same amount of time they were boiled.
Drain the vegetables thoroughly and use as desired or store for later use.
Best for:
Green beans
Broccoli
Leafy greens (spinach, kale)
Steam Blanching
Steam blanching uses steam instead of boiling water, which can be gentler on the food and better at preserving water-soluble vitamins and minerals. Suitable for delicate items like spinach or fruits.
How to Steam Blanch:
Bring a small amount of water (about 2-3 inches or 5-7 cm) to a boil in a pot.
Place the food in a steamer basket above the boiling water. Ensure the basket is not touching the water.
Cover the pot with a lid and steam for the specified time, typically:
Spinach: 2 minutes
Fruits (peaches, tomatoes): 2-3 minutes
Immediately transfer the steamed food to an ice water bath (use enough ice water to fully submerge the food) to stop the cooking process.
Leave the food in the ice water bath for the same amount of time it was steamed.
Drain the food thoroughly and use as desired or store for later use.
Best for:
Spinach
Fruits (peaches, tomatoes)
Microwave Blanching
Microwave blanching is a quicker, less traditional method where food is heated in a microwave using a small amount of water. While convenient, it’s less consistent and can lead to uneven texture.
How to Microwave Blanch:
Place the food in a microwave-safe dish with a small amount of water (about 60-120 mL / 1/4 to 1/2 cup, depending on the size of the batch).
Cover the dish with a microwave-safe lid or plastic wrap, leaving a small vent for steam to escape.
Microwave on high for the specified time, typically:
Small vegetables (e.g., green beans, broccoli): 2-4 minutes
Stir halfway through cooking to ensure even blanching.
Immediately transfer the food to an ice water bath (use enough ice water to fully submerge the food) to stop the cooking process.
Leave the food in the ice water bath for the same amount of time it was microwaved.
Drain the food thoroughly and use as desired or store for later use.
Best for:
Small batches of vegetables
Convenience when boiling or steaming is not an option
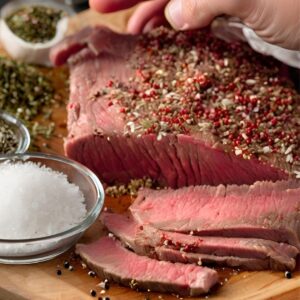
Shock Blanching
Shock blanching involves an initial quick dip into boiling water followed by immediate cooling in ice water. This method helps to brighten the color and relax tissues to enhance freezing qualities without fully cooking the food.
How to Shock Blanch:
Prepare Boiling Water:
Fill a large pot with water, using approximately 4 liters (1 gallon) of water per 500 grams (1 pound) of vegetables.
Add 10 grams (2 teaspoons) of salt per liter (quart) of water to help preserve color and flavor.
Bring the water to a rolling boil over high heat.
Prepare Ice Water Bath:
Fill a large bowl with cold water and add plenty of ice cubes to create an ice water bath. Ensure there’s enough water to fully submerge the vegetables and rapidly cool them.
Blanch the Vegetables:
Carefully place the prepared vegetables into the boiling water. Do not overcrowd the pot; blanch in batches if necessary.
Cover the pot with a lid to quickly return the water to a boil.
Blanch for the recommended time based on the type of vegetable:
Broccoli florets: 2 minutes
Green beans: 2 minutes
Asparagus spears: 2 minutes
Spinach or kale: 1 minute
Peas: 1.5 minutes
Use a slotted spoon or strainer to remove the vegetables promptly.
Shock in Ice Water:
Immediately transfer the blanched vegetables into the ice water bath to stop the cooking process.
Cool the vegetables for the same amount of time they were blanched, ensuring they are completely cooled throughout.
Drain and Dry:
Remove the vegetables from the ice water and drain thoroughly.
Pat dry with clean kitchen towels or use a salad spinner to remove excess water. Proper drying prevents freezer burn if you plan to freeze the vegetables.
Use or Store:
Use the blanched vegetables immediately in your recipes, or store them:
Refrigerator: Store in an airtight container for up to 3 days.
Freezer: Place in freezer-safe bags or containers, removing as much air as possible, and freeze for up to 12 months.
Best for:
Brightening and preserving color and texture of vegetables
Preparing vegetables for freezing
Suitable vegetables include:
Broccoli
Green beans
Asparagus
Spinach
Peas
Bell peppers
Carrots
Tips:
Work in small batches to maintain water temperature and ensure even blanching.
Label and date your stored vegetables for easy identification and to monitor freshness.
Adjust blanching times slightly depending on the size and thickness of the vegetable pieces.
Calcium Blanching
Calcium blanching involves adding calcium to the blanching water to help maintain the firmness and structure of the food. This is particularly useful for fruits destined for canning or jarring.
How to Calcium Blanch:
Prepare Calcium Solution:
Dissolve 15 grams (1 tablespoon) of calcium chloride or calcium hydroxide in 4 liters (1 gallon) of boiling water. Stir until fully dissolved.
Ensure the solution is well-mixed before proceeding.
Blanch the Food:
Carefully add the prepared fruits (such as peeled and cored pears or apples) to the boiling calcium solution.
Boil for the specified time, typically:
Pears: 3-5 minutes
Apples: 2-4 minutes
The exact time may vary depending on the size and ripeness of the fruit.
Shock in Ice Water:
Immediately transfer the blanched fruit into an ice water bath to stop the cooking process.
Cool the fruit in the ice water for the same amount of time it was blanched.
Drain and Prepare for Canning:
Remove the fruit from the ice water and drain thoroughly.
The fruit is now ready for canning or jarring with a maintained firm texture.
Best for:
Fruits intended for canning:
Pears
Apples
Maintaining texture in canned or jarred foods
Tips:
Ensure that the calcium compound is fully dissolved in the water before adding the fruit to prevent uneven blanching.
Calcium blanching is particularly useful for maintaining the crispness and firmness of fruits that might otherwise become too soft during the canning process.
Store the calcium-blanched fruit in a clean, sterilized container if you are not immediately proceeding with the canning or jarring process.
Key Aspects of Blanching
Preservation of Color and Nutrients
Blanching helps deactivate enzymes that cause oxidation and loss of color, flavor, and nutrients. The quick cooking and cooling process preserves vibrant colors and essential nutrients.
Benefits:
Deactivates Enzymes: Prevents enzymatic reactions that degrade food quality.
Preserves Color: Maintains the bright and natural color of vegetables and fruits.
Retains Nutrients: Keeps essential vitamins and minerals intact.
Example: Blanching green beans helps them retain their bright green color and nutritional value.
Texture Enhancement
Blanching softens vegetables and fruits slightly, making them more pliable and enhancing their texture, which is especially important for freezing or canning.
Benefits:
Softens Texture: Makes fruits and vegetables more tender.
Improves Pliability: Easier to handle and prepare for further processing.
Example: Blanching broccoli makes it tender-crisp, perfect for stir-frying or freezing.
Ease of Peeling
Blanching can loosen the skins of items like tomatoes, peaches, and almonds, making them much easier to peel.
Benefits:
Simplifies Peeling: Loosens the skin for easy removal.
Reduces Prep Time: Speeds up the preparation process for certain recipes.
Example: Blanching tomatoes allows the skin to slip off easily, ideal for making sauces.
Flavor Improvement
By removing surface impurities and partially cooking the food, blanching can enhance natural flavors, making them more palatable and ready for further cooking or immediate consumption.
Benefits:
Enhances Flavor: Brings out the natural taste of vegetables and fruits.
Removes Impurities: Cleanses the surface, improving overall taste.
Example: Blanching carrots intensifies their sweetness and flavor, making them more enjoyable to eat.
Preparation for Freezing
Blanching before freezing vegetables helps retain quality by stopping enzyme activities that can cause loss of flavor, color, and texture during storage.
Benefits:
Maintains Quality: Ensures vegetables remain flavorful, colorful, and crisp after freezing.
Stops Enzyme Activity: Prevents degradation during storage.
Example: Blanching spinach before freezing keeps it vibrant green and nutrient-rich, ready for use in future recipes.
Tips for Effective Blanching
Use a Large Pot of Water: Ensure there is enough water to allow the food to move freely, which helps maintain a consistent boil and even cooking.
Salt the Water: Adding salt to the blanching water can enhance the flavor of the vegetables.
Time Precisely: Different vegetables have specific blanching times required to optimize color, texture, and flavor without overcooking. Always set a timer to avoid guessing.
Cool Rapidly: Immediately immerse the blanched food in ice water to stop the cooking process quickly. This prevents overcooking and helps set the color.
Blanching is a simple yet critical cooking technique that can dramatically improve the quality of vegetables and fruits in your cooking. By understanding and mastering the uses of blanching, you can enhance your culinary creations, making them more appealing and nutritious.
Shocking, also known as shocking or shocking, is a culinary technique used to quickly stop the cooking process, usually after blanching. This process involves rapidly cooling the food, which helps preserve texture, color, and nutrients. Here are the different types of shocking methods:
Ice Water Bath Shocking
Ice water bath shocking is a technique used to quickly cool blanched foods by submerging them in a bath of ice and water. This method is highly effective in stopping the cooking process, preserving the texture, color, and nutrients of vegetables and fruits.
How to Do It:
Prepare the Ice Water Bath:
Fill a large bowl with cold water and add plenty of ice cubes to create an ice water bath. The bowl should be large enough to fully submerge the blanched food.
Transfer the Food:
After blanching the food, immediately remove it from the boiling water using a slotted spoon or strainer.
Quickly transfer the blanched food into the ice water bath. This rapid cooling process stops the cooking and sets the vibrant color of the food.
Cool the Food:
Let the food sit in the ice water bath until it is completely cooled. This usually takes the same amount of time as the blanching process.
Drain the Food:
Once cooled, remove the food from the ice water bath and drain thoroughly. You can use a colander or pat the food dry with a clean kitchen towel.
Proceed with Your Recipe:
The food is now ready for use in your recipe or for storage.
Best for:
Vegetables (e.g., green beans, broccoli, carrots)
Fruits (e.g., tomatoes, peaches)
Cold Running Water Shocking
For smaller batches or when ice is scarce, running cold tap water over the food until it cools can also effectively stop the cooking process. This method is more water-intensive and generally less efficient than an ice water bath.
How to Do It:
Place the Food in a Colander:
Put the blanched food into a colander.
Run Cold Water:
Run cold tap water over the food, ensuring that all pieces are cooled evenly.
Continue Cooling:
Keep the water running until the food is completely cooled.
Drain and Proceed:
Drain the food thoroughly and proceed with the next steps in your recipe.
Best for:
Small batches of vegetables or fruits
Situations where ice is not available
Refrigeration or Freezing Shocking
This less common method is used for specific culinary needs, such as quickly chilling doughs, batters, or pre-cooked meals. It involves placing the hot food directly into a refrigerator or freezer to rapidly reduce its temperature.
How to Do It:
Cool Slightly at Room Temperature:
After cooking, allow the food to cool slightly at room temperature to prevent drastic temperature changes that might affect the texture or safety of the food.
Transfer to a Suitable Container:
Place the food in a container that is appropriate for refrigeration or freezing. Ensure the container is covered or sealed to prevent moisture loss or contamination.
Refrigerate or Freeze:
Place the container in the refrigerator or freezer until the food is thoroughly chilled.
Best for:
Doughs and batters
Pre-cooked meals that need rapid cooling
Alcohol Shocking
Alcohol shocking is a specialized technique occasionally used in professional kitchens for certain desserts or delicate foods. This method involves dipping hot items into an alcohol-based mixture to rapidly cool them while simultaneously adding flavor.
How to Do It:
Prepare an Alcohol-Based Mixture:
Choose an alcohol like vodka or another neutral spirit that pairs well with the flavors of the dish.
Pour the alcohol into a shallow bowl or container.
Dip the Hot Food:
Briefly dip the hot food into the alcohol mixture. The alcohol rapidly cools the food and adds a subtle flavor.
Remove and Proceed:
Remove the food from the alcohol mixture and proceed with the next steps in your recipe.
Best for:
Certain desserts
Delicate foods requiring rapid cooling and flavor enhancement.
Key Aspects of Shocking
Rapid Cooling
The primary goal of shocking is to cool food quickly to prevent overcooking. Rapid cooling helps preserve the desired doneness achieved during blanching or cooking.
Benefits:
Prevents Overcooking: Ensures food stops cooking immediately, maintaining the perfect texture and doneness.
Speeds Up Processing: Quickly prepares food for the next step in your recipe or for storage.
Color Preservation
Shocking helps lock in the vibrant colors of vegetables and fruits that are often lost through prolonged cooking. The quick transition from hot to cold stabilizes the pigments.
Benefits:
Maintains Visual Appeal: Keeps food looking fresh and appetizing.
Enhances Plate Presentation: Adds visual appeal to dishes, making them more attractive.
Texture Maintenance
By stopping the cooking process immediately, shocking ensures that foods retain their crisp, tender texture rather than becoming soft and mushy.
Benefits:
Preserves Crunch: Maintains the desired crispness of vegetables.
Prevents Mushiness: Keeps food from becoming overly soft or soggy.
Nutrient Retention
Rapid cooling reduces the time food spends at high temperatures, helping to preserve heat-sensitive nutrients such as vitamins C and B.
Benefits:
Maintains Nutritional Value: Preserves essential vitamins and minerals.
Supports Healthy Eating: Ensures that nutrient-rich foods retain their health benefits.
Use of Shocking
Preserving Vegetable Quality
Color and Texture: Shocking is crucial for maintaining the vibrant color and crisp texture of vegetables. After blanching, vegetables like green beans, carrots, and broccoli are immediately submerged in an ice-water bath. This process stops enzyme actions that can lead to softening, wilting, and color loss.
Preparing Seafood
Texture Retention: Delicate seafood items, such as shrimp and lobster, often benefit from shocking. Once they have been blanched or boiled to the desired doneness, shocking them in ice water stops the cooking process instantly, preventing them from becoming tough and rubbery.
Enhancing Fruit Applications
Firmness and Color: Fruits that require some form of cooking before being used in desserts or other dishes are often shocked to retain firmness and color. This method is particularly useful for fruit dishes where aesthetic presentation is important.
Pasta and Noodle Preparation
Preventing Overcooking: Shocking pasta and noodles after boiling ensures they retain a desirable al dente texture, especially useful in preparing dishes where the pasta will be cooked again, such as in baked pasta dishes or stir-fries.
Peeling Ease
Simplifying Processing: Shocking can help in easing the peeling process for items like tomatoes and peaches. The rapid cooling after a brief boil loosens the skins, making them easy to remove without further cooking the flesh.
Food Safety
Rapid Cooling for Storage: Shocking is often employed in commercial kitchens to rapidly cool cooked foods before storage to prevent bacterial growth. This technique is aligned with food safety protocols to quickly reduce the temperature of food items.
Preparatory Step for Freezing
Freezing Vegetables and Fruits: Before freezing, many types of produce are blanched and then shocked. This process helps to preserve flavor, nutritional value, texture, and color, extending their shelf life while maintaining quality.
Tips for Effective Shocking
Prepare in Advance:
Have your ice-water bath ready before you begin cooking, especially if you are blanching multiple batches or working with foods that cook very quickly.
Use Plenty of Ice:
Ensure there is enough ice in your water bath to maintain a cold temperature even after adding hot food. This might mean refreshing the ice as needed.
Fully Submerge:
Make sure the food is completely submerged in the ice water to cool it evenly and quickly. Use a strainer or spider to keep the items under water.
Drain Well:
Once the food has cooled completely, remove it from the ice water and let it drain thoroughly. Excess water can dilute flavors or affect the texture if the food is to be cooked further.
Time Efficiently:
Limit the time food spends in the ice water. Prolonged exposure to water can start to leach flavors and make the food soggy. Typically, the duration in the ice bath should be the same as the time spent blanching.
Shocking is a crucial technique in preserving the quality of ingredients, especially when preparing dishes that require vibrant, visually appealing presentations. By mastering the use of shocking, you can elevate the texture, color, and nutritional content of your culinary creations.
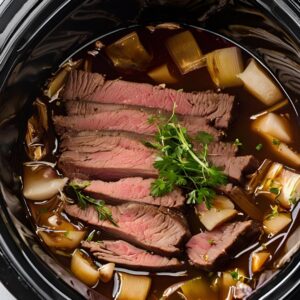
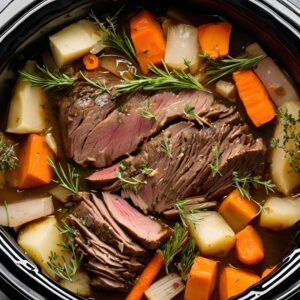
Slow cooking is a culinary technique that involves cooking food at low temperatures over extended periods, allowing flavors to develop and ingredients to become tender.
Crock-Pot or Slow Cooker
A Crock-Pot or slow cooker is a kitchen appliance designed for cooking food at a low temperature over an extended period. It’s ideal for preparing stews, soups, braised meats, and other dishes that benefit from slow, gentle cooking. The appliance typically consists of a ceramic or metal pot encased in a heating element, with a tight-fitting lid to retain moisture.
How to Use a Crock-Pot or Slow Cooker:
Prepare Ingredients:
Chop vegetables, season meats, and gather other ingredients as required by your recipe.
Layer Ingredients:
Place the ingredients into the slow cooker. Typically, root vegetables and tougher cuts of meat go on the bottom, where the heat is more direct.
Add Liquid:
Pour in broth, water, wine, or other liquids as specified by the recipe. The liquid helps to create steam and keeps the food moist during cooking.
Set the Temperature:
Most Crock-Pots or slow cookers have low, high, and sometimes medium settings. Choose the appropriate setting based on your recipe.
Low setting: Cooks at approximately 200°F (93°C).
High setting: Cooks at approximately 300°F (149°C).
Cover and Cook:
Place the lid on the slow cooker and cook for the time specified in your recipe. This can range from 4-6 hours on high to 8-10 hours on low.
Finish and Serve:
Once cooking is complete, remove the lid, stir if necessary, and serve. Some recipes may require you to thicken the sauce or finish the dish with fresh herbs or other garnishes.
Best For:
Stews and soups: The slow cooking process is perfect for developing deep flavors in stews, chili, and soups.
Braised meats: Tougher cuts of meat, such as beef brisket, pork shoulder, or chicken thighs, become tender and flavorful after slow cooking.
One-pot meals: Combine protein, vegetables, and grains or legumes in the slow cooker for a complete meal.
Batch cooking: Make large batches of food that can be portioned and frozen for later use.
Tips:
Avoid lifting the lid: Each time you lift the lid, heat escapes, and cooking time is extended.
Plan ahead: Start your slow cooker in the morning so your meal is ready by dinnertime.
Use the right cut of meat: Tougher cuts of meat, such as chuck roast or pork shoulder, work best in a slow cooker because they become tender with long, slow cooking
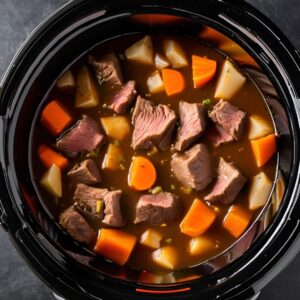
Slow Cooker Beef Stew Recipe
Ingredients:
900 grams (2 pounds) beef stew meat, cubed
300 grams (10.6 oz) carrots, sliced (4 medium carrots)
600 grams (1.3 pounds) potatoes, diced (4 medium potatoes)
150 grams (5.3 oz) onion, chopped (1 medium onion)
10 grams (0.35 oz) garlic, minced (2 cloves)
1 liter (1000 mL / 4 cups / 32 oz) beef broth
400 grams (14 oz) canned diced tomatoes
1 gram (0.035 oz) thyme (1 teaspoon)
5 grams (0.18 oz) salt
5 grams (0.18 oz) black pepper
Instructions:
Place the beef, carrots, potatoes, onion, and garlic in the slow cooker.
Add the beef broth, diced tomatoes, thyme, salt, and pepper.
Cover and cook on low for 7-8 hours or until the beef is tender.
Serve hot.
Oven Slow Cooking
Oven slow cooking is a method that replicates the slow cooking process of a slow cooker by using a conventional oven. This technique allows you to achieve tender, flavorful dishes by cooking at low temperatures over an extended period. It’s ideal for braising meats, casseroles, and stews.
How to Do It:
Preheat the Oven:
Set your oven to a low temperature, typically between 150°C and 160°C (300°F and 325°F). For very low and slow cooking, you can go as low as 120°C (250°F).
Prepare the Ingredients:
Season and sear your meat if necessary, then place it in an oven-safe pot or Dutch oven with a tight-fitting lid.
Add vegetables, herbs, and liquids (such as broth, wine, or water) as required by your recipe.
Cover and Cook:
Place the lid on the pot to keep moisture in, and place the pot in the oven.
Cook for the recommended time, usually 2-4 hours depending on the recipe. Check occasionally to ensure the liquid hasn’t evaporated, and add more if necessary.
Finish and Serve:
Once the cooking time is complete, remove the pot from the oven.
Let the dish rest for a few minutes before serving to allow the flavors to meld.
Best for:
Braising meats: Tough cuts of meat, like brisket, pork shoulder, or lamb shanks, benefit greatly from this method.
Casseroles and stews: The slow cooking process enhances the flavors and textures of these dishes.
One-pot meals: Combines proteins, vegetables, and grains for a complete meal.
Tips:
Use an oven-safe pot: A heavy-bottomed Dutch oven is ideal for oven slow cooking as it retains heat well and distributes it evenly.
Monitor liquid levels: Check the dish periodically to ensure it doesn’t dry out.
Low and slow: The key to oven slow cooking is maintaining a consistent low temperature for an extended period.
Oven slow cooking is a versatile and effective method for creating tender, flavorful dishes with minimal hands-on time. It’s perfect for busy days when you want to prepare a hearty meal with little effort.
Oven-Braised Short Ribs Recipe
Ingredients:
1.8 kg (4 pounds) beef short ribs
Salt and pepper, to taste (about 5 grams / 0.18 oz each)
30 mL (2 tablespoons) olive oil
1 onion, chopped (150 grams / 5.3 oz)
2 carrots, chopped (200 grams / 7 oz)
2 cloves garlic, minced (10 grams / 0.35 oz)
480 mL (2 cups) beef broth
240 mL (1 cup) red wine
15 grams (1 tablespoon) tomato paste
Fresh rosemary and thyme (2-3 sprigs each)
Instructions:
Preheat your oven to 160°C (325°F).
Season the short ribs generously with salt and pepper.
Heat the olive oil in a large oven-safe pot or Dutch oven over medium heat. Brown the short ribs on all sides, then remove them from the pot and set aside.
Add the chopped onion, carrots, and minced garlic to the pot. Cook until the vegetables are softened, about 5 minutes.
Stir in the beef broth, red wine, and tomato paste, mixing well. Add the fresh rosemary and thyme.
Return the browned short ribs to the pot, ensuring they are submerged in the liquid.
Cover the pot with a lid and transfer it to the preheated oven.
Cook for 3-4 hours, or until the short ribs are tender and easily pull apart.
Serve the short ribs hot, with the braising liquid spooned over the top.
Stovetop Slow Cooking
Stovetop slow cooking is a method of cooking food over low heat on the stove for an extended period, mimicking the slow-cooking process of a Crock-Pot or oven. This technique is ideal for dishes like stews, soups, and braised meats, allowing flavors to develop deeply while tenderizing tougher cuts of meat.
How to Do It:
Prepare Ingredients:
Season and sear meats if necessary, chop vegetables, and gather any other ingredients required for your recipe.
Use a Heavy-Bottomed Pot:
Choose a large, heavy-bottomed pot or Dutch oven with a tight-fitting lid. These types of pots retain heat well and distribute it evenly, which is crucial for slow cooking on the stovetop.
Layer Ingredients:
Add your ingredients to the pot, typically starting with tougher vegetables and meat on the bottom, then layering in liquids like broth, wine, or water.
Bring to a Simmer:
Place the pot on the stove over medium heat and bring the contents to a gentle simmer. Avoid boiling, as this can cause the meat to toughen.
Reduce Heat and Cover:
Once simmering, reduce the heat to the lowest setting. Cover the pot with a lid to retain moisture.
Cook Slowly:
Allow the dish to cook slowly for several hours, typically 2-4 hours, depending on the recipe. Check periodically to ensure the liquid hasn’t evaporated and the food is not sticking to the bottom.
Adjust as Needed:
Stir occasionally, add more liquid if necessary, and taste for seasoning towards the end of cooking.
Finish and Serve:
Once the food is tender and the flavors are well-developed, remove the pot from the heat. Let the dish rest briefly before serving.
Best for:
Stews and soups: Slowly simmering on the stovetop enhances the depth of flavors.
Braised meats: Tough cuts like beef brisket, pork shoulder, or lamb shanks benefit from slow stovetop cooking.
Chili and curries: These dishes develop richer flavors with extended cooking time.
Tips:
Use a low flame: Keep the heat as low as possible to prevent scorching and to ensure even cooking.
Check periodically: Since stovetop cooking can vary depending on the stove and pot, keep an eye on the dish to prevent it from drying out or burning.
Maintain moisture: If the liquid reduces too much during cooking, add more broth or water to maintain the desired consistency.
Stovetop slow cooking is a versatile and effective method for creating flavorful, tender dishes without the need for specialized appliances. It’s perfect for home cooks who prefer a hands-on approach to their cooking.
Stovetop Chicken Stock Recipe
Ingredients:
1 whole chicken or chicken carcass (approximately 1.5-2 kg / 3.3-4.4 lbs)
2 carrots, chopped (200 grams / 7 oz)
2 celery stalks, chopped (200 grams / 7 oz)
1 onion, quartered (150 grams / 5.3 oz)
4 cloves garlic, crushed (20 grams / 0.7 oz)
2.4 liters (10 cups) water
2 bay leaves (1 gram / 0.035 oz)
Salt and pepper to taste (approximately 5 grams / 0.18 oz each)
Instructions:
Place the chicken, carrots, celery, onion, and garlic in a large pot.
Add the water, bay leaves, salt, and pepper to the pot.
Bring the mixture to a boil over medium-high heat, then reduce the heat to low.
Simmer the stock gently for 3-4 hours, occasionally skimming off any foam or impurities that rise to the surface.
Once the stock has developed a rich flavor, strain it through a fine-mesh sieve or cheesecloth into a clean container. Discard the solids.
Use the stock immediately in your recipes, or let it cool and refrigerate for later use. The stock can also be frozen for longer storage.
Sous Vide
Sous vide, a cooking technique that became popular in the 1970s in professional kitchens, involves placing food in vacuum-sealed bags and cooking it at a consistent, controlled temperature in a water bath. The term “sous vide” is French for “under vacuum.” This method ensures that food is cooked to perfection, with even temperature distribution across the entire surface. In restaurant kitchens, sous vide allows for precise cooking, achieving the ideal doneness while offering flexibility in timing during busy service periods.
Advantages of Sous Vide in Professional Kitchens
Precision and Consistency: In restaurant kitchens, achieving consistent cooking results is crucial. Sous vide allows for precise cooking of everything from meats to seafood, vegetables, and desserts, ensuring that every dish is cooked to the exact desired temperature. This is one of the most reliable ways to maintain the same quality across every plate served.
Workflow Flexibility: Sous vide enables the preparation of food in advance, which can then be quickly reheated before service. This reduces the workload during peak service hours and allows the kitchen team to respond quickly to customer orders.
Minimized Waste: Cooking food at low temperatures slowly often results in less shrinkage and moisture loss. This is particularly beneficial with expensive proteins, such as filet mignon or scallops, leading to less waste and higher cost efficiency.
Intensified Flavor and Aroma: Since food is cooked in vacuum-sealed bags, marinades or aromatics penetrate the food more effectively, resulting in richer and more intense flavors.
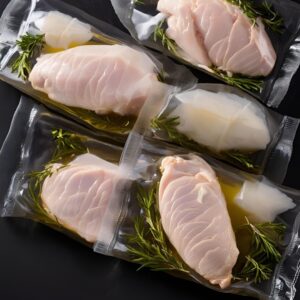
Ideal for Delicate Foods: Delicate foods such as seafood, eggs, and foie gras can be perfectly cooked using sous vide. These items, which are prone to overcooking at higher temperatures, maintain their ideal texture when cooked at a low, controlled temperature.
How to Sous Vide:
Prepare the Ingredients:
Season and prepare the food as needed. In professional kitchens, this often involves marinating or infusing the food with herbs or aromatics to enhance flavor.
Seal the Food:
Place the food in vacuum-sealed bags using industrial-grade vacuum sealers. These machines remove all air from the bags, ensuring the food is cooked under optimal conditions.
Set Up the Water Bath:
Attach the sous vide immersion circulator to a large-capacity water bath or gastronorm containers. Set the desired temperature based on the food being cooked. In professional kitchens, multiple water baths might be used for different temperatures.
Steak: 130°F – 140°F (54°C – 60°C)
Chicken: 145°F – 150°F (63°C – 66°C)
Fish: 122°F – 131°F (50°C – 55°C)
Vegetables: 185°F (85°C)
Cook the Food:
Submerge the vacuum-sealed bags in the water bath and cook for the required time, which can range from 1 hour to several hours, depending on the type and thickness of the food.
Steak: 1-4 hours
Chicken: 1.5-4 hours
Fish: 30 minutes – 1 hour
Vegetables: 1-2 hours
Finish the Food:
After cooking, remove the bags from the water bath. Typically, meats are quickly seared at high heat (in a pan, on a grill, or under a salamander) to develop a flavorful crust. For example, a steak might be seared in a hot cast-iron pan for 1-2 minutes per side.
Serve:
The cooked and finished food is plated using professional presentation techniques. Sous vide-cooked dishes are typically tender and juicy on the inside, with a perfectly seared exterior.
Applications of Sous Vide in Professional Kitchens
Steaks and Meats: In restaurants, sous vide is commonly used to cook steaks, lamb chops, and pork tenderloin to perfection. The meats are quickly seared before serving to enhance flavor and texture.
Seafood: Sous vide is ideal for gently cooking delicate seafood such as salmon, shrimp, and scallops, ensuring they remain moist and tender.
Vegetables: Vegetables cooked sous vide retain their texture and nutrients. Restaurants often use this method to prepare vegetables as garnishes for main courses.
Eggs: Sous vide-cooked eggs have a perfect consistency and are ideal for breakfast or brunch services.
Desserts: Sous vide is also used to perfectly cook desserts like crème brûlée or chocolate fondant.
Challenges of Using Sous Vide in Professional Kitchens
Equipment Investment: Sous vide equipment, particularly for industrial kitchens, can be expensive. Vacuum sealers, water baths, and immersion circulators are significant upfront investments.
Time Management: Because sous vide requires cooking at low temperatures for extended periods, managing time for last-minute orders can be challenging. Therefore, advanced preparation and planning are crucial.
High Training Requirements: Sous vide is a precise technique that requires trained staff to use correctly. Incorrect temperature settings or insufficient cooking times can negatively affect the quality of the dish.
Sous vide is an advanced technique that allows for precise and consistent cooking in professional kitchens. Its advantages, including flavor intensity, texture perfection, and the preservation of food’s natural qualities, make it a valuable tool for elevating restaurant menus. With the right equipment and knowledge, sous vide offers kitchen teams the opportunity to create exceptional dishes with unmatched consistency and quality.
Season the chicken breasts with 5 grams each of salt and black pepper.
Place each chicken breast in a vacuum-seal bag with a sprig of thyme and 15 mL of olive oil.
Vacuum-seal the bags tightly, removing all air.
Submerge the sealed bags in the preheated water bath and cook for 1.5 hours.
Remove the chicken breasts from the bags.
Heat a pan over high heat and add a small amount of oil.
Sear the chicken breasts for 1-2 minutes on each side until they develop a golden crust.
Slice or serve the chicken breasts hot.
Smoking
Smoking is one of the most revered and time-honored techniques in professional kitchens, offering a unique way to cook, flavor, and preserve food. This method, which involves exposing food to smoke from burning or smoldering wood, imparts a distinctive smoky flavor and can be applied to a wide range of ingredients, including meats, fish, vegetables, and cheeses. Originating from ancient preservation methods, smoking remains a cornerstone of many culinary traditions, particularly in barbecue and gourmet cuisine.
The Essence of Smoking
At its core, smoking is about slow, controlled cooking and flavoring. Unlike grilling, which uses direct high heat, smoking relies on indirect heat and wood smoke to cook food slowly over time. This allows the smoke to penetrate deeply, creating complex layers of flavor. There are two primary methods of smoking: cold smoking and hot smoking.
Cold Smoking:
Cold smoking exposes food to smoke at temperatures typically below 85°F (29°C). Since the temperature is low, the food does not cook during the process; instead, it absorbs the smoke flavor. This method is ideal for items that are either already cooked or cured, such as smoked salmon, cheese, and cured meats. Cold smoking can take several hours to a few days, depending on the intensity of flavor desired.
Hot Smoking:
Hot smoking combines cooking and smoking by exposing food to smoke at temperatures between 165°F and 300°F (74°C to 149°C). This method fully cooks the food while infusing it with a rich smoky flavor. It is commonly used for meats like ribs, brisket, poultry, and fish. The duration of hot smoking can vary from a few hours to an entire day, depending on the cut of meat and the temperature used.
The Role of Wood in Smoking
The choice of wood is crucial in smoking, as different types of wood impart different flavors to the food. Selecting the right wood is an essential skill for any chef aiming to master the art of smoking.
Hickory: Strong, hearty flavor; ideal for pork, ribs, and red meats.
Mesquite: Bold, intense flavor; best for beef and game meats.
Applewood: Sweet and mild; perfect for poultry and pork.
Cherrywood: Fruity and sweet; works well with poultry, pork, and fish.
Oak: Robust and versatile; pairs well with beef, lamb, and sausages.
Alder: Delicate and mild; traditionally used for fish, especially salmon.
Wood chips or chunks should be soaked in water for about 30 minutes before being added to the smoker. This ensures a slow, steady release of smoke, which is essential for achieving the best results.
Smoking Equipment and Techniques
Professional kitchens use various types of smoking equipment, depending on the specific needs and scale of the operation. Traditional smokers, smokehouses, and modern electric smokers each offer unique advantages.
Traditional Wood Smokers: These rely on burning wood to produce smoke, requiring careful monitoring of temperature and smoke levels. They are ideal for chefs who prefer a hands-on approach.
Electric Smokers: These offer precise control over temperature and smoke production, making them popular in modern kitchens where consistency and efficiency are key.
Smokehouses: Larger operations may use smokehouses, which can handle higher volumes of food and allow for more extensive smoking processes, particularly for cold smoking.
How to Smoke: A Step-by-Step Guide
Choose the Right Equipment:
Select the appropriate smoker for your needs, whether it’s a traditional wood smoker, an electric smoker, or a smokehouse. Ensure the equipment is clean and ready for use.
Prepare the Food:
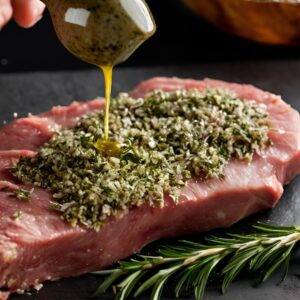
Season or marinate the food as desired. For meats, consider using a dry rub, marinade, or brine to enhance flavor.
Preheat the Smoker:
Preheat the smoker to the desired temperature. For cold smoking, maintain a temperature below 85°F (29°C). For hot smoking, set the temperature between 165°F and 300°F (74°C to 149°C), depending on the food being smoked.
Add Wood Chips:
Choose the appropriate wood chips for the flavor profile you want to achieve. Soak the wood chips in water for about 30 minutes before adding them to the smoker to ensure a steady, slow burn.
Place the Food in the Smoker:
Arrange the food on the smoker racks, ensuring there is enough space between pieces for the smoke to circulate evenly. Close the smoker lid.
Monitor the Temperature:
Maintain a consistent temperature throughout the smoking process. Use a meat thermometer to check the internal temperature of the food, ensuring it reaches safe levels for consumption.
Smoke for the Appropriate Time:
Smoke the food for the recommended time, which varies based on the type of food and the smoking method:
Cold-Smoked Salmon: 12-24 hours
Hot-Smoked Ribs: 4-6 hours
Smoke-Roasted Turkey: 3-5 hours
Rest and Serve:
Once the smoking process is complete, allow the food to rest for a few minutes to let the juices redistribute. Slice and serve.
Applications of Smoking in Professional Kitchens
In professional kitchens, smoking is not just about flavor; it’s also about presentation, texture, and the overall dining experience. Smoked meats like brisket, ribs, and pulled pork are staples in many restaurants, particularly those specializing in barbecue. These dishes often require long smoking times to break down tough connective tissues in the meat, resulting in a tender, flavorful product that becomes the centerpiece of the menu.
Smoked Fish: Cold-smoked salmon and hot-smoked mackerel or trout are popular in high-end restaurants, often served as appetizers or part of a larger dish.
Smoked Vegetables: Smoking vegetables like bell peppers, tomatoes, or mushrooms can add depth to vegetarian dishes, enhancing their appeal and flavor profile.
Smoked Cheeses: Cold-smoking cheeses like cheddar, gouda, or mozzarella adds a rich, smoky flavor, perfect for cheese boards or gourmet sandwiches.
Smoked Oils and Spices: Smoking oils, butter, or spices like paprika can add a unique touch to various dishes, offering a subtle yet distinctive smoky flavor.
Challenges of Smoking in Professional Kitchens
While smoking offers numerous benefits, it also presents several challenges in a professional kitchen setting:
Equipment and Space: Professional smokers and smokehouses require significant space and regular maintenance to function properly.
Time-Consuming Process: Smoking, particularly cold smoking, is a time-intensive process that requires careful planning and scheduling.
Temperature Control: Maintaining a consistent temperature is crucial for successful smoking. Fluctuations can lead to uneven cooking and subpar results.
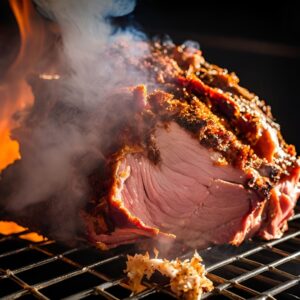
Smoked Pulled Pork Recipe
Ingredients:
1 pork shoulder (2.2-2.7 kg / 5-6 pounds)
60 grams (1/4 cup) brown sugar
15 grams (2 tablespoons) paprika
18 grams (1 tablespoon) salt
6 grams (1 tablespoon) black pepper
10 grams (1 tablespoon) garlic powder
10 grams (1 tablespoon) onion powder
2 grams (1 teaspoon) cayenne pepper
Wood chips (hickory or applewood)
Instructions:
Preheat the smoker to 107°C (225°F).
In a bowl, mix 60 grams of brown sugar, 15 grams of paprika, 18 grams of salt, 6 grams of black pepper, 10 grams of garlic powder, 10 grams of onion powder, and 2 grams of cayenne pepper to make the rub.
Rub the spice mixture all over the pork shoulder.
Place the pork shoulder in the smoker.
Add wood chips to the smoker for smoke flavor.
Smoke the pork shoulder for 8-10 hours, until the internal temperature reaches 90°C (195°F) and the meat is tender.
Remove from the smoker and let the pork rest for 30 minutes before pulling the meat apart with forks.
Serve with barbecue sauce and buns.
Key Aspects of Slow Cooking
1. Low Temperature, Long Duration
Slow cooking typically occurs at temperatures between 170°F and 280°F (75°C and 140°C). This low, steady heat allows the food to cook gently over several hours, often ranging from 4 to 10 hours, depending on the recipe.
2. Tenderizes Tough Cuts of Meat
One of the main benefits of slow cooking is its ability to tenderize tough cuts of meat. Cuts like brisket, pork shoulder, and chuck roast, which contain a lot of connective tissue, break down over the long cooking time, resulting in melt-in-your-mouth textures.
3. Flavor Development
The extended cooking time allows flavors to meld and intensify. Ingredients like herbs, spices, and aromatics have more time to infuse into the food, creating deep, rich flavors that are difficult to achieve with faster cooking methods.
4. Moisture Retention
Slow cooking is typically done in a covered pot or slow cooker, which traps moisture. This prevents the food from drying out and helps retain the natural juices, resulting in a moist and succulent dish.
5. Convenience and Efficiency
Slow cooking is a convenient method for busy individuals. Once the ingredients are prepared and the cooking begins, it requires little attention, allowing the cook to focus on other tasks. Many slow cookers also have timers, enabling you to set them in the morning and come home to a fully cooked meal.
6. Versatility
Slow cooking is incredibly versatile and can be used for a wide range of dishes, including stews, soups, braised meats, chili, casseroles, and even desserts. It’s also ideal for cooking large batches of food, making it great for meal prep.
7. Energy Efficiency
Slow cookers use less energy than conventional ovens due to their lower wattage and the fact that they maintain a low, consistent temperature over time. This makes slow cooking an energy-efficient method of preparing meals.
8. Nutrient Preservation
Cooking at lower temperatures helps preserve nutrients that might otherwise be lost in higher-heat cooking methods. Slow-cooked meals often retain more of their vitamins, minerals, and antioxidants.
9. Economical Cooking
Because slow cooking is ideal for tougher, less expensive cuts of meat, it’s a cost-effective way to prepare hearty, satisfying meals. It also reduces food waste by making use of ingredients that might otherwise be considered undesirable.
10. Enhances Food Safety
Slow cooking, especially for large cuts of meat, ensures thorough cooking. The consistent low heat and extended cooking time allow the food to reach safe internal temperatures without overcooking or burning.
11. Improves Texture and Consistency
Slow cooking promotes even cooking, ensuring that all parts of the dish are uniformly tender and flavorful. This is especially important in dishes like stews or chili, where a variety of ingredients need to blend together harmoniously.
Use of Slow Cooking
Slow cooking is a popular culinary technique that leverages extended cooking times at low temperatures to create deeply flavorful and tender dishes. This method is particularly valued for its ability to transform tougher cuts of meat into succulent meals and for infusing complex flavors into a variety of dishes. Here’s how slow cooking is commonly utilized:
Tenderizing Tough Cuts of Meat
Perfect for Braising
Slow cooking is ideal for braising, a technique that tenderizes tougher cuts of meat such as brisket, pork shoulder, or lamb shanks. The low, slow heat breaks down collagen in the meat, making it extremely tender.
Salt and pepper to taste (about 5 grams / 0.18 oz each)
Instructions:
Season the chuck roast with salt and pepper.
Heat the olive oil in a large skillet over medium-high heat. Brown the roast on all sides, then transfer it to a slow cooker.
In the same skillet, sauté the onions and garlic until soft. Add the tomato paste and cook for another minute.
Deglaze the skillet with red wine, scraping up any browned bits, then pour the mixture over the roast in the slow cooker.
Add the beef broth, carrots, potatoes, and fresh herbs to the slow cooker.
Cover and cook on low for 8-10 hours, until the roast and vegetables are tender.
Developing Rich Flavors
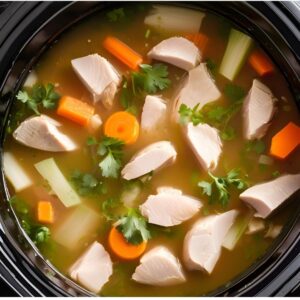
Soups and Sauces
Slow cooking helps develop profound depths of flavor in soups and sauces, allowing herbs and spices to impart more complex tastes over the extended cooking period.
Example Recipe: Slow Cooker Chicken Soup
Ingredients:
1 whole chicken (about 1.5-2 kg / 3.3-4.4 pounds) or 4 chicken breasts (approximately 680-900 grams / 1.5-2 pounds)
Salt and pepper to taste (about 5 grams / 0.18 oz each)
Instructions:
Place the whole chicken or chicken breasts, carrots, celery, onion, garlic, chicken broth, bay leaves, and fresh herbs in the slow cooker.
Cover and cook on low for 6-8 hours.
Remove the chicken, shred the meat, and return it to the slow cooker.
Season with salt and pepper to taste.
Tips for Effective Slow Cooking
1. Choose the Right Cut of Meat
Tougher cuts of meat like chuck roast, brisket, pork shoulder, and lamb shanks are ideal for slow cooking. These cuts have more connective tissue and fat, which break down during the long cooking process, resulting in tender, flavorful dishes.
2. Don’t Overfill the Slow Cooker
Keep your slow cooker no more than two-thirds full. Overfilling can lead to uneven cooking and can prevent the food from reaching the correct temperature. Conversely, too little food can overcook and dry out.
3. Layer Ingredients Correctly
Place harder vegetables like potatoes, carrots, and onions at the bottom of the slow cooker, as they take longer to cook. Meats should be placed on top of the vegetables to ensure they cook evenly.
4. Use the Low Setting
Whenever possible, cook on the low setting rather than high. Slow cooking on low allows flavors to develop more deeply and results in more tender meat. The high setting can be used if you’re short on time, but it may result in a slightly different texture.
5. Keep the Lid On
Resist the temptation to lift the lid and check on your food frequently. Each time you remove the lid, heat escapes, and it can take about 20-30 minutes to regain the lost heat. This can significantly extend the cooking time.
6. Brown Meat and Vegetables First
While it’s not necessary, browning meat and sautéing vegetables before adding them to the slow cooker can add depth of flavor to your dish. The caramelization that occurs during browning enhances the overall taste and can give your slow-cooked meals a more robust flavor.
7. Adjust Liquid Amounts
Slow cookers retain moisture, so you generally need less liquid than you would for stovetop or oven cooking. If you’re adapting a recipe, reduce the liquid by about a third. Keep in mind that ingredients like vegetables release liquid as they cook, so start with less liquid and add more if needed.
8. Add Dairy and Fresh Herbs at the End
Dairy products like milk, cream, and yogurt can curdle if cooked for too long, so it’s best to stir them in during the last 30 minutes of cooking. The same goes for fresh herbs like parsley, cilantro, and basil, which can lose their flavor if cooked for too long.
9. Season Wisely
Seasoning at the beginning of cooking is important, but flavors can mellow out over time in a slow cooker. Taste your dish about an hour before it’s done and adjust the seasoning as needed. Don’t be afraid to add a splash of vinegar, a squeeze of lemon juice, or a dash of salt to brighten up the flavors before serving.
10. Let It Rest
After the cooking time is complete, allow the dish to rest for about 15-20 minutes before serving. This rest period allows the flavors to meld together and ensures that the juices are evenly distributed throughout the dish, particularly in meats.
11. Use the Right Size Slow Cooker
Choose a slow cooker that is appropriately sized for the recipe you’re making. A larger slow cooker can dry out smaller quantities of food, while a smaller one might lead to overflow. A general rule is to ensure the cooker is between half to two-thirds full for best results.
12. Prep Ingredients the Night Before
To save time in the morning, you can prepare and chop all your ingredients the night before. Store them in the fridge in separate containers, and in the morning, simply combine them in the slow cooker and start cooking.
13. Double Up and Freeze
Slow cookers are great for making large batches. Consider doubling your recipe and freezing half for a quick meal later on. Many slow-cooked dishes, like stews, soups, and chili, freeze exceptionally well.
14. Adjust Cooking Time for Altitude
If you live at a high altitude, cooking times may be longer. The lower atmospheric pressure at high altitudes affects the boiling point of liquids, so you may need to add additional time to your slow cooker recipes.
Frying is a cooking technique where food is cooked in hot fat or oil, typically resulting in a crispy exterior and tender interior. It is a popular method across various cuisines due to its ability to add texture and depth to a wide range of dishes. Understanding the different types of frying and mastering the technique can greatly enhance your cooking repertoire.
Types of Frying
Frying is a versatile cooking technique that involves cooking food in hot oil or fat. Different frying methods can be used depending on the type of food and the desired outcome. Here are various types of frying methods along with recipes for each:
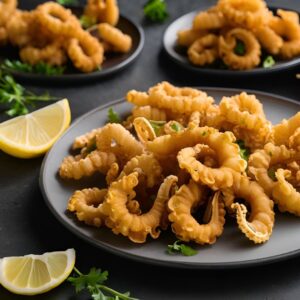
Deep Frying
Deep frying is a popular cooking method that involves submerging food in hot oil to cook it quickly and evenly. This technique creates a crispy exterior while keeping the interior moist and tender, making it ideal for a wide range of dishes, from French fries to fried chicken. Here’s a detailed guide to understanding and mastering deep frying.
The Basics of Deep Frying
1. The Right Equipment:
Deep Fryer or Heavy Pot: A deep fryer is designed specifically for frying, but a heavy pot or Dutch oven can also be used. Ensure the pot is deep enough to hold a substantial amount of oil with enough space to prevent overflow.
Thermometer: Maintaining the correct oil temperature is crucial in deep frying. A candy or deep-fry thermometer helps monitor the oil’s temperature, ensuring it stays within the optimal range.
Spider Strainer or Slotted Spoon: These tools are essential for safely lowering food into the hot oil and removing it when done.
Wire Rack or Paper Towels: After frying, place the food on a wire rack or paper towels to drain excess oil.
2. Choosing the Right Oil:
High Smoke Point: The oil used for deep frying should have a high smoke point, typically above 375°F (190°C). Common oils for deep frying include:
Canola Oil: Neutral flavor and high smoke point (400°F / 204°C).
Peanut Oil: Popular for its flavor and high smoke point (450°F / 232°C).
Vegetable Oil: Versatile and widely available, with a smoke point of 400°F (204°C).
Sunflower Oil: Light flavor with a smoke point of 440°F (227°C).
3. Temperature Control:
Optimal Temperature Range: The ideal frying temperature is usually between 350°F and 375°F (175°C – 190°C). If the temperature is too low, the food will absorb too much oil and become greasy. If it’s too high, the food will cook too quickly on the outside while remaining raw inside.
Avoid Overcrowding: Adding too much food at once can lower the oil temperature, resulting in uneven cooking. Fry in small batches to maintain the proper temperature.
4. Preparing the Food:
Dry the Food: Before frying, ensure the food is as dry as possible. Excess moisture causes the oil to splatter and can prevent the food from becoming crispy.
Coatings and Batters: Many foods are coated in flour, breadcrumbs, or batter before frying to enhance the crispy texture. These coatings also help protect the food from absorbing too much oil.
Seasoning: Season the food either before or immediately after frying to ensure the flavors are well absorbed.
The Deep Frying Process
Heat the Oil:
Pour oil into the deep fryer or heavy pot, filling it no more than two-thirds full. Heat the oil to the desired temperature, checking it with a thermometer.
Prepare the Food:
While the oil is heating, prepare the food for frying. If using a coating or batter, ensure it’s evenly applied.
Fry the Food:
Carefully lower the food into the hot oil using a spider strainer or slotted spoon. Fry in small batches to avoid overcrowding the pot. Cook the food until it’s golden brown and crispy, which usually takes 3-5 minutes depending on the size and type of food.
Drain and Rest:
Once the food is cooked, remove it from the oil using the strainer or spoon. Place the food on a wire rack or paper towels to drain excess oil. Let it rest for a few minutes to allow the coating to crisp up further.
Serve:
Serve the fried food immediately for the best texture and flavor. Fried foods are best enjoyed fresh, as they can lose their crispiness over time.
Common Foods for Deep Frying
Potatoes: French fries, potato chips, hash browns.
1 whole chicken, cut into pieces (about 1.5-2 kg / 3.3-4.4 pounds)
480 mL (2 cups) buttermilk
240 grams (2 cups) all-purpose flour
5 grams (1 teaspoon) paprika
5 grams (1 teaspoon) garlic powder
Salt and pepper to taste (about 5 grams / 0.18 oz each)
Vegetable oil for frying
Instructions:
Marinate the chicken pieces in buttermilk for at least 1 hour, or preferably overnight for more flavor and tenderness.
In a separate bowl, mix together the flour, paprika, garlic powder, salt, and pepper.
Heat the oil in a deep fryer or large pot to 175°C (350°F).
Dredge the marinated chicken pieces in the flour mixture, ensuring each piece is evenly coated.
Fry the chicken in batches until golden brown and cooked through, about 10-12 minutes, depending on the size of the pieces. Make sure the internal temperature reaches 74°C (165°F).
Drain the fried chicken on paper towels to remove excess oil.
Serve the chicken hot, and enjoy!
Pan Frying
Pan frying is a versatile cooking technique that involves cooking food in a shallow pan with a small amount of oil or fat over medium to high heat. This method is ideal for achieving a crisp, golden-brown exterior while keeping the interior tender and juicy. Pan frying is commonly used for cooking meats, fish, vegetables, and other ingredients that benefit from a quick, high-heat cooking method. Here’s a detailed guide to mastering pan frying.
The Basics of Pan Frying
1. The Right Equipment:
Skillet or Frying Pan: A heavy-bottomed skillet or frying pan, preferably made of cast iron, stainless steel, or non-stick material, is ideal for pan frying. The pan should be large enough to hold the food in a single layer without overcrowding, allowing for even cooking.
Spatula or Tongs: These tools are essential for turning food and ensuring even browning. A fish spatula is particularly useful for delicate items like fish fillets.
Lid: A lid can be used to cover the pan while cooking thicker cuts of meat or when you need to retain moisture and heat.
2. Choosing the Right Oil or Fat:
High Smoke Point: The oil or fat used for pan frying should have a high smoke point, as the cooking process involves relatively high heat. Common choices include:
Canola Oil: Neutral flavor and a high smoke point (400°F / 204°C).
Vegetable Oil: Versatile with a smoke point of 400°F (204°C).
Grapeseed Oil: Light flavor and a smoke point of 420°F (216°C).
Butter or Clarified Butter: Adds rich flavor, but be cautious as regular butter has a lower smoke point (350°F / 177°C). Clarified butter (also known as ghee) has a higher smoke point (450°F / 232°C).
3. Preparing the Food:
Dry the Food: Before pan frying, ensure the food is dry by patting it with paper towels. Excess moisture can cause the oil to splatter and prevent the food from browning properly.
Seasoning and Coating: Season the food with salt and pepper, and if desired, coat it lightly with flour, breadcrumbs, or batter. Coatings help create a crisp exterior and protect delicate foods like fish.
The Pan Frying Process
Preheat the Pan:
Place the skillet or frying pan over medium to medium-high heat. Allow the pan to heat up for a few minutes before adding oil. A properly heated pan ensures even cooking and prevents food from sticking.
Add Oil or Fat:
Add just enough oil or fat to coat the bottom of the pan. Swirl the pan to ensure an even layer of oil. The oil should shimmer but not smoke, indicating it’s ready for frying.
Add the Food:
Carefully place the food in the pan, making sure not to overcrowd it. Overcrowding lowers the temperature and results in steaming rather than frying, which can prevent the food from achieving a crispy exterior.
Cook Without Disturbing:
Allow the food to cook without moving it for the first few minutes. This helps develop a golden-brown crust. Once the crust has formed, gently flip the food using a spatula or tongs.
Finish Cooking:
Continue cooking until the food reaches the desired doneness. Thicker cuts of meat may need to be finished in the oven, especially if they need to cook through without burning the exterior.
Drain and Rest:
Once the food is cooked, remove it from the pan and place it on a paper towel-lined plate to drain any excess oil. Let the food rest for a few minutes before serving to allow the juices to redistribute.
Tips for Effective Pan Frying
Use the Right Amount of Oil: Too little oil can cause the food to stick, while too much can make it greasy. Aim for a thin, even layer that just coats the bottom of the pan.
Control the Heat: Adjust the heat as needed to maintain a steady sizzle. If the pan gets too hot, lower the heat to avoid burning the food.
Avoid Overcrowding: Fry in batches if necessary to ensure each piece of food has enough space to cook evenly and develop a crispy crust.
Test for Doneness: Use a meat thermometer to check the internal temperature of meats, ensuring they’re cooked to a safe and appropriate level. For example, chicken should reach an internal temperature of 165°F (74°C).
Finish in the Oven (if needed): Thicker cuts of meat, like chicken breasts or pork chops, can be started on the stovetop and finished in the oven to ensure they cook through without burning the exterior.
Vegetables: Zucchini, eggplant, asparagus, bell peppers.
Tofu: Crispy tofu cubes or slices.
Eggs: Fried eggs, omelets.
Potatoes: Hash browns, potato cakes.
Safety Tips for Pan Frying
Handle Hot Oil Carefully: Be cautious when working with hot oil, as it can splatter and cause burns. Use a splatter guard if necessary.
Watch for Smoke: If the oil begins to smoke, it’s too hot. Remove the pan from the heat and let it cool slightly before continuing.
Keep a Lid Handy: In case of a grease fire, cover the pan with a lid to smother the flames. Never use water to extinguish an oil fire.
Pan-Fried Fish Fillets Recipe
Ingredients:
4 fish fillets (such as cod or tilapia, approximately 150–200 grams / 5-7 oz each)
Salt and pepper to taste (about 5 grams / 0.18 oz each)
120 grams (1 cup) all-purpose flour
2 eggs, beaten
120 grams (1 cup) breadcrumbs
30 mL (2 tablespoons) olive oil
Lemon wedges for serving
Instructions:
Season the fish fillets on both sides with salt and pepper.
Dredge each fillet in the flour, shaking off any excess.
Dip the floured fillets in the beaten eggs, ensuring they are fully coated.
Coat the egg-dipped fillets with breadcrumbs, pressing gently to ensure an even coating.
Heat the olive oil in a skillet over medium heat.
Once the oil is hot, carefully add the fillets to the skillet. Fry for about 3-4 minutes per side, or until the fillets are golden brown and cooked through. The fish should flake easily with a fork.
Remove the fillets from the skillet and drain them on paper towels to remove excess oil.
Serve the pan-fried fish fillets hot with lemon wedges on the side.
Shallow Frying
Shallow frying is a cooking technique that involves frying food in a small amount of oil, typically enough to cover the bottom of the pan and reach halfway up the sides of the food. This method is used to create a crispy exterior while cooking the food thoroughly. Shallow frying is ideal for foods that benefit from quick, high-heat cooking but do not require full immersion in oil, such as cutlets, fritters, and fillets.
The Basics of Shallow Frying
1. The Right Equipment:
Skillet or Frying Pan: A heavy-bottomed skillet or frying pan, preferably non-stick or cast iron, is best for shallow frying. The pan should be wide enough to hold the food in a single layer without overcrowding.
Tongs or Spatula: Use these tools for turning the food and ensuring even browning. A slotted spatula is particularly useful for delicate items.
Paper Towels: Keep these on hand to drain excess oil from the food after frying.
2. Choosing the Right Oil:
High Smoke Point: Select an oil with a high smoke point for shallow frying, as the cooking process involves medium to high heat. Common choices include:
Canola Oil: Neutral flavor with a high smoke point (400°F / 204°C).
Vegetable Oil: Versatile and widely used, with a smoke point of 400°F (204°C).
Sunflower Oil: Light flavor with a high smoke point (440°F / 227°C).
Olive Oil: While its smoke point is lower (around 375°F / 190°C), olive oil can still be used for shallow frying, especially for foods cooked at slightly lower temperatures.
3. Preparing the Food:
Dry the Food: Before frying, pat the food dry with paper towels to remove any excess moisture. This prevents oil splatter and helps achieve a crispier finish.
Coatings and Breading: Many foods are coated in flour, breadcrumbs, or batter before shallow frying. This coating helps create a crispy exterior and protects the food from absorbing too much oil.
The Shallow Frying Process
Preheat the Pan:
Place the skillet or frying pan over medium heat and allow it to warm up. This step is crucial for ensuring even cooking and preventing the food from sticking.
Add Oil:
Pour enough oil into the pan to cover the bottom and reach about halfway up the sides of the food. Heat the oil until it shimmers but doesn’t smoke, indicating it’s ready for frying.
Add the Food:
Carefully place the food in the hot oil. Arrange it in a single layer without overcrowding the pan, which can cause the food to steam rather than fry.
Cook Until Golden Brown:
Allow the food to cook undisturbed for a few minutes, letting a golden-brown crust form. Once the bottom is crispy, carefully flip the food using tongs or a spatula.
Finish Cooking:
Continue cooking until the food is evenly browned on all sides and cooked through. This typically takes 3-5 minutes per side, depending on the thickness of the food.
Drain and Serve:
Once cooked, transfer the food to a plate lined with paper towels to drain any excess oil. This step helps keep the food crispy. Serve immediately while hot.
Tips for Effective Shallow Frying
Maintain a Consistent Temperature: Adjust the heat as needed to keep the oil at a steady temperature. If the oil is too hot, the food may burn on the outside before cooking through. If it’s too cool, the food can become greasy.
Test the Oil: To check if the oil is hot enough, drop a small piece of bread or a breadcrumb into the oil. It should sizzle and turn golden brown within a few seconds.
Don’t Overcrowd the Pan: Fry in batches if necessary to ensure each piece of food has enough space to cook evenly. Overcrowding the pan can lower the oil temperature and result in soggy food.
Use Fresh Oil: If you’re frying multiple batches, you may need to replace the oil if it becomes too dark or begins to smoke. Fresh oil ensures a cleaner flavor and better frying results.
Keep a Lid Handy: If the oil begins to splatter, you can partially cover the pan with a lid to minimize mess, but be careful not to trap too much steam, which can affect the crispiness of the food.
Be Cautious with Hot Oil: Hot oil can cause serious burns, so handle it with care. Use tongs or a slotted spatula to turn food and avoid splattering.
Watch for Smoke: If the oil starts to smoke, it’s too hot. Remove the pan from the heat to let it cool slightly before continuing.
Prevent Oil Spills: Never fill the pan more than halfway with oil to avoid spills. If oil spills over the sides, it can cause dangerous flare-ups.
Shallow-Fried Pork Cutlets Recipe
Ingredients:
4 pork cutlets (approximately 150-180 grams / 5-6 oz each)
Salt and pepper to taste (about 5 grams / 0.18 oz each)
120 grams (1 cup) all-purpose flour
2 eggs, beaten
120 grams (1 cup) breadcrumbs
30 mL (2 tablespoons) vegetable oil
Instructions:
Season the pork cutlets on both sides with salt and pepper.
Dredge each cutlet in the flour, shaking off any excess.
Dip the floured cutlets in the beaten eggs, ensuring they are fully coated.
Coat the egg-dipped cutlets with breadcrumbs, pressing gently to ensure an even coating.
Heat the vegetable oil in a skillet over medium-high heat.
Once the oil is hot, carefully add the cutlets to the skillet. Fry for about 3-4 minutes per side, or until the cutlets are golden brown and cooked through. The internal temperature should reach 145°F (63°C).
Remove the cutlets from the skillet and drain them on paper towels to remove excess oil.
Serve the pork cutlets hot.
Stir Frying
Stir frying is a fast and versatile cooking technique that involves cooking food quickly over high heat while stirring constantly. This method is ideal for preparing a wide variety of ingredients, from meats and seafood to vegetables and noodles. Stir frying originated in Chinese cuisine but has become popular worldwide due to its ability to produce flavorful, nutritious meals in a short amount of time.
The Basics of Stir Frying
1. The Right Equipment:
Wok or Skillet: A wok is the traditional pan used for stir frying, with its rounded bottom and high sides that allow for easy tossing and stirring of ingredients. If a wok is not available, a large, heavy-bottomed skillet can also be used.
Stirring Utensil: A wooden spatula, silicone spatula, or long chopsticks are ideal for stirring and tossing ingredients without scratching the pan.
Prep Bowls: Since stir frying is a fast process, it’s essential to have all ingredients prepped and ready to go before you start cooking. Small prep bowls help organize ingredients.
2. Choosing the Right Oil:
High Smoke Point: Stir frying requires cooking at high temperatures, so it’s important to choose an oil with a high smoke point. Common options include:
Peanut Oil: A traditional choice for stir frying, with a smoke point of 450°F (232°C).
Vegetable Oil: Versatile and widely available, with a smoke point of 400°F (204°C).
Canola Oil: Neutral flavor with a high smoke point (400°F / 204°C).
Sunflower Oil: Light flavor and a smoke point of 440°F (227°C).
3. Preparing the Ingredients:
Cut Ingredients Uniformly: For even cooking, all ingredients should be cut into uniform sizes. Thin slices or small pieces work best, as they cook quickly.
Dry the Ingredients: Moisture can cause ingredients to steam rather than fry, so make sure meats, seafood, and vegetables are dry before adding them to the pan.
Marinate for Flavor: Meats and seafood can be marinated beforehand to add extra flavor. Common marinades include soy sauce, ginger, garlic, and a bit of sugar.
The Stir Frying Process
Heat the Wok or Skillet:
Place the wok or skillet over high heat. Allow it to heat up for a minute or two before adding oil. A properly heated pan is crucial for achieving the characteristic sear of stir frying.
Add Oil:
Add a small amount of oil to the pan, swirling it around to coat the surface evenly. The oil should shimmer and slightly smoke, indicating it’s hot enough for stir frying.
Cook the Protein:
Start by cooking the protein (meat, seafood, tofu) first. Add it to the hot oil and stir constantly until it’s browned and just cooked through. This usually takes 2-4 minutes, depending on the size and type of protein. Remove the cooked protein from the pan and set it aside.
Cook the Aromatics:
Add a bit more oil if needed, then add aromatics such as garlic, ginger, and onions. Stir fry for 30 seconds to a minute until fragrant. Be careful not to burn the aromatics, as they cook quickly.
Add Vegetables:
Add the vegetables in order of cooking time, starting with the ones that take longer to cook (e.g., carrots, bell peppers) and finishing with more delicate ones (e.g., spinach, bean sprouts). Stir constantly to ensure even cooking. This step usually takes 2-5 minutes.
Return the Protein and Add Sauce:
Return the cooked protein to the pan. Pour in your stir fry sauce, which could be a mix of soy sauce, oyster sauce, hoisin sauce, or other seasonings. Stir everything together to coat the ingredients evenly with the sauce. Cook for another 1-2 minutes until the sauce is heated through and slightly thickened.
Serve Immediately:
Stir fried dishes are best served immediately, while the ingredients are still hot and crisp. Serve the stir fry over steamed rice or noodles for a complete meal.
Tips for Effective Stir Frying
Prep Everything in Advance: Stir frying happens quickly, so having all your ingredients chopped, measured, and ready to go before you start cooking is essential.
Use High Heat: High heat is key to stir frying. It cooks the food quickly, sealing in flavor and moisture while creating a nice sear.
Keep it Moving: Stir frying requires constant movement to prevent burning and ensure even cooking. Use your spatula to keep the ingredients in motion throughout the process.
Don’t Overcrowd the Pan: If you have a lot of ingredients, cook in batches. Overcrowding the pan can cause the temperature to drop, leading to steaming rather than frying.
Balance the Flavors: A good stir fry balances sweet, salty, sour, and umami flavors. Taste the dish before serving and adjust the seasoning if needed.
Common Ingredients for Stir Frying
Proteins: Chicken, beef, pork, shrimp, tofu.
Vegetables: Broccoli, bell peppers, carrots, snow peas, mushrooms, bok choy, bean sprouts.
Aromatics: Garlic, ginger, green onions, shallots.
Toss the chicken pieces with soy sauce and cornstarch in a bowl until evenly coated. Let it marinate for a few minutes while you prepare the other ingredients.
Heat the vegetable oil in a wok or large skillet over high heat until the oil shimmers.
Add the marinated chicken to the wok and stir-fry until the chicken is cooked through and slightly browned, about 5 minutes. Remove the chicken from the wok and set aside.
In the same wok, add the bell pepper, broccoli florets, carrots, garlic, and ginger. Stir-fry the vegetables for 3-4 minutes until they are tender but still crisp.
Return the cooked chicken to the wok. Add the hoisin sauce and sesame oil, and stir-fry everything together for another 2 minutes until the chicken is well coated and the sauce is heated through.
Serve the chicken stir fry hot with rice or noodles.
Flash Frying
Flash frying is a high-heat cooking method used to cook food quickly, usually within a matter of seconds to a couple of minutes. This technique is often employed to achieve a crisp, golden exterior while keeping the inside tender and moist. Flash frying is ideal for delicate foods like seafood, thin cuts of meat, and small items like herbs or vegetables that benefit from a quick burst of intense heat.
The Basics of Flash Frying
1. The Right Equipment:
Heavy-Bottomed Pan or Deep Fryer: A heavy-bottomed pan, such as a cast iron skillet, or a deep fryer is ideal for flash frying. The pan should be deep enough to hold a few inches of oil without overflowing.
Thermometer: An instant-read or deep-fry thermometer is essential for monitoring the oil temperature. Flash frying requires very hot oil, typically between 375°F and 400°F (190°C – 205°C).
Spider Strainer or Slotted Spoon: These tools are useful for quickly removing food from the hot oil without carrying excess oil.
2. Choosing the Right Oil:
High Smoke Point: Since flash frying requires high heat, it’s important to use an oil with a high smoke point to prevent burning. Suitable oils include:
Peanut Oil: Smoke point of 450°F (232°C).
Canola Oil: Smoke point of 400°F (204°C).
Vegetable Oil: Smoke point of 400°F (204°C).
Sunflower Oil: Smoke point of 440°F (227°C).
3. Preparing the Food:
Thin or Small Cuts: Foods best suited for flash frying are typically thin or small, allowing them to cook quickly. Examples include thin slices of meat, shrimp, or small vegetables like baby corn or green beans.
Coating: A light coating of flour, cornstarch, or breadcrumbs can help achieve a crispy exterior. The coating also helps to protect delicate foods from the intense heat.
Dry the Food: Ensure the food is dry before frying to prevent oil splatters and to help achieve a crispy texture.
The Flash Frying Process
Heat the Oil:
Pour oil into your pan or deep fryer to a depth of about 2 inches (5 cm). Heat the oil to 375°F – 400°F (190°C – 205°C). Use a thermometer to ensure the oil reaches the correct temperature.
Prepare the Food:
While the oil is heating, prepare your food by slicing it into thin or small pieces and coating it lightly in flour, cornstarch, or breadcrumbs if desired.
Fry the Food Quickly:
Carefully lower the food into the hot oil using a spider strainer or slotted spoon. Fry in small batches to prevent the oil temperature from dropping. The food should cook very quickly—usually in 30 seconds to 2 minutes, depending on the thickness and type of food.
Drain and Serve:
Once the food is golden brown and crispy, remove it from the oil and place it on a paper towel-lined plate to drain any excess oil. Serve immediately for the best texture.
Tips for Effective Flash Frying
Use a Thermometer: Maintaining the correct oil temperature is crucial for successful flash frying. If the oil is too cool, the food will absorb too much oil and become greasy. If it’s too hot, the food may burn on the outside before cooking through.
Work Quickly: Flash frying is a fast process, so have all your ingredients prepped and ready before you start. Fry in small batches to ensure even cooking.
Keep it Simple: Flash frying is ideal for foods that don’t require long cooking times. Avoid using this method for thick or dense items that need more time to cook through.
Don’t Overcrowd the Pan: Frying too much at once can lower the oil temperature and result in uneven cooking. Fry in small batches for the best results.
Common Foods for Flash Frying
Seafood: Shrimp, calamari, thin fish fillets.
Meat: Thin cuts of beef or pork, chicken strips.
Vegetables: Green beans, zucchini slices, bell pepper strips.
Herbs: Basil, parsley, sage (often used as a garnish).
Dough: Mini doughnuts, wontons, or small fritters.
Flash-Fried Calamari Recipe
Ingredients:
450 grams (1 pound) calamari, cleaned and cut into rings
120 grams (1 cup) all-purpose flour
Salt and pepper to taste (about 5 grams / 0.18 oz each)
Vegetable oil for frying
Lemon wedges for serving
Instructions:
In a shallow dish, season the flour with salt and pepper, mixing well.
Dredge the calamari rings in the seasoned flour, making sure each piece is evenly coated. Shake off any excess flour.
Heat the vegetable oil in a deep skillet or wok to 375°F (190°C). Use a thermometer to ensure the oil reaches the correct temperature.
Carefully add the calamari rings to the hot oil in small batches. Flash-fry for about 1-2 minutes, or until the calamari is golden and crispy. Be careful not to overcrowd the pan.
Use a spider strainer or slotted spoon to remove the calamari from the oil. Place them on a paper towel-lined plate to drain any excess oil.
Serve the flash-fried calamari hot, with lemon wedges on the side for squeezing over the top.
Key Aspects of Frying
Frying is a versatile and popular cooking method that involves cooking food in hot oil. The technique can vary from shallow frying to deep frying, but the core principles remain the same. Frying can produce a wide range of textures and flavors, from crispy and golden to tender and juicy. Understanding the key aspects of frying will help you achieve the best results in your cooking.
1. The Role of Oil
High Smoke Point: The oil used for frying must have a high smoke point to withstand the high temperatures required without burning. Common frying oils include canola oil, peanut oil, vegetable oil, and sunflower oil.
Neutral Flavor: A neutral-flavored oil is often preferred for frying to avoid overpowering the natural flavors of the food. However, for certain dishes, oils like olive oil or coconut oil can be used to add a distinctive taste.
Oil Temperature: Maintaining the correct oil temperature is crucial. For deep frying, the temperature typically ranges from 350°F to 375°F (175°C to 190°C). If the oil is too hot, the food will burn on the outside before cooking through. If it’s too cool, the food will absorb too much oil, becoming greasy.
2. Preparing the Food
Uniform Size: Cut food into uniform pieces to ensure even cooking. Smaller pieces cook faster, so consider the size and thickness of the food when frying.
Drying the Food: Ensure that food is dry before frying. Excess moisture can cause oil to splatter and prevents the food from achieving a crispy texture.
Coatings: Many fried foods benefit from a coating of flour, breadcrumbs, or batter. These coatings help create a crispy exterior and also protect the food from absorbing too much oil.
3. Frying Process
Preheating the Oil: Always preheat the oil to the desired temperature before adding food. Adding food to cold or improperly heated oil can result in greasy, undercooked food.
Batch Cooking: Avoid overcrowding the pan or fryer. Frying in small batches ensures that the oil temperature remains consistent and that each piece cooks evenly.
Turning the Food: For shallow or pan frying, turning the food at the right time is essential for even browning. Use tongs or a spatula to carefully flip the food once it’s golden on one side.
4. Draining and Serving
Draining Excess Oil: After frying, remove the food from the oil and place it on a paper towel-lined plate or wire rack to drain excess oil. This helps maintain the crispy texture.
Serving Immediately: Fried foods are best served fresh and hot. They tend to lose their crispiness as they cool, so plan to serve them as soon as possible after frying.
5. Safety Considerations
Handling Hot Oil: Always exercise caution when working with hot oil. Use long-handled utensils to avoid splashes, and never leave hot oil unattended.
Ventilation: Frying can produce smoke and strong odors, so ensure your kitchen is well-ventilated by using an exhaust fan or opening a window.
Fire Safety: In case of an oil fire, never use water to extinguish it. Instead, cover the pan with a metal lid or use a fire extinguisher rated for grease fires.
6. Reusing and Disposing of Oil
Reusing Oil: Oil can be reused for frying several times if it’s filtered and stored properly. After cooling, strain the oil through a fine sieve or cheesecloth to remove food particles, and store it in an airtight container in a cool, dark place.
Disposing of Oil: Never pour used oil down the drain, as it can clog pipes. Instead, dispose of it in a sealed container or take it to a recycling center that accepts cooking oil.
7. Common Frying Mistakes
Overcrowding the Pan: Adding too much food at once lowers the oil temperature, leading to uneven cooking and greasy results.
Using the Wrong Oil: Using an oil with a low smoke point can cause it to break down at high temperatures, leading to off-flavors and excessive smoke.
Not Monitoring the Temperature: Failing to maintain the correct oil temperature can result in food that is burnt on the outside and undercooked inside, or greasy and soggy.
Use of Frying in Cooking
Frying is a fundamental cooking technique used extensively across various cuisines worldwide. It involves cooking food in hot oil or fat, which results in a characteristic texture and flavor that is often crisp, rich, and satisfying. Here’s how frying is typically utilized in culinary practices:
Achieving Crisp Texture
Texture Enhancement: Frying is renowned for its ability to produce a crispy outer layer while keeping the interior of the food moist and tender. This contrast in textures is highly appealing and can be seen in foods like French fries, fried chicken, and tempura.
Flavor Development
Maillard Reaction: Frying at high temperatures induces the Maillard reaction, where amino acids and reducing sugars combine to give fried foods a distinctive brown color and complex flavor. This is especially notable in seared meats and deep-fried foods.
Quick Cooking
Efficiency: Many frying methods, particularly stir-frying and shallow frying, allow for quick cooking of foods, making them ideal for fast-paced meal preparations. Vegetables and thin cuts of meat can be cooked in minutes, retaining more nutrients than longer cooking methods might.
Versatility
Diverse Applications: From snacks and appetizers like spring rolls and onion rings to main dishes such as stir-fried noodles and schnitzels, frying is versatile enough to be used in a multitude of culinary applications across all meal courses.
Cultural Significance
Global Cuisines: Frying techniques are pivotal in many traditional dishes around the world. In Japan, tempura uses a light batter and precise frying to create delicately crispy vegetables and seafood. In Italy, foods like calamari are often lightly fried to enhance their natural flavors.
Food Preservation
Reducing Moisture: Frying can decrease the moisture content of food, which helps in preserving it for longer periods. This is useful in preparing dried foods or snacks that require a longer shelf life.
Tips for Effective Frying
Frying is a popular cooking method that can produce delicious, crispy food when done correctly. Here are some tips for effective frying to ensure the best results and maintain safety:
1. Choose the Right Oil
High Smoke Point: Use oils with a high smoke point like canola, peanut, vegetable, or sunflower oil. These oils can withstand the high temperatures required for frying without breaking down or burning.
Neutral Flavor: Select a neutral-flavored oil unless you want the oil to impart a specific flavor to the food.
2. Preheat the Oil
Proper Temperature: Always preheat the oil to the correct temperature before adding food. For most frying, the optimal temperature is between 350°F and 375°F (175°C to 190°C). Use a thermometer to ensure the oil reaches the desired heat.
Avoid Cold Oil: Adding food to cold or improperly heated oil will cause it to absorb too much oil, resulting in greasy, soggy food.
3. Prepare the Food Correctly
Dry the Food: Pat the food dry with paper towels before frying to remove excess moisture. This prevents oil splatters and helps achieve a crispier texture.
Uniform Size: Cut food into uniform pieces to ensure even cooking. Smaller, thinner pieces will cook more quickly, so adjust cooking times accordingly.
4. Use Proper Coatings
Coat Lightly: Dredge the food in flour, cornstarch, or breadcrumbs for a crispy exterior. Ensure the coating is even and shake off any excess to prevent clumping.
Use Batters Wisely: If using a batter, dip the food just before frying to maintain the batter’s texture.
5. Avoid Overcrowding the Pan
Fry in Batches: Overcrowding the pan or fryer lowers the oil temperature, leading to uneven cooking and greasy food. Fry in small batches to maintain consistent heat and ensure each piece cooks evenly.
6. Monitor the Temperature
Constant Heat: Keep the oil at a steady temperature throughout the frying process. Use a thermometer to check the oil regularly and adjust the heat as needed.
Avoid Overheating: If the oil starts to smoke, it’s too hot. Reduce the heat to avoid burning the food and creating off-flavors.
7. Use the Right Tools
Tongs or Slotted Spoon: Use tongs, a slotted spoon, or a spider strainer to gently lower food into the hot oil and remove it once cooked. These tools allow excess oil to drain away as you remove the food.
Paper Towels or Wire Rack: After frying, place the food on a paper towel-lined plate or wire rack to drain any excess oil. This helps maintain the crispy texture.
8. Season Immediately
Season After Frying: Season the food with salt or other spices immediately after frying while it’s still hot. This helps the seasoning adhere better to the food.
9. Serve Fresh
Serve Immediately: Fried foods are best enjoyed fresh and hot. They tend to lose their crispiness as they cool, so plan to serve them as soon as possible after frying.
10. Reuse and Store Oil Properly
Strain and Store: After frying, allow the oil to cool completely. Strain it through a fine sieve or cheesecloth to remove any food particles, and store it in an airtight container in a cool, dark place for future use. Reuse the oil only if it remains clear and doesn’t smell rancid.
Discard Properly: If the oil becomes dark, foamy, or develops an off smell, discard it in a sealed container—never pour it down the drain.
11. Ensure Safety
Handle Hot Oil Carefully: Always be cautious when working with hot oil. Use long-handled utensils to avoid splashes, and never leave hot oil unattended.
Prevent Oil Spills: Fill the pan or fryer no more than halfway with oil to prevent spills. If oil spills over, it can cause dangerous flare-ups.
Ventilate the Kitchen: Frying can produce smoke, so ensure your kitchen is well-ventilated by turning on an exhaust fan or opening a window.
Know Fire Safety: In case of an oil fire, never use water to extinguish it. Instead, cover the pan with a metal lid or use a fire extinguisher rated for grease fires.
12. Clean Up Thoroughly
Let Oil Cool Before Cleaning: Allow the oil to cool completely before attempting to clean the pan or fryer. Use warm, soapy water to clean the pan and remove any oil residue.
Introduction to Quality Control in Culinary Operations
Definition and Importance of Quality Control in Culinary Settings
Definition: Quality control (QC) in culinary operations refers to the systematic processes and procedures implemented to ensure food products meet predetermined standards of quality, safety, and consistency.
Importance: QC ensures that every dish served meets the same high standards, preventing foodborne illnesses, enhancing customer satisfaction, and maintaining the restaurant’s reputation.
Overview of How Quality Control Enhances Food Safety, Consistency, and Customer Satisfaction
Food Safety: Implementing QC reduces the risk of contamination and foodborne illnesses by adhering to safety protocols.
Consistency: Standardized procedures and recipes ensure that customers receive the same quality and taste every time they visit.
Customer Satisfaction: High standards in food quality and service lead to positive dining experiences, fostering customer loyalty and repeat business.
Recipe Standardization
Recipe standardization is a critical process in professional kitchens that ensures consistency, efficiency, and customer satisfaction. It involves creating detailed, tested, and perfected recipes that can be reliably reproduced under the same conditions, time after time. Here’s a guide to understanding and implementing recipe standardization in a culinary setting.
Importance of Recipe Standardization
Consistency: Ensures that every customer receives the same quality and taste every time they order a dish, no matter when they visit or who prepares the meal.
Cost Control: Standardized recipes help in precise budgeting and inventory management since the exact amounts of ingredients are known and used consistently.
Training and Efficiency: Makes it easier to train new staff. Chefs and kitchen staff can quickly learn how to prepare dishes according to the established standards, reducing errors and waste.
Steps to Standardize a Recipe
Recipe Creation and Testing
Develop a recipe with clear instructions and specific ingredient measurements. Test the recipe multiple times to ensure it produces consistent results and meets your quality standards.
Documenting the Recipe
Write down every detail:
Ingredients: List all ingredients with specific types (e.g., “kosher salt” instead of just “salt”) and precise measurements (grams, ounces, etc.).
Procedures: Include step-by-step instructions on how to prepare the dish, cooking temperatures, equipment to use, and plating guidelines.
Cooking and Prep Times: Document all time requirements to help with kitchen scheduling.
Yield: Specify the number of servings or the quantity the recipe produces.
Staff Training
Conduct training sessions where staff members practice making the dish under supervision until they can do so perfectly and consistently.
Use demonstrations, tasting sessions, and hands-on practice to ensure thorough understanding.
Quality Control
Regularly check the dishes prepared by staff against the standardized recipe for taste, presentation, and portion size.
Offer feedback and additional training if inconsistencies are noted.
Feedback and Adjustments
Encourage staff to provide feedback on the recipes based on their cooking experiences and customer comments.
Make necessary adjustments to the recipes if certain aspects consistently receive negative feedback or if improvements are identified.
Revisiting and Updating
Periodically review and update recipes to reflect changes in customer preferences, seasonal ingredient availability, or new culinary techniques.
Tools for Recipe Standardization
Digital Tools
Recipe Management Software
Description: Software designed to organize, standardize, and manage recipes.
Examples:
ChefTec: Allows for detailed recipe entry, cost analysis, and inventory management.
Benefits: Simplifies recipe documentation, ensures consistency, and helps with cost control.
Digital Scales
Digital Scales
Description: Electronic scales that provide precise measurements for ingredients.
Examples:
Oxo Good Grips Scale: Known for its accuracy and ease of use.
My Weigh KD-8000: Offers precise measurements and a large capacity.
Benefits: Ensures exact measurements, reducing ingredient waste and ensuring consistency.
Physical Tools
Measuring Cups and Spoons
Description: Standardized tools for measuring liquid and dry ingredients.
Examples:
Cuisipro Stainless Steel Measuring Cups: Durable and precise.
OXO Good Grips Measuring Spoons: Easy to use and accurate.
Benefits: Ensures accurate ingredient measurements, which is essential for recipe consistency.
Thermometers
Description: Tools used to measure the temperature of food during cooking.
Examples:
Thermapen: High-precision digital thermometer.
CDN ProAccurate Thermometer: Reliable and widely used in professional kitchens.
Benefits: Ensures that food is cooked to the correct temperature, maintaining quality and safety.
Visual and Written Aids
Standard Operating Procedures (SOPs)
Description: Detailed written instructions on how to perform tasks.
Examples:
Recipe Cards: Laminated cards with step-by-step instructions and pictures.
Wall Charts: Visual aids posted in the kitchen for quick reference.
Benefits: Provides clear, accessible guidance for staff, ensuring consistent execution of recipes.
Visual Plating Guides
Description: Diagrams or photos showing how to plate dishes.
Examples:
Photo Plating Guides: Pictures of the finished dish with notes on presentation.
Diagrams: Step-by-step diagrams showing how to arrange components on the plate.
Benefits: Ensures consistency in presentation and helps maintain the restaurant’s visual standards.
Training Materials
Training Videos
Description: Videos demonstrating the proper techniques and steps for recipes.
Examples:
Internal Training Videos: Custom videos created by the restaurant.
Professional Cooking Schools: Videos from culinary schools showing advanced techniques.
Benefits: Provides visual learning for staff, helping them understand and replicate techniques accurately.
Hands-On Training Sessions
Description: Practical training sessions where staff learn by doing.
Examples:
Workshops: Sessions focused on specific recipes or techniques.
Shadowing: New staff members shadow experienced chefs.
Benefits: Allows staff to practice under supervision, ensuring they understand and can perform each step correctly.
Inventory Management Tools
Inventory Management Systems
Description: Software to track and manage kitchen inventory.
Examples:
MarketMan: Helps manage orders, track inventory, and analyze costs.
BlueCart: Streamlines inventory and ordering processes.
Benefits: Ensures that all ingredients are available and fresh, which is essential for maintaining recipe consistency.
Feedback and Quality Control Tools
Customer Feedback Systems
Description: Tools to gather and analyze customer feedback on dishes.
Examples:
SurveyMonkey: Create and distribute customer satisfaction surveys.
Zonka Feedback: Collects and analyzes feedback from customers in real-time.
Benefits: Helps identify areas for improvement and ensures recipes meet customer expectations.
Quality Control Checklists
Description: Checklists used to ensure all steps in recipe preparation are followed correctly.
Examples:
Daily QC Checklists: Lists all the quality control points to check each day.
Pre-Service Checklists: Ensures everything is in place before service starts.
Benefits: Maintains high standards of food quality and consistency by ensuring all procedures are followed.
Presentation and Plating
Importance of Food Presentation in Quality Control
Visual Appeal Enhances the Overall Dining Experience: A well-presented dish looks appetizing and can enhance the perception of taste, making the dining experience more enjoyable for customers.
Consistent Presentation Reinforces Brand Image and Quality: Uniformity in plating ensures that every dish that leaves the kitchen meets the restaurant’s standards, reinforcing the brand’s image of quality and reliability.
Techniques for Consistent and Appealing Plating
Use Standard Plating Guides and Templates: Create visual guides or templates that show the exact placement of each component of a dish. This helps ensure every plate looks the same, regardless of who is preparing it.
Train Staff on Plating Techniques and Visual Appeal: Conduct regular training sessions where staff learn the principles of plating, such as balance, symmetry, and focal points. Emphasize the importance of cleanliness and attention to detail.
Training Staff on Presentation Standards and Practices
Conduct Regular Training Sessions and Demonstrations: Schedule periodic training sessions where chefs demonstrate the correct plating techniques. Use these sessions to introduce new dishes and plating styles.
Provide Feedback and Corrections During Service: Monitor plating during service and provide immediate feedback. Correct any deviations from the standards and explain the importance of adhering to the guidelines.
Examples of Plating Guidelines and Their Impact on Customer Satisfaction
A Restaurant that Standardized Plating Practices
Situation: A restaurant noticed inconsistent presentation of its dishes, leading to varied customer experiences and reviews.
Action: The restaurant implemented standard plating guides and conducted comprehensive training sessions for the kitchen staff. They also introduced regular monitoring and feedback mechanisms.
Result: The consistent presentation led to a significant increase in positive customer reviews and higher overall satisfaction. Customers appreciated the visually appealing and uniformly presented dishes, enhancing their dining experience and increasing repeat business.
Basic Ingredient Quality and Freshness
Ensuring the quality and freshness of ingredients is fundamental in culinary practice, as it directly influences the flavor, nutrition, and overall success of the dishes prepared. Here are the key aspects to consider and strategies for managing ingredient quality and freshness in a professional or home kitchen.
Importance of Ingredient Quality and Freshness
Flavor Profile: Fresh, high-quality ingredients provide superior flavor. They can enhance the taste of a dish significantly, reducing the need for excessive seasoning or flavor enhancers.
Nutritional Value: Fresher ingredients retain more nutrients. The longer produce, for example, is stored, the more vitamins and minerals it loses.
Food Safety: Fresh, properly handled ingredients are less likely to harbor harmful bacteria or pathogens that can lead to foodborne illnesses.
Customer Satisfaction: In a professional setting, using quality ingredients can elevate a customer’s dining experience, contributing to positive reviews and repeat business.
Strategies for Ensuring Ingredient Quality and Freshness
Procurement
Source Responsibly: Build relationships with reputable suppliers who provide high-quality, fresh products. Consider local farms or producers that can offer fresher options than distant suppliers.
Seasonal Purchasing: Buy seasonal produce, which is likely to be fresher, tastier, and often less expensive. It also varies the menu and introduces diners to new flavors.
Regular Inspections: Upon delivery, inspect ingredients thoroughly. Look for signs of spoilage or poor handling, and reject any items that do not meet your standards.
Storage:
Proper storage extends the life of ingredients, maintains their quality, and reduces waste.
Specific Storage Methods:
Refrigeration
Purpose: Slows bacterial growth and preserves the freshness of perishable foods.
Best For: Dairy, meat, fish, eggs, and many fruits and vegetables.
Freezing
Purpose: Halts bacterial growth and significantly extends the shelf life of foods.
Best For: Meats, fish, bread, certain fruits and vegetables, and cooked dishes.
Dry Storage
Purpose: Keeps pantry staples in a stable environment away from heat, moisture, and light.
Best For: Grains, legumes, nuts, spices, and canned goods.
Root Cellaring
Purpose: Utilizes cool, humid conditions to store root vegetables and some fruits.
Best For: Potatoes, carrots, beets, apples, and pears.
Curing and Smoking
Purpose: Preserves and flavors foods through dehydration and the application of smoke.
Best For: Meats and some cheeses.
Pickling and Fermenting
Purpose: Uses acidity and beneficial bacteria to preserve and flavor foods.
Best For: Vegetables, fruits, and dairy products.
Using Hermetic Seals
Purpose: Provides an airtight seal to protect against oxygen, pests, and moisture.
Best For: Dry goods, including grains, flour, and legumes.
Hydrating Storage
Purpose: Maintains moisture for certain vegetables to keep them crisp.
Best For: Leafy greens, celery, and carrots.
Vacuum Sealing
Definition: Vacuum sealing is a method of preserving food by placing it in an airtight bag and removing the air. This process reduces oxidation and bacterial growth, thereby extending the freshness and shelf life of the food.
Importance: Vacuum sealing preserves the nutritional value and taste of food, reduces waste, and enhances food safety.
Equipment Needed for Vacuum Sealing
Vacuum Sealers
Vacuum Packaging Machine: Used to remove air from the bag and seal it airtight. Available in various models and sizes.
Examples:
FoodSaver Vacuum Sealer: Popular model for home use.
Chamber Vacuum Sealer: Suitable for industrial kitchens and high-volume operations.
Vacuum Bags and Rolls
Vacuum Bags: Specially designed airtight bags for vacuum sealing. They come in different sizes.
Examples:
FoodSaver Bags: Durable and versatile for multiple uses.
VacMaster Bags: Thicker and more durable, ideal for commercial use.
Vacuum Sealing Techniques
Preparation
Preparing the Food: Clean, cut, and portion the food appropriately. Ensure the food is dry and clean.
Preparing the Bag: Choose a bag of the appropriate size for the food. Leave the top of the bag open for vacuum sealing.
Vacuum Sealing Process
Placing the Bag: Place the food in the bag and position the open end of the bag in the vacuum sealer.
Vacuum and Seal: Activate the machine to start the vacuum process. Once the air is removed, the machine will automatically seal the bag.
Check and Store: Ensure the bag is airtight and the food is securely sealed. Store the vacuum-sealed food under appropriate conditions.
Advantages of Vacuum Sealing
Food Safety
Reducing Bacterial Growth: Removing air prevents the growth of aerobic bacteria and molds.
Preventing Oxidation: Vacuum sealing prevents oxidation, preserving the flavor and color of the food.
Economic and Environmental Benefits
Reducing Food Waste: Extends the freshness of food, reducing waste.
Cost Savings: Allows for bulk purchasing and long-term storage, saving money.
Important Considerations for Vacuum Sealing
Proper Storage
Freezing: Vacuum-sealed foods can be stored longer in the freezer.
Refrigeration: For short-term storage, vacuum-sealed foods can be kept in the refrigerator.
Specific Considerations for Different Types of Food
Meat and Fish: Vacuum-sealed meat and fish retain freshness longer when stored in the freezer.
Vegetables and Fruits: Blanch vegetables before vacuum sealing to maintain freshness and color.
Nuts and Dried Foods: Protects against oxidation and extends shelf life.
Applications of Vacuum Sealing
Home Use
Home Storage: Preserve leftovers, fresh vegetables, meat, and fish.
Meal Prep: Prepare and freeze ready-to-eat meals in advance.
Commercial Use
Restaurants: Ensure ingredients and preparations remain fresh for extended periods.
Food Processing: Widely used in the food processing and packaging industry.
Practical Training on Vacuum Sealing
Training Sessions
Hands-On Training: Conduct regular training sessions for staff to learn and practice vacuum sealing techniques.
Feedback: Provide performance evaluations and feedback during and after training.
Demonstrations
Visual Training: Demonstrate the vacuum sealing process visually, explaining each step.
Common Issues: Address common issues that may arise during vacuum sealing and how to resolve them.
Best Practices in Culinary Operations
Implementing best practices in taste and seasoning, presentation, customer feedback, and equipment maintenance can significantly enhance the quality and success of a culinary operation. Here’s how each aspect plays a crucial role in delivering an excellent dining experience.
Taste and Seasoning
Regular Taste Tests:
Importance: Conducting regular taste tests throughout the cooking process is crucial. It ensures that the seasoning is balanced and that the flavor profiles meet the chef’s standards before the dish reaches the customer.
Implementation: Chefs and cooks should sample a dish at different stages of its preparation, adjusting seasonings such as salt, acids (like lemon juice or vinegar), and spices to achieve the desired taste.
Presentation
Establish Presentation Guidelines:
Importance: The visual presentation of a dish is often the diner’s first impression, which can greatly influence their overall satisfaction and perception of taste.
Implementation: Develop and maintain strict plating guidelines for each dish to ensure consistency and visual appeal. Train all kitchen staff on these standards, using photographs or live demonstrations as references.
Customer Feedback
Utilizing Feedback for Improvement:
Importance: Customer feedback is invaluable for understanding how dishes are received in terms of flavor, presentation, and overall experience. It provides direct insight into what works and what may need adjustment.
Implementation: Encourage feedback through comment cards, digital platforms, or direct communication. Regularly review feedback and discuss it with kitchen and service staff to make informed adjustments to dishes, menus, and service practices.
Equipment Maintenance
Ensuring Reliability and Safety:
Importance: Well-maintained kitchen equipment is essential for consistent cooking results, efficiency, and safety. Malfunctioning equipment can lead to unevenly cooked dishes, longer preparation times, and potential hazards.
Implementation: Schedule regular maintenance checks and promptly repair any faulty equipment. Keep logs of maintenance activities and train staff on the proper operation and daily care of equipment.
Safe Food Processing Techniques
Safe food processing refers to the methods used in food handling, preparation, and storage to minimize the risk of contamination and ensure food safety. These techniques focus on time, temperature, and sanitation controls throughout the food production process.
Time and Temperature Control: Proper cooking, cooling, and reheating are essential to keep food out of the temperature “danger zone” (between 41°F and 135°F), where bacteria multiply quickly. For example, food should be reheated to 165°F (74°C) before serving to ensure it is safe to eat.
Cross-Contamination Prevention: Keeping raw and ready-to-eat foods separate is essential to avoid the transfer of harmful bacteria. Use color-coded cutting boards and utensils for different types of food, such as red for raw meat and green for vegetables.
Sanitation and Hygiene: Kitchen staff must follow strict personal hygiene practices, including frequent handwashing, wearing clean uniforms, and using gloves when necessary. All equipment and surfaces should be thoroughly cleaned and sanitized to prevent contamination.
Practical Application of Safe Food Processing
Time and Temperature Control: Proper cooking, cooling, and reheating are essential to keep food out of the temperature “danger zone” (between 41°F and 135°F), where bacteria multiply quickly. For example, food should be reheated to 165°F (74°C) before serving to ensure it is safe to eat.
Cross-Contamination Prevention: Keeping raw and ready-to-eat foods separate is essential to avoid the transfer of harmful bacteria. Use color-coded cutting boards and utensils for different types of food, such as red for raw meat and green for vegetables. In food safety, color-coded cutting boards help prevent cross-contamination by designating specific colors for different food types. The commonly used color codes are:
Red: Raw meat
Yellow: Raw poultry
Blue: Raw seafood
Green: Vegetables and fruits
Brown: Cooked meats
White: Dairy products or bakery items
Sanitation and Hygiene: Kitchen staff must follow strict personal hygiene practices, including frequent handwashing, wearing clean uniforms, and using gloves when necessary. All equipment and surfaces should be thoroughly cleaned and sanitized to prevent contamination.
Frequent Hand Washing
Clean Uniforms
Glove Usage
Surface and Equipment Sanitation
Evaluating Safe Food Processing
To ensure safe food processing techniques are being followed, kitchens should:
Conduct Regular Inspections: Frequently review storage areas, food preparation stations, and sanitation practices to ensure that safety standards are met.
Review Temperature Logs: Regularly check temperature logs for storage, cooking, and cooling to ensure proper adherence to guidelines.
Provide Ongoing Training: Reinforce safe food processing techniques through continuous training and regular updates to staff on the latest food safety protocols.
Practical examples of HACCP and safe food processing techniques:
Receiving and Storage: When receiving raw meat, ensure that it is delivered at or below 4°C (40°F). Check for proper packaging and inspect for signs of spoilage. Store raw meat on lower shelves to prevent dripping onto ready-to-eat foods.
Cooking: For ground beef, use a food thermometer to ensure it reaches an internal temperature of 160°F (71°C) to kill harmful bacteria like E. coli.
Cross-Contamination Prevention: Use separate, color-coded cutting boards—red for raw meat and green for vegetables—to prevent the transfer of harmful bacteria.
Cooling: After cooking large quantities of soup, divide it into shallow containers to cool rapidly. Ensure the temperature falls from 135°F to 70°F within two hours, and to 41°F within four more hours.
Sanitation: Staff should wash hands for at least 20 seconds after handling raw ingredients. Regularly clean all surfaces and tools to avoid contamination.
Monitoring: Implement daily temperature checks for refrigeration units and cooking processes, and document the results to ensure compliance with food safety protocols.
Mastering knife skills is a fundamental aspect of cooking that can significantly enhance your speed and efficiency in the kitchen. At an intermediate level, understanding and practicing more advanced techniques and cuts can improve your preparation times and the quality of your dishes. Here’s a breakdown of how to elevate your knife skills focusing on speed, efficiency, and fundamental cuts.
Speed and Efficiency
Improving your speed and efficiency with a knife involves more than just cutting faster. It requires technique, proper knife handling, and safety to ensure precision and consistency. Here are key points to focus on:
Body Posture and Placement: Stand straight and align your body parallel to the cutting board. Keep the food item close to your body to minimize arm strain and enhance control.
Consistent Cutting Motion: Use a rocking motion where the tip of the knife mostly remains in contact with the cutting board. This technique allows for quicker and more fluid movements.
Mise en Place: Organize your workspace. Having all ingredients ready and appropriately positioned can significantly reduce preparation time.
Sharpen Your Knife Regularly: A sharp knife requires less force to cut, reduces the risk of slipping, and speeds up your cutting significantly.
Speed Drills: Time yourself on simple tasks, like dicing an onion or julienning carrots, and work on improving your time while maintaining cut quality.
Repetition and Routine: Consistent practice is key. Integrate a variety of cutting tasks into your regular cooking routine to build muscle memory and improve hand-eye coordination.
Safety First: Always keep your knives sharp, your cutting board stable (using a damp cloth underneath it), and your focus sharp. Keep your fingers tucked safely using the claw grip to avoid cuts.
By advancing your knife skills to include these techniques and cuts, you’ll not only work faster but also enhance the overall quality of your food, making your cooking more enjoyable and professional.
Fundamental Knife Cuts
Slicing, Dicing, Chopping
Slicing
Description: Producing thin, even slices of food.
Uses: Vegetables, fruits, meats, and cheeses.
Technique: Hold the knife at a slight angle, use a smooth, consistent motion to create uniform slices.
Dicing
Description: Cutting food into uniform cubes of specific sizes.
Types:
Fine Dice: Approximately 1/8 inch cubes.
Medium Dice: Approximately 1/4 inch cubes.
Large Dice: Approximately 3/4 inch cubes.
Uses: Ensures even cooking, important for soups, stews, and salads.
Technique: Cut the food into even slices, then strips, and finally cubes.
Chopping
Description: Less precise than dicing, involves cutting foods into pieces that are roughly the same size.
Uses: Quick and efficient for many recipes, ideal for vegetables and herbs.
Technique: Use a rocking motion with the knife, keeping the tip on the cutting board and lifting the handle up and down.
Julienne
Description: A precise cut resulting in matchstick-sized strips, typically 2-3 inches long and 1/8 inch thick.
Uses: Stir-fry dishes, salads, garnishes.
Technique:
Trim the vegetable into a rectangular shape.
Slice into even, thin slabs.
Stack slabs and cut into matchstick-sized strips.
Chiffonade
Description: A technique used for leafy vegetables and herbs, creating thin ribbons.
Uses: Ideal for basil, spinach, and other herbs used as flavor enhancements or garnishes.
Technique:
Stack the leaves.
Roll them tightly.
Slice into thin ribbons.
Dicing
Description: Involves cutting food into uniform cubes.
Uses: Ensures even cooking and aesthetics in dishes where ingredients are prominently visible.
Technique: Similar to basic dicing but emphasizes consistency in cube size.
Mincing
Description: A fine chopping technique.
Uses: Especially for garlic, herbs, and onions to maximize flavor dispersion in dishes.
Technique: Finely chop the ingredient, then use a rocking motion to further reduce the size.
Mirepoix
Description: A rough chop cut used for creating a flavor base from diced vegetables (usually onions, carrots, and celery).
Uses: Soups, stews, and sauces.
Technique: Cut the vegetables into rough, even-sized pieces, typically around 1/2 to 3/4 inch.
Using a Mandoline
Description: Not a knife cut per se, but a mandoline is used to produce very thin, consistent slices or julienne strips quickly.
Uses: Making chips, slices for gratins, or vegetable noodles.
Technique: Adjust the mandoline to the desired thickness, then slide the food back and forth across the blade.
Supreme
Description: Used for citrus fruits to remove the peel and pith, and segment the fruit.
Uses: Salads, desserts, elegant presentations.
Technique:
Cut off the top and bottom of the fruit.
Slice off the peel and pith, following the fruit’s contour.
Cut between the membranes to release clean segments.
Tourne
Description: Produces a football-shaped cut with seven equal sides, used primarily for aesthetic purposes.
Uses: Fine dining, especially for potatoes and carrots.
Technique: Use a paring knife to trim the vegetable into a barrel shape, then carve seven equal sides.
Paysanne
Description: Thin, flat square or rectangle slices of vegetables.
Uses: Quick cooking, visual appeal in broths or rustic dishes.
Technique: Cut the vegetable into thin slices, then into uniform squares or rectangles.
Deboning
Description: Involves removing bones from meat or poultry with minimal waste.
Uses: Preparing boneless meat dishes, making fillets, stuffing.
Technique:
Use a sharp, flexible knife.
Cut along the bone, staying close to minimize waste.
Remove the bone cleanly without damaging the meat.
Tips for Effective Knife Skills
Sharp Knives: Always use sharp knives. A sharp knife is safer and more effective as it requires less force to cut through ingredients.
Proper Technique: Use the ‘claw grip’ to hold the food securely and tuck your fingers away safely. The ‘pinch grip’ should be used to hold the knife, with your thumb and forefinger gripping the base of the blade for control.
Stable Cutting Board: Use a non-slip mat or a damp towel under your cutting board to prevent it from sliding.
Practice Regularly: Like any skill, proficiency with knife cuts comes with regular practice. Start with basic cuts and gradually progress to more advanced techniques.
By mastering these fundamental knife cuts and techniques, you’ll enhance not only the quality and presentation of your dishes but also your efficiency and safety in the kitchen.
Honing and Sharpening Skills
Maintaining the sharpness of your kitchen knives is crucial for efficient and safe cooking. Honing and sharpening are two distinct processes that play vital roles in knife maintenance. Understanding their purposes, how often they should be done, and the correct methods to perform each can significantly enhance your culinary experience.
Honing
Alignment: Honing a knife doesn’t actually sharpen it; rather, it realigns the edge of the blade. Regular use can cause the delicate edge of a knife to bend and dull, and honing straightens this edge to restore its sharpness.
Regular Maintenance: It’s good practice to hone your knife each time you use it, or at least before every major cooking session. This helps maintain the blade’s edge between more intensive sharpening sessions.
Using a Honing Steel:
Grip: Hold the honing steel vertically with the tip resting on a non-slip surface like a cutting board. Grip the handle of the steel firmly with one hand.
Angle: Place the base of the knife’s blade against the top of the steel at an approximate angle of 15-20 degrees.
Motion: Gently pull the knife down the steel, drawing it towards you while sliding it down so the entire length of the blade passes along the steel. Repeat this motion 5-10 times on each side of the blade.
Sharpening
Grinding and Shaping: Unlike honing, sharpening removes material from the blade, creating a new edge. This is necessary when the blade becomes too dull to be restored by honing alone.
As Needed Basis: The frequency of sharpening depends on how much you use your knives and what you’re cutting. Typically, sharpening might be necessary every few months for heavily used knives or once or twice a year for those used less frequently.
Using a Whetstone:
Soak: Submerge the whetstone in water for about 5-10 minutes to lubricate it, which helps protect the blade during sharpening.
Angle: Place the knife against the coarse side of the stone at an angle of 15-20 degrees.
Motion: Using gentle pressure, slide the blade forward and across the stone, covering the entire length of the blade. Repeat this process 10-15 times per side, then switch to the finer grit side of the stone and repeat to polish the edge.
Testing: Test the sharpness of your knife by cutting into a piece of paper or a tomato. If the blade slices through smoothly, it is sharp.
Advanced Knife Skills in Professional Settings
Role of Advanced Knife Skills in Various Culinary Roles (e.g., Garde Manger, Saucier)
Essential for High-Level Culinary Positions: Advanced knife skills are necessary for chefs to perform sophisticated and complex tasks efficiently. They are fundamental in roles that require precision and aesthetic presentation.
Critical for Specialized Tasks and Presentations: These skills are particularly important for tasks that demand detailed cuts and presentations. For example, a Garde Manger needs advanced knife skills for garnishes and cold dish preparations, while a Saucier relies on precise cuts for sauces and main courses.
Expectations and Standards in Professional Kitchens for Knife Proficiency
Consistent Quality and Precision: In professional kitchens, food must consistently meet high standards. Advanced knife skills ensure that chefs produce uniform and precise cuts every time.
Speed and Efficiency: Kitchen operations need to be fast and efficient. Advanced knife skills enable chefs to make quick and accurate cuts, saving time and increasing overall kitchen productivity.
How Advanced Knife Skills Contribute to Career Advancement in the Culinary Industry
Demonstrates Professionalism and Expertise: Having advanced knife skills showcases a chef’s professionalism and competence. It proves that the chef can maintain high standards and pay attention to detail in their work.
Opens Opportunities for Higher Positions and Specialized Roles: These skills pave the way for promotions and specialized roles within the kitchen. For example, a chef with advanced knife skills is more likely to be promoted to positions like Sous Chef or Executive Chef.
Additional Resources
Recommended Readings and Videos for Further Learning
“The Professional Chef” by The Culinary Institute of America
This comprehensive textbook covers a wide range of culinary topics, including detailed sections on knife skills. It’s a valuable resource for both novice and experienced chefs.
Knife Skills Tutorials on YouTube
There are many excellent video tutorials available that demonstrate proper knife techniques. Some recommended channels include:
ChefSteps: Provides clear, step-by-step guides on various knife cuts.
America’s Test Kitchen: Offers practical advice and demonstrations on knife skills and maintenance.
List of Reputable Knife Brands and Sharpening Tools
Knife Brands
Wüsthof: Known for their durability and precision, Wüsthof knives are a favorite among professional chefs.
Shun: These Japanese knives are renowned for their sharpness and craftsmanship.
Global: Lightweight and well-balanced, Global knives are popular for their unique design and performance.
Victorinox: Offers high-quality, affordable knives that are perfect for both professionals and home cooks.
Sharpening Tools
King Whetstones: These high-quality whetstones are perfect for maintaining the sharpness of your knives through traditional honing techniques.
Chef’sChoice Electric Sharpeners: For those who prefer a quicker method, these electric sharpeners provide excellent results and are easy to use.
Tips for Continued Practice and Skill Development
Regularly Practice and Challenge Yourself with New Techniques
Consistent practice is key to mastering knife skills. Set aside time each week to practice different cuts and techniques.
Challenge yourself by trying new and advanced cuts that you haven’t mastered yet. This will help you build confidence and improve your precision.
Attend Workshops and Culinary Courses
Enrolling in workshops and culinary courses can provide hands-on experience and professional guidance. Look for local cooking schools or culinary institutions that offer classes on knife skills.
Participate in advanced courses that focus on specific techniques or cuisines to broaden your skill set and knowledge.
Known for its crisp texture and mild flavor, Iceberg is popular in salads and sandwiches. It forms a tight, round head and has a high water content, which makes it very refreshing.
Romaine Lettuce:
Characterized by long, sturdy leaves, Romaine is crunchy and slightly bitter. It’s the classic choice for Caesar salads and is high in vitamins A and K.
Butterhead Lettuce (Includes Boston and Bibb):
Features large, soft leaves that are tender and sweet. The heads are loose and round with a buttery texture, ideal for delicate salads.
Red Leaf and Green Leaf Lettuce:
These varieties offer more texture and a burst of color in salads. They have a mild flavor and are more perishable than heartier types like Romaine.
Other Salad Greens
Spinach:
Rich in iron and vitamins, spinach has a slightly sweet flavor when young and gets more assertive as it ages. It’s versatile, great both raw and cooked.
Arugula:
Also known as rocket, arugula is peppery and slightly tangy, adding a kick to salads and sandwiches.
Kale:
Robust and earthy, kale can be a bit tough raw but softens nicely when massaged with dressing. It’s packed with nutrients and works well in mixed salads.
Mixed Greens:
Often a blend of several young salad leaves like mesclun, offering a range of flavors and textures in a single mix.
Watercress:
A peppery, aquatic plant that adds a spicy note to salads and is also lovely in soups and as a garnish.
Endive:
Slightly bitter and crunchy, it adds texture to salads and can also be used as an edible serving dish for small appetizers.
Radicchio:
With its deep red color and bitter flavor, radicchio adds a bold touch to any salad.
Mesclun:
A salad mix of young, tender greens that originated in Provence, France. The mix includes a variety of species, each contributing its unique flavor and texture.
Preparing Salad and Dressing
Creating a fresh, flavorful salad involves more than just tossing together some greens and toppings. The art of salad making includes choosing the right ingredients, preparing them properly, and pairing them with a dressing that complements their flavors. Here’s a comprehensive guide to preparing both salads and dressings:
Preparing Salad
Choose Your Greens: Start with a base of fresh greens such as romaine, spinach, arugula, or mixed greens. Consider the flavor profiles of each—mild, peppery, or bitter—and how they’ll pair with other ingredients.
Incorporate Variety: Add a variety of other vegetables for texture and color, such as sliced cucumbers, cherry tomatoes, bell peppers, and shredded carrots. Include elements that offer crunch, like nuts or seeds, and sweetness, such as fresh fruits or dried fruits.
Add Protein: To make your salad more filling, include a protein source like grilled chicken, tofu, boiled eggs, or canned beans. Cheese such as feta, goat, or shaved Parmesan can also add flavor and richness.
Prepare Ingredients Properly: Wash all vegetables and greens thoroughly under cold water to remove any dirt or chemicals. Dry them well, ideally using a salad spinner, to ensure that the dressing adheres properly and doesn’t become diluted.
Assemble Thoughtfully: Layer your ingredients starting with the greens, followed by other vegetables and fruits, then proteins, and finally any nuts, seeds, or delicate herbs. This ensures everything maintains its integrity until you’re ready to toss the salad.
Preparing Dressing
Choose Your Style: Decide whether you want a vinaigrette or a creamy dressing. Vinaigrettes are made with a mixture of oil and vinegar or citrus juice, while creamy dressings often start with mayonnaise, yogurt, or sour cream.
Basic Vinaigrette Formula: A classic vinaigrette consists of 3 parts oil to 1 part vinegar. Whisk together ingredients like olive oil and balsamic or red wine vinegar. Add salt, pepper, and optional additions like minced garlic, mustard, or honey to balance the acidity and enhance the flavor.
Creamy Dressings: For a creamy dressing, start with a base of mayonnaise or yogurt, and mix in ingredients such as lemon juice, herbs, and seasonings. Adjust the thickness by adding a little water or milk if necessary.
Season to Taste: Always taste your dressing and adjust the seasoning as needed. The dressing should have a good balance of fat, acid, and seasoning to complement the salad without overpowering it.
Emulsify: To ensure that the oil and vinegar mix well and don’t separate quickly, use a whisk or a blender to create an emulsion. This makes the dressing creamy and consistent.
Dress the Salad Before Serving: To keep the salad fresh, add the dressing just before serving. This prevents the greens from wilting and keeps the salad crisp and vibrant.
Additional Tips
Experiment with Ingredients: Don’t be afraid to try different combinations of oils and vinegars in vinaigrettes, or add unusual ingredients like tahini or miso to creamy dressings for depth.
Use Fresh Herbs: Chopped fresh herbs like parsley, basil, or chives can transform a simple dressing into something special.
Balance Your Flavors: Remember that a salad dressing should have a good balance of fat (from the oil or cream base), acid (from vinegar or citrus), and seasonings to complement the salad ingredients.
By following these guidelines, you can prepare salads and dressings that are not only healthy and nutritious but also packed with flavor and visually appealing, making them a joy to serve and eat.
About Micro-Greens
Micro-greens are young vegetable greens that are approximately 1–3 inches tall. They have an intense aromatic flavor and concentrated nutrient content and come in a variety of flavors.
These micro-greens vary in taste from peppery to sweet, adding not only flavor but also visual appeal to dishes. They can be used as garnishes, in salads, on sandwiches, and even blended into smoothies for a nutritional boost.
Micro-greens are typically harvested just after the first true leaves have developed. They are packed with flavor, making them a popular choice for chefs and home cooks looking to enhance the taste and nutrition of their dishes.
About Edible Flowers
Edible flowers bring a unique blend of vibrant colors, intriguing flavors, and delightful aromas to culinary dishes. From salads and desserts to cocktails and main courses, these flowers not only enhance the presentation but also enrich the taste experience. Here’s a closer look at some popular edible flowers and their culinary uses:
Nasturtium
Flavor and Use: Nasturtiums have a peppery flavor similar to watercress, which makes them perfect for adding a spicy note to salads. The entire plant is edible, including the leaves and flowers.
Calendula
Flavor and Use: Often referred to as “poor man’s saffron,” calendula has a slightly bitter and spicy taste. Its vibrant yellow and orange petals are used to color and garnish soups, pastas, and rice dishes.
Lavender
Flavor and Use: With its sweet, floral aroma and hints of lemon and citrus, lavender is used in desserts like cakes and ice creams, as well as savory dishes such as stews and marinades.
Rose
Flavor and Use: Rose petals have a highly aromatic flavor with a subtle sweetness. They’re commonly used in Middle Eastern cuisine, in desserts like baklava, and beverages like rosewater.
Violet
Flavor and Use: Violets have a sweet floral flavor and are beautiful as decorations on desserts or frozen in ice cubes for cocktails. They are also popular in syrups and jellies.
Borage
Flavor and Use: Borage flowers have a mild cucumber taste and are typically used in salads, garnishes, or to decorate desserts. The leaves can also be used as an herb.
Pansy
Flavor and Use: Pansies have a mild and slightly grassy flavor, making them ideal for both decorative and culinary uses in salads and as garnishes on cakes and pastries.
Hibiscus
Flavor and Use: Known for its vibrant color and cranberry-like flavor, hibiscus is commonly used in teas, cocktails, and jams. It’s also popular in various ethnic cuisines for flavoring and enhancing dishes.
Marigold
Flavor and Use: With a citrusy, spicy taste, marigold (particularly Tagetes varieties) is great for adding color and a hint of tang to salads, seafood dishes, and breads.
Chive Blossoms
Flavor and Use: These have a mild onion flavor and are often disassembled into their individual florets to sprinkle over salads, soups, and creamy dishes for a hint of sharpness and a pop of purple color.
Creating a good stock is a fundamental culinary skill that serves as the base for many dishes, including soups, sauces, and stews. Understanding how to prepare basic vegetable and meat stocks will help you build a strong foundation for flavor in your cooking. Here are the essentials for making both types of stock and some tips to enhance your stock-making skills.
Vegetable Stock
Ingredients:
2 onions, chopped
2 carrots, chopped
2 celery stalks, chopped
1 leek, cleaned and chopped (optional)
3 cloves of garlic, smashed
1 bay leaf
A few sprigs of fresh thyme or 1 tsp dried thyme
A handful of parsley stems
1 small bunch of fresh herbs (like dill or basil), optional
Salt and pepper to taste
8-10 cups of water
Method:
Prepare Ingredients: Wash and roughly chop all vegetables. There’s no need to peel them if they are clean, as the peels add flavor and color.
Sauté Vegetables: In a large pot, heat a small amount of oil or butter. Add onions, carrots, celery, and leek. Sauté for a few minutes until they begin to soften but not brown, as browning may make the stock bitter.
Add Water and Simmer: Add water to cover the vegetables. Bring to a boil, then reduce heat to a gentle simmer. Add garlic, herbs, bay leaf, and any other seasonings.
Simmer: Allow the stock to simmer gently for 1-3 hours, uncovered or partially covered. The longer it simmers, the more flavorful it will be.
Strain and Store: Strain the stock through a fine sieve or cheesecloth to remove all solids. Season with salt and pepper to taste. Let it cool before storing in the refrigerator or freezer.
Brown Stock
Ingredients:
2 lbs of beef or chicken bones (or a mix)
1 onion, chopped
1 carrot, chopped
1 celery stalk, chopped
1 bay leaf
Sprigs of thyme
Parsley stems
10 cups of water
Method:
Roast Bones: For a deeper flavor, roast the bones at 400°F for about 30-40 minutes until they are well browned.
Add to Pot: Place the roasted bones in a large stockpot. Add cold water to cover the bones. Slowly bring to a boil.
Skim Foam: As the stock begins to boil, skim off any foam that rises to the surface. This foam consists of impurities and excess fat.
Add Vegetables and Simmer: Add the chopped vegetables and herbs to the pot. Reduce heat to a low simmer. Simmer uncovered for 3-6 hours for chicken and 6-12 hours for beef.
Strain and Store: Strain the stock through a fine mesh strainer. Cool the stock and store it in the refrigerator or freeze it for longer storage.
White Stock
Ingredients:
4 lbs chicken bones (or veal/beef bones)
4 quarts cold water
1 large onion, peeled and quartered
2 carrots, peeled and cut into large chunks
2 celery stalks, cut into large chunks
1 bouquet garni (parsley stems, thyme, bay leaf tied together)
Method:
Simmering: Place bones in a large pot and cover with cold water. Bring to a boil, then reduce to a simmer.
Skimming: Skim off any impurities that rise to the surface.
Adding Vegetables: Add the onion, carrots, celery, and bouquet garni.
Cooking: Simmer gently for 4-6 hours, skimming occasionally.
Straining: Strain the stock through a fine-mesh sieve.
Cooling: Cool quickly by placing the pot in an ice bath.
Storage: Store in the refrigerator for up to 3 days or freeze for up to 3 months.
Fish Stock
Ingredients:
4 lbs fish bones and heads (preferably from non-oily fish like cod or halibut)
4 quarts cold water
1 large onion, peeled and chopped
2 celery stalks, chopped
1 leek, cleaned and chopped
1 bouquet garni (parsley stems, thyme, bay leaf tied together)
Method:
Simmering: Place fish bones and heads, onion, celery, leek, and bouquet garni in a large pot. Cover with cold water and bring to a boil.
Skimming: Skim off any impurities that rise to the surface.
Cooking: Reduce to a simmer and cook for 20-30 minutes.
Straining: Strain the stock through a fine-mesh sieve.
Cooling: Cool quickly by placing the pot in an ice bath.
Storage: Store in the refrigerator for up to 3 days or freeze for up to 3 months.
Tips for Making Stock
Making stock is a culinary fundamental that can elevate your cooking to a new level of flavor. Here are detailed tips focusing on the importance of roasting bones and vegetables, as well as advice on the appropriate simmering times to optimize the quality of your homemade stock.
Roasting Bones and Vegetables for Making Stock
Purpose of Roasting
Enhanced Flavor: Roasting bones and vegetables caramelizes their natural sugars, which intensifies the flavors and adds depth to the stock.
Rich Color: Roasting leads to browning, which contributes to a richer, more appealing color in the finished stock.
Reduced Cloudiness: The roasting process helps to solidify proteins on the surface of the bones, which can result in a clearer stock after simmering and straining.
How to Roast
Preparation: Preheat your oven to 400°F (200°C). Arrange bones (chicken, beef, or veal) on a roasting pan in a single layer. For vegetable stocks, include onions, carrots, and celery, which can be cut into large chunks to prevent them from burning.
Roasting Time: Roast the bones and vegetables until they are well-browned, typically about 30-40 minutes. Turning them halfway through can help ensure even browning.
Deglazing: After roasting, place the roasting pan over a stove burner on low heat. Add a small amount of water or wine to lift the browned bits (fond) from the bottom of the pan. This liquid, full of flavor, should then be added to the stockpot.
Simmering Time for Making Stock
Importance of Proper Simmering
Flavor Extraction: The longer the bones and ingredients simmer, the more flavors and gelatin are extracted, leading to a richer stock.
Consistency: Proper simmering time ensures that the stock achieves a desirable mouthfeel, often enriched by the natural gelatin found in bones.
Recommended Simmering Times
Chicken Stock: Simmer for 3 to 4 hours. Chicken bones are smaller and release their flavors and gelatin faster than beef bones.
Beef or Veal Stock: Simmer for 6 to 8 hours, or even longer. Beef bones are denser and require more time to fully extract their flavors.
Fish Stock: Simmer for only 1 to 1.5 hours. Fish bones and flesh are delicate and can develop off-flavors if overcooked.
Vegetable Stock: Simmer for 1 to 2 hours. Vegetables can become bitter if simmered too long.
Simmering Tips
Low and Slow: Keep the heat low enough so that the liquid barely bubbles. Vigorous boiling can break down particles that cloud the stock.
Skimming: Regularly skim off any foam or impurities that rise to the surface. This foam contains impurities and excess fat that can cloud the stock and affect its flavor.
No Stirring: Avoid stirring the stock as it simmers. Stirring can disrupt the formation of a clear stock by mixing up sediments.
Storing Stock and Basic Sauce Making Techniques
Proper storage of stock and mastering basic sauce-making techniques are crucial skills in the kitchen. These practices ensure that your bases for dishes maintain their quality and that your sauces are rich in flavor and perfect in texture.
Storing Stock
Properly storing stock is essential for preserving its flavor and freshness, minimizing waste, and maintaining food safety.
Cooling and Storing:
Cool Quickly: To minimize bacterial growth, cool stock as quickly as possible. Place the pot in a sink filled with ice water and stir to lower the temperature.
Refrigerate: Once cooled, transfer the stock to containers. It’s practical to use varying sizes depending on how you plan to use the stock later (e.g., some in ice cube trays for small needs and some in larger containers).
Freezing: Stock can be frozen for up to 6 months. Make sure containers are airtight to prevent freezer burn. Label and date the containers to keep track of storage time.
Basic Sauce Making Techniques
Understanding foundational sauce-making techniques allows you to create a variety of delicious, complex sauces based on simple principles.
Roux Preparation
What It Is: A roux is a mixture of fat (usually butter) and flour that thickens and forms the base of many sauces.
Method:
Melt the butter over medium heat. Add an equal amount of flour.
Stir continuously with a wooden spoon or whisk until the mixture forms a smooth paste which cooks for about 2 minutes to remove the raw flour taste.
The color of the roux can range from blonde to brown, depending on how long it is cooked.
Preparing Stocks for Sauce Bases
Integration: Stock is often used as a base for sauces. Use freshly made stock, free of grease and impurities, to ensure the sauce has the best flavor and clarity.
Reduction: Simmering the stock to reduce its volume can concentrate the flavors, making it a more powerful base for your sauce.
Emulsification of Sauces
What It Is: Emulsification involves combining two ingredients that normally don’t mix, like oil and vinegar or oil and water.
Method:
Gradually add one ingredient (like oil) to another (like vinegar) while continuously whisking.
Adding an emulsifier like egg yolks or mustard can help stabilize the emulsion. For example, slowly adding oil to egg yolk while whisking creates a stable emulsion for mayonnaise.
Seasoning and Reduction of Sauces
Concentration: Reduce sauces over low heat to thicken and concentrate their flavors. Watch closely to prevent over-reduction, which can lead to overly thick or salty sauces.
Seasoning: Season the sauce at the end of cooking to adjust the flavor. Fresh herbs, spices, or acid (like lemon juice or vinegar) can be added to balance and enhance the sauce.
About The Five Mother Sauces
The five mother sauces are fundamental to classic French cuisine and serve as base recipes that can be transformed into a variety of complex sauces. Each mother sauce has a unique preparation method and base ingredients. Understanding how to make each of these sauces will greatly enhance your culinary skills.
Bechamel (White) Sauce
Ingredients:
2 tablespoons butter
2 tablespoons flour
1 cup milk
Salt and white pepper
Nutmeg (optional)
Method:
Make the Roux: Melt the butter in a saucepan over medium heat. Add the flour and stir continuously for about 2 minutes, without letting it brown, to cook out the raw flour taste.
Add Milk: Gradually add the milk, whisking constantly to prevent lumps. Continue to cook and stir until the sauce thickens and comes to a gentle boil.
Season: Season with salt, white pepper, and a pinch of nutmeg for additional flavor if desired. Simmer for a few more minutes, then remove from heat.
Béchamel (White Sauce) Derivatives
These variations on béchamel add unique flavors and textures, enhancing a wide range of dishes in classic and modern cuisine.
1. Mornay Sauce
Mornay sauce is a classic cheese sauce made by adding Gruyère and Parmesan to béchamel, ideal for gratins and pasta dishes.
Ingredients:
2 cups béchamel sauce
1/2 cup grated Gruyère cheese
1/4 cup grated Parmesan cheese
Pinch of nutmeg (optional)
Salt and white pepper to taste
Method:
Heat Béchamel: In a saucepan, warm the béchamel over medium heat.
Add Cheeses: Stir in Gruyère and Parmesan, whisking until melted and smooth.
Season and Serve: Add a pinch of nutmeg, salt, and white pepper to taste.
2. Soubise Sauce
Soubise sauce is a mild, onion-flavored béchamel, perfect for pairing with meats and poultry.
Ingredients:
2 cups béchamel sauce
2 medium onions, thinly sliced
2 tablespoons butter
Salt and white pepper to taste
Method:
Sauté Onions: In a saucepan, melt butter and add sliced onions. Cook over low heat until the onions are soft and golden, about 15–20 minutes.
Purée and Combine: Purée the cooked onions until smooth, then stir into the béchamel.
Season: Add salt and white pepper to taste.
3. Crème Sauce
Crème sauce is a richer, creamier version of béchamel, made by adding heavy cream. It’s versatile and perfect for pasta, fish, and vegetable dishes.
Ingredients:
2 cups béchamel sauce
1/2 cup heavy cream
Salt and white pepper to taste
Method:
Combine with Cream: In a saucepan, warm the béchamel, then stir in the heavy cream.
Simmer Gently: Bring the sauce to a simmer, stirring until it thickens slightly, about 2–3 minutes.
Season and Serve: Add salt and white pepper to taste.
4. Cheddar Cheese Sauce
Cheddar cheese sauce is a flavorful, sharp version of béchamel, perfect for macaroni and cheese, nachos, or as a vegetable dip.
Ingredients:
2 cups béchamel sauce
1 cup sharp cheddar cheese, shredded
1/4 tsp mustard powder (optional, for depth)
Salt and white pepper to taste
Method:
Warm the Béchamel: Heat the béchamel in a saucepan over medium-low heat.
Add Cheddar and Mustard Powder: Gradually stir in the shredded cheddar, whisking until melted and smooth. Add mustard powder if desired.
Season and Serve: Add salt and white pepper to taste
5. Nantua Sauce
Nantua sauce is a luxurious seafood-based sauce, created by enriching béchamel with cream and shellfish butter, typically lobster or shrimp. It pairs wonderfully with fish and shellfish dishes.
Ingredients:
2 cups béchamel sauce
1/2 cup heavy cream
1/4 cup lobster or shrimp butter (made by blending lobster or shrimp purée with butter)
Salt and white pepper to taste
Method:
Prepare the Béchamel: Warm the béchamel sauce over medium heat.
Add Cream and Shellfish Butter: Stir in heavy cream and lobster or shrimp butter until fully incorporated.
Season and Serve: Add salt and white pepper to taste.
Veloute Sauce
Ingredients:
2 tablespoons butter
2 tablespoons flour
1 cup clear stock (chicken, fish, or vegetable)
Method:
Make the Roux: Melt the butter in a saucepan. Add the flour and stir for about 2 minutes on medium heat, ensuring the mixture does not brown.
Add Stock: Gradually whisk in the stock until the mixture is smooth.
Simmer: Bring to a simmer and continue to stir as the sauce thickens. Cook for about 20-30 minutes on low heat, stirring frequently.
Velouté Sauce Derivatives
These velouté derivatives provide a base for flavorful, elegant sauces ideal for enhancing poultry, veal, and seafood dishes.
1. Suprême Sauce
Suprême sauce is a creamy, mild sauce made by enriching chicken velouté with cream and butter, giving it a smooth texture. It’s ideal for pairing with chicken or other poultry.
Ingredients:
2 cups chicken velouté
1/2 cup heavy cream
1 tbsp butter
Salt and white pepper to taste
Method:
Heat Velouté: In a saucepan, warm the chicken velouté over medium heat.
Add Cream: Slowly stir in the cream, mixing until the sauce is well-blended and slightly thickened.
Finish with Butter: Add butter, stirring until it melts and the sauce is silky.
Season and Serve: Season with salt and white pepper to taste.
2. Allemande Sauce
Allemande sauce is a refined, creamy sauce made by enriching veal velouté with egg yolks and cream, adding a slight tang from lemon juice. It pairs beautifully with veal and vegetables.
Ingredients:
2 cups veal velouté
2 egg yolks
1/2 cup heavy cream
1 tsp lemon juice
Salt and white pepper to taste
Method:
Temper the Egg Yolks: In a bowl, whisk the egg yolks and cream together.
Combine with Velouté: Slowly whisk some warm velouté into the yolk mixture, then add the tempered yolks back into the saucepan with the velouté.
Simmer Gently: Heat on low, stirring constantly until the sauce thickens slightly (do not boil).
Finish with Lemon Juice: Stir in the lemon juice, then season with salt and white pepper to taste.
3. Bercy Sauce
Bercy sauce is a flavorful, wine-based sauce often paired with fish. It combines fish velouté, white wine, and shallots for a bright, savory taste.
Ingredients:
2 cups fish velouté
1/4 cup dry white wine
1 tbsp minced shallots
1 tbsp butter
1 tbsp chopped parsley
Salt and white pepper to taste
Method:
Sauté Shallots: In a saucepan, melt butter and add shallots, cooking until soft.
Add Wine: Pour in the white wine and reduce by half.
Combine with Velouté: Stir in fish velouté and simmer until thickened.
Finish and Serve: Add parsley, then season with salt and white pepper.
4. Normande Sauce
Normande sauce is a creamy, mushroom-flavored sauce, often served with seafood dishes like poached fish or shellfish.
Ingredients:
2 cups fish velouté
1/2 cup heavy cream
1/4 cup mushroom purée (made by blending sautéed mushrooms)
1 tsp lemon juice
1 tbsp butter
Salt and white pepper to taste
Method:
Prepare the Velouté: Warm the fish velouté over medium heat.
Add Mushroom Purée and Cream: Stir in mushroom purée and heavy cream, mixing until well-blended.
Simmer and Season: Simmer gently for 5–10 minutes. Add lemon juice and butter, stirring to incorporate.
Season to Taste: Add salt and white pepper as needed.
5. Vin Blanc Sauce
Vin Blanc, or “white wine sauce,” is a light, creamy sauce often served with poached fish or seafood. It’s made by combining fish velouté with white wine and cream for a delicate, flavorful finish.
Ingredients:
2 cups fish velouté
1/4 cup dry white wine
1/2 cup heavy cream
1 tbsp butter
Salt and white pepper to taste
Method:
Reduce the Wine: In a saucepan, simmer white wine until reduced by half.
Combine with Velouté: Add the fish velouté to the reduced wine and simmer gently.
Finish with Cream and Butter: Stir in heavy cream and butter until smooth.
Season: Add salt and white pepper to taste.
Espagnole (Brown) Sauce
Ingredients:
1/4 cup butter
1/4 cup flour
1 quart brown stock (beef or veal)
Mirepoix (a mixture of diced onion, carrot, and celery)
Tomato paste
Herbs (bay leaf, thyme)
Method:
Make Brown Roux: Cook butter and flour together for a few minutes until they form a brown roux.
Add Mirepoix and Tomato Paste: Add mirepoix and a small amount of tomato paste to the roux and cook until vegetables are soft.
Add Stock and Herbs: Gradually add the brown stock and herbs. Bring to a simmer and cook for about 2 hours, skimming the fat and impurities that rise to the top.
Strain: Strain the sauce through a fine sieve to ensure a smooth consistency.
Aromatics: 3-4 bay leaves, 10-12 sprigs thyme, 10-15 black peppercorns
Method:
Roast the Bones:
Preheat your oven to 450°F (232°C).
Spread the veal bones on a large roasting pan in a single layer.
Roast for about 45 minutes, turning once, until bones are deeply browned (browning is essential for rich flavor).
Prepare the Vegetables:
In the same roasting pan, spread the chopped onions, carrots, and celery around the bones.
Coat the vegetables with tomato paste, then continue roasting for another 15–20 minutes, until the vegetables develop a slight caramelization.
Transfer to Stockpot:
Place the roasted bones and vegetables in a large stockpot.
Pour cold water into the pot until bones and vegetables are fully submerged.
Add bay leaves, thyme, and peppercorns for seasoning.
Simmer and Skim:
Bring the pot to a low simmer (avoid boiling, as it can make the stock cloudy).
Let it simmer gently for 18–24 hours for maximum flavor extraction, skimming off fat and impurities that rise to the top every few hours.
Strain and Reduce:
After simmering, strain the stock through a fine-mesh sieve, discarding solids.
Return the strained stock to the pot and bring to a simmer. Continue to reduce the liquid until it reaches a thick, syrupy consistency, about 50% reduction.
Final Straining and Storage:
Once reduced, strain the demi-glace through a fine sieve again for a smooth finish.
Cool completely before refrigerating. It will thicken as it cools and can be stored for a week in the fridge or frozen in portions for future use.
2. Bordelaise Sauce (Wine-Based Brown Sauce)
Bordelaise sauce is a French classic, made with red wine and enriched with beef stock or demi-glace. This rich, flavorful sauce pairs perfectly with grilled or roasted meats, especially steak.
Ingredients:
1 cup red wine (preferably Bordeaux)
1 cup demi-glace (or reduced Espagnole sauce)
2 shallots, finely chopped
1-2 tsp fresh thyme leaves
1 bay leaf
1 tbsp butter
Salt and black pepper to taste
Optional: 1 tbsp beef marrow (for authenticity)
Method:
Reduce the Wine: In a saucepan, combine red wine, shallots, thyme, and bay leaf. Simmer over medium heat until the wine reduces by half.
Add Demi-Glace: Stir in the demi-glace, blending well. Simmer the mixture on low heat for 10-15 minutes until it thickens slightly.
Strain and Finish: Strain the sauce to remove solids, then return it to low heat. Stir in butter for a glossy finish. Add salt and pepper to taste.
Optional Marrow Addition: For an authentic touch, mix in beef marrow before serving.
3. Chasseur Sauce (Hunter’s Sauce)
Chasseur, or “Hunter’s Sauce,” is a mushroom and wine-based sauce perfect for poultry and game meats. It has a robust, earthy flavor from mushrooms and a touch of acidity from wine.
Ingredients:
2 cups demi-glace (or reduced Espagnole sauce)
1/2 cup sliced mushrooms
1/4 cup dry white wine
1 tbsp tomato paste
1 tbsp butter
1 tbsp finely chopped shallots
1 tsp chopped parsley
Salt and black pepper to taste
Method:
Sauté Mushrooms and Shallots: In a saucepan, melt butter and add mushrooms and shallots. Sauté until mushrooms are soft and lightly browned.
Add Wine and Tomato Paste: Pour in the white wine, stirring to deglaze the pan, and add tomato paste. Let it reduce by half.
Add Demi-Glace: Stir in the demi-glace and bring to a gentle simmer for 10–15 minutes, allowing the flavors to meld.
Finish and Serve: Add parsley, then season with salt and pepper.
4. Lyonnaise Sauce
Lyonnaise sauce is a classic onion-based brown sauce with a hint of vinegar, giving it a slightly tangy flavor. It’s often served with grilled or roasted meats, adding depth and sweetness from caramelized onions.
Ingredients:
2 cups demi-glace (or reduced Espagnole sauce)
1/2 cup thinly sliced onions
1/4 cup white wine vinegar
1 tbsp butter
Salt and black pepper to taste
Method:
Caramelize the Onions: Melt butter in a saucepan and cook the onions over medium heat until caramelized and golden brown.
Deglaze with Vinegar: Add the vinegar to the onions, stirring well, and cook until the vinegar reduces by half.
Combine with Demi-Glace: Add demi-glace to the pan, mixing thoroughly, and let the sauce simmer for 10–15 minutes.
Season and Serve: Add salt and pepper to taste, adjusting as needed.
5. Robert Sauce
Robert sauce is a tangy, mustard-based sauce with caramelized onions, traditionally served with pork and grilled meats.
Ingredients:
2 cups demi-glace (or reduced Espagnole sauce)
1/2 cup finely chopped onions
1/4 cup dry white wine
1 tbsp Dijon mustard
1 tbsp butter
Salt and black pepper to taste
Method:
Sauté Onions: Melt butter in a saucepan, then add onions and cook until softened.
Deglaze with Wine: Add white wine and cook until it is reduced by half.
Add Demi-Glace: Stir in demi-glace and simmer for 10 minutes.
Finish with Mustard: Add mustard, then season with salt and pepper as needed.
Tomato Sauce
Ingredients:
2 tablespoons olive oil
1 small onion, finely chopped
2 cloves garlic, minced
1 can (28 ounces) crushed tomatoes
Herbs (basil, oregano)
Salt and sugar to taste
Method:
Sauté Onion and Garlic: Heat olive oil in a saucepan. Add onion and garlic, and sauté until translucent.
Add Tomatoes and Herbs: Add crushed tomatoes and herbs. Simmer on low heat for about 1 hour.
Season: Add salt and a pinch of sugar to balance the acidity.
Tomato Sauce Derivatives
1. Marinara Sauce
Marinara sauce is a quick, versatile tomato-based sauce, often used for pasta, pizza, or as a dip. It features garlic and herbs, creating a bright and aromatic flavor.
Ingredients:
2 cups canned crushed tomatoes
2 tbsp olive oil
2 cloves garlic, minced
1 tsp dried basil
1 tsp dried oregano
Salt and black pepper to taste
Optional: Fresh basil for garnish
Method:
Sauté Garlic: In a saucepan, heat olive oil over medium heat. Add minced garlic and cook until fragrant (about 30 seconds to 1 minute).
Add Tomatoes and Herbs: Stir in the crushed tomatoes, basil, and oregano.
Simmer: Reduce heat to low and let the sauce simmer uncovered for 15–20 minutes, stirring occasionally to blend flavors.
Season and Serve: Season with salt and pepper to taste. For extra freshness, garnish with fresh basil if desired.
2. Creole Sauce
Creole sauce is a flavorful, mildly spicy tomato-based sauce featuring the “holy trinity” of Cajun cooking: onions, bell peppers, and celery. It’s commonly used with seafood, chicken, or rice dishes.
Ingredients:
2 cups tomato sauce
1/2 cup chopped onion
1/2 cup chopped bell peppers
1/4 cup chopped celery
1 clove garlic, minced
1/2 tsp cayenne pepper (adjust to taste)
1/2 tsp thyme
Salt and pepper to taste
Method:
Sauté Vegetables: In a saucepan, cook onions, bell peppers, celery, and garlic over medium heat until softened.
Add Tomato Sauce and Seasonings: Stir in the tomato sauce, cayenne, thyme, salt, and pepper.
Simmer: Reduce heat to low and let the sauce cook for 20–30 minutes, stirring occasionally to blend flavors.
3. Bolognese Sauce
Bolognese is a rich, meat-based tomato sauce with vegetables, commonly paired with pasta. This slow-simmered sauce combines flavors of ground meat, wine, and cream.
Ingredients:
1 lb ground beef or pork
2 tbsp olive oil
1/2 cup diced onions
1/2 cup diced carrots
1/2 cup diced celery
1 cup tomato sauce
1/2 cup milk
1/2 cup dry white wine or red wine
Salt and pepper to taste
Method:
Sauté Vegetables: Heat olive oil in a large pot. Add onions, carrots, and celery, cooking until softened.
Cook Meat: Add ground beef or pork and cook until browned, breaking up any large pieces.
Deglaze with Wine: Pour in the wine, scraping up any browned bits from the bottom of the pot. Simmer until the wine has mostly evaporated.
Add Tomato Sauce and Milk: Stir in the tomato sauce and milk, then season with salt and pepper.
Simmer: Lower the heat and simmer uncovered for 1–2 hours, stirring occasionally, until the sauce is thick and flavors are well-developed.
4. Puttanesca Sauce
Puttanesca sauce is a bold and briny tomato-based sauce featuring olives, capers, and anchovies, typically served with pasta.
Ingredients:
2 cups tomato sauce
2 tbsp olive oil
2 cloves garlic, minced
1/4 cup black or Kalamata olives, chopped
1 tbsp capers, rinsed
2-3 anchovy fillets, finely chopped
1/2 tsp red pepper flakes (optional, for spice)
Salt and pepper to taste
Method:
Sauté Garlic and Anchovies: Heat olive oil in a saucepan, add garlic and anchovies, and cook until garlic is fragrant and anchovies have melted.
Add Olives, Capers, and Tomato Sauce: Stir in olives, capers, and tomato sauce, then bring to a gentle simmer.
Simmer and Season: Let the sauce cook for 15–20 minutes to blend flavors, adding red pepper flakes if desired. Season with salt and pepper to taste.
5. Arrabbiata Sauce
Arrabbiata, meaning “angry” in Italian, is a spicy tomato-based sauce made with garlic and red pepper flakes. This sauce is commonly served with pasta and has a bold, fiery kick.
Ingredients:
2 cups tomato sauce
2 tbsp olive oil
3 cloves garlic, minced
1 tsp red pepper flakes (adjust to taste)
Salt and black pepper to taste
Optional: Fresh parsley or basil for garnish
Method:
Sauté Garlic and Red Pepper: Heat olive oil in a saucepan over medium heat. Add garlic and red pepper flakes, cooking until fragrant (about 1 minute).
Add Tomato Sauce: Stir in tomato sauce and bring to a simmer.
Simmer and Season: Cook for 15–20 minutes, allowing flavors to meld. Season with salt and pepper to taste.
Garnish and Serve: Garnish with fresh parsley or basil, if desired.
Hollandaise Sauce
Ingredients:
3 egg yolks
1 tablespoon lemon juice
1/2 cup melted butter
Salt and cayenne pepper
Method:
Whisk Egg Yolks: In a heatproof bowl, whisk the egg yolks and lemon juice vigorously until the mixture is thickened and doubled in volume.
Double Boiler: Place the bowl over a pot of simmering water (not boiling), ensuring the bottom does not touch the water.
Add Butter: Slowly drizzle in the melted butter while whisking vigorously until the sauce is thickened and doubled in volume.
Season: Remove from heat, and season with salt and a pinch of cayenne pepper.
Hollandaise Sauce Derivatives
1. Béarnaise Sauce
Béarnaise is a classic French derivative of hollandaise, enriched with fresh tarragon, shallots, and vinegar reduction. It’s often paired with steak, lamb, or other grilled meats.
Ingredients:
1 cup hollandaise sauce
1 tablespoon tarragon vinegar (or white wine vinegar)
1 tablespoon minced shallots
1 tablespoon fresh tarragon, finely chopped
1 teaspoon fresh chervil (optional)
Method:
Prepare Vinegar Reduction: In a small saucepan, combine tarragon vinegar and minced shallots. Simmer over medium heat until reduced by half, about 2–3 minutes.
Incorporate Reduction into Hollandaise: Stir the vinegar reduction into the hollandaise sauce.
Add Fresh Herbs: Fold in the chopped tarragon and chervil, mixing until evenly incorporated.
2. Maltaise Sauce
Maltaise sauce is a refreshing, citrus-infused version of hollandaise, featuring blood orange juice. This variation pairs wonderfully with steamed asparagus and other green vegetables.
Ingredients:
1 cup hollandaise sauce
2 tablespoons blood orange juice
1 teaspoon grated blood orange zest
Method:
Prepare the Hollandaise: Warm the hollandaise sauce gently in a saucepan over low heat.
Add Citrus Flavor: Stir in the blood orange juice and zest, whisking until the sauce is smooth and fully combined.
3. Mousseline Sauce
Mousseline sauce is a light and airy variation of hollandaise, made by gently folding whipped cream into the sauce. It’s often served with delicate foods like poached fish and asparagus.
Ingredients:
1 cup hollandaise sauce
1/2 cup heavy cream, whipped to soft peaks
Method:
Prepare Hollandaise: Ensure the hollandaise is warm, but not hot, to keep the cream from deflating.
Fold in Whipped Cream: Gently fold the whipped cream into the hollandaise until well blended and light in texture.
4. Foyot Sauce
Foyot sauce is a savory, umami-rich variation of Béarnaise, with the addition of demi-glace, making it perfect for grilled meats like steak.
Ingredients:
1 cup Béarnaise sauce (prepared)
2 tablespoons demi-glace
Method:
Prepare Béarnaise: Make or warm the Béarnaise sauce.
Add Demi-Glace: Gently stir in the demi-glace until fully blended with the Béarnaise, adding a rich depth of flavor.
5. Choron Sauce
Choron sauce is a creamy tomato variation of Béarnaise, omitting the tarragon to let the tomato flavor shine. It pairs beautifully with grilled meats and poultry.
Ingredients:
1 cup Béarnaise sauce (prepared without tarragon)
2 tablespoons tomato purée
Method:
Prepare Béarnaise Base: Start with a warm Béarnaise sauce, ensuring it’s smooth.
Incorporate Tomato Purée: Gently stir in the tomato purée until fully combined, adding a subtle sweetness and color.
Storage and Reheating of Sauces
Proper storage and reheating of sauces are crucial to maintaining their quality, flavor, and safety. Whether you’re dealing with a simple tomato sauce or a complex hollandaise, understanding the best practices for handling leftovers will help ensure that your efforts in the kitchen continue to pay off in delicious meals. Here’s how to properly store and reheat various types of sauces:
Storage of Sauces
Cooling Down:
Allow sauces to cool to room temperature before storing. This reduces the risk of bacterial growth and prevents condensation from forming inside the container, which could dilute the sauce.
Use Airtight Containers:
Transfer the sauce to airtight containers to prevent oxidation and flavor absorption from other foods in the refrigerator. Glass containers are ideal as they don’t impart any flavors to the sauce.
Refrigeration:
Most sauces can be stored in the refrigerator for up to 3-5 days. Bechamel, tomato, and veloute based sauces generally hold up well.
Freezing:
Many sauces freeze well, including tomato sauce and stock-based sauces like espagnole. Use freezer-safe containers or bags. Leave some space at the top of the container as sauces will expand when frozen. Properly frozen sauces can be stored for up to 3 months.
Labeling:
Always label your sauces with the date of storage. This helps keep track of how long they’ve been in the refrigerator or freezer, ensuring you use them within safe time frames.
Reheating of Sauces
Thawing:
If frozen, thaw sauces in the refrigerator overnight rather than at room temperature to minimize the risk of bacterial growth.
Stovetop Reheating:
Reheat sauces gently on the stove over low heat. Stir frequently to prevent burning and ensure even heating, especially for thick and creamy sauces like bechamel.
Adding Liquids:
Some sauces may thicken when cooled. Add a small amount of water, stock, or milk when reheating to adjust the consistency without diluting the flavor significantly.
Microwave Reheating:
For a quick option, sauces can be reheated in the microwave. Use a microwave-safe container, cover it loosely, and stir periodically to ensure even heating. This method works well for simpler sauces like tomato sauce.
Double Boiler:
For delicate sauces such as hollandaise or béarnaise, reheating in a double boiler is recommended to prevent the sauce from separating. Keep the heat low and stir continuously.
Emulsion Sauces:
Reheating emulsified sauces (like hollandaise) can be tricky as they can easily split. It’s best reheated over very low heat while whisking constantly. Sometimes, adding an extra yolk while reheating can help stabilize the emulsion.
Enhancing Dishes with Sauces and Stocks
Pairing Sauces with Dishes
Meat
Espagnole or Demi-Glace with Beef: These rich, brown sauces enhance the deep flavors of beef dishes. Demi-glace, a reduction of espagnole, provides an even more concentrated flavor.
Velouté with Chicken: This light, stock-based sauce adds a creamy, savory element to chicken dishes, complementing their mild flavor.
Poultry
Velouté or Béchamel-Based Sauces: Velouté enhances the natural flavors of poultry with its smooth texture, while béchamel adds a creamy, rich component to dishes like chicken pot pie or creamed chicken.
Fish
Hollandaise: This buttery, lemony sauce is perfect for delicate fish, adding richness without overpowering the flavor.
Light Tomato Sauces: These sauces add acidity and freshness to fish dishes, balancing the natural sweetness of seafood.
Vegetables
Béchamel: A versatile sauce that adds creaminess and richness to vegetable dishes like gratins or creamed spinach.
Tomato Sauce: Adds acidity and depth to vegetable dishes, enhancing their natural flavors.
Hollandaise: Pairs well with steamed or roasted vegetables, adding a luxurious finish.
Using Stocks as a Base
Soups
Chicken Stock for Chicken Soup: Provides a rich, savory base that enhances the flavor of chicken and vegetables.
Fish Stock for Seafood Bisques: Adds a delicate, oceanic depth to seafood soups, ensuring a balanced and flavorful result.
Stews
Brown Stock for Beef Stew: The deep, rich flavor of brown stock complements the hearty, robust nature of beef stew, adding complexity and depth.
Gravies
Pan Drippings Deglazed with Stock: Using pan drippings and stock to make gravy captures the essence of roasted meats, creating a flavorful sauce that enhances the dish.
Fresh pasta is made from a simple dough of eggs and flour, occasionally with added water, oil, or salt. It is known for its delicate texture and quick cooking time compared to dried pasta. The key to excellent fresh pasta lies in the quality of ingredients and the technique of kneading and shaping the dough to the desired form.
Types of Fresh Pasta
Egg Pasta (Pasta all’uovo)
Description: Egg pasta, or “pasta all’uovo,” is made with a mixture of eggs and flour. It is rich in flavor and has a delicate texture. The addition of eggs gives the pasta a golden color and a tender bite.
Best for:
Lasagna
Tagliatelle
Fettuccine
Pappardelle
Benefits:
Rich Flavor: The eggs add a richness and depth of flavor to the pasta.
Tender Texture: The dough is smooth and tender, making it ideal for various shapes and preparations.
Versatility: Can be used in a variety of dishes, from simple butter and sage sauces to hearty meat ragùs.
Homemade Egg Pasta Recipe
Ingredients:
2 cups all-purpose flour
3 large eggs
Pinch of salt
Instructions:
Form a Dough: On a clean work surface, make a mound with the flour and create a well in the center. Crack the eggs into the well and add a pinch of salt.
Mix: Use a fork to gently whisk the eggs, gradually incorporating the flour from the edges of the well until a dough forms.
Knead: Knead the dough for about 10 minutes until it is smooth and elastic. If the dough is too sticky, add a little more flour.
Rest: Wrap the dough in plastic wrap and let it rest for at least 30 minutes.
Roll and Cut: Roll out the dough using a pasta machine or rolling pin to your desired thickness. Cut into desired shapes such as tagliatelle or fettuccine.
Cook: Bring a large pot of salted water to a boil. Cook the pasta for 2-3 minutes until al dente. Serve with your favorite sauce
Semolina Pasta (Pasta di Semola)
Description: Semolina pasta is made with semolina flour and water. This type of pasta has a firmer texture and is often used for shapes that need to hold up well during cooking.
Best for:
Orecchiette
Cavatelli
Trofie
Benefits:
Firm Texture: Holds its shape well, making it ideal for hearty sauces.
Distinct Flavor: Semolina adds a slightly nutty flavor to the pasta.
Durability: Can withstand longer cooking times without becoming mushy.
Homemade Semolina Pasta Recipe
Ingredients:
2 cups semolina flour
1/2 to 3/4 cup water
Pinch of salt
Instructions:
Form a Dough: In a large bowl, mix the semolina flour and salt. Gradually add water, mixing with your hands until a dough forms.
Knead: Knead the dough for about 10 minutes until it is smooth and elastic.
Rest: Cover the dough with a damp cloth and let it rest for 30 minutes.
Shape: Divide the dough into small pieces and shape into your desired form, such as orecchiette or cavatelli.
Cook: Bring a large pot of salted water to a boil. Cook the pasta for 5-7 minutes until al dente. Serve with your favorite sauce.
Whole Wheat Pasta
Description: Whole wheat pasta is made with whole wheat flour, giving it a nuttier flavor and a coarser texture compared to regular pasta. It is often considered a healthier alternative due to its higher fiber content.
Best for:
Spaghetti
Penne
Fusilli
Benefits:
Healthier Option: Higher in fiber and nutrients compared to regular pasta.
Nutty Flavor: Adds a distinct taste to dishes.
Hearty Texture: Pairs well with robust sauces.
Homemade Whole Wheat Penne Recipe
Ingredients:
1 1/2 cups whole wheat flour
1/2 cup all-purpose flour
3 large eggs
Pinch of salt
Instructions:
Form a Dough: On a clean work surface, make a mound with the flours and create a well in the center. Crack the eggs into the well and add a pinch of salt.
Mix: Use a fork to gently whisk the eggs, gradually incorporating the flour from the edges of the well until a dough forms.
Knead: Knead the dough for about 10 minutes until it is smooth and elastic.
Rest: Wrap the dough in plastic wrap and let it rest for at least 30 minutes.
Roll and Cut: Roll out the dough using a pasta machine or rolling pin to your desired thickness. Cut into desired shapes such as spaghetti or penne.
Cook: Bring a large pot of salted water to a boil. Cook the pasta for 2-3 minutes until al dente. Serve with your favorite sauce.
Gluten-Free Pasta
Description: Gluten-free pasta is made using alternative flours such as rice, corn, or quinoa flour. It is suitable for those with gluten intolerance or celiac disease.
Best for:
All pasta shapes, depending on the blend of flours used.
Benefits:
Suitable for Gluten-Intolerant Individuals: Provides a pasta option for those who cannot consume gluten.
Variety of Flavors: Depending on the flours used, it can offer different flavors and textures.
Homemade Gluten-Free Pasta Recipe
Ingredients:
1 cup rice flour
1/2 cup potato starch
1/2 cup tapioca flour
3 large eggs
Pinch of salt
Instructions:
Form a Dough: On a clean work surface, mix the flours and create a well in the center. Crack the eggs into the well and add a pinch of salt.
Mix: Use a fork to gently whisk the eggs, gradually incorporating the flour from the edges of the well until a dough forms.
Knead: Knead the dough for about 10 minutes until it is smooth and elastic.
Rest: Wrap the dough in plastic wrap and let it rest for at least 30 minutes.
Roll and Cut: Roll out the dough using a pasta machine or rolling pin to your desired thickness. Cut into desired shapes.
Cook: Bring a large pot of salted water to a boil. Cook the pasta for 2-3 minutes until al dente. Serve with your favorite sauce.
Specialty and Regional Pasta
Examples: Orecchiette, cavatelli, and pici.
Method:
Orecchiette:
Ingredients: 200 grams semolina flour, 100 ml water, a pinch of salt.
Mixing and Kneading: Combine ingredients and knead until smooth.
Shaping: Roll into small logs, cut into small pieces, and press with your thumb to form ear-shaped discs.
Cavatelli:
Ingredients: 200 grams semolina flour, 100 ml water, a pinch of salt.
Mixing and Kneading: Combine ingredients and knead until smooth.
Shaping: Roll into small logs, cut into small pieces, and use a cavatelli board or fork to shape.
Pici:
Ingredients: 200 grams flour, 100 ml water, a pinch of salt.
Mixing and Kneading: Combine ingredients and knead until smooth.
Shaping: Roll into long, thick spaghetti-like strands by hand.
Gnocchi
Ingredients:
500 grams potatoes (preferably starchy potatoes like russets)
150 grams flour
1 large egg
A pinch of salt
Method:
Cooking Potatoes: Boil potatoes in their skins until tender. Peel while still warm and pass through a potato ricer.
Combine Ingredients: Mix the riced potatoes with the flour, egg, and salt to form a dough.
Shaping: Roll the dough into logs about 1 inch thick. Cut into 1-inch pieces and press with a fork to create indentations.
Cooking: Boil gnocchi in salted water until they float to the surface, about 2-3 minutes. Drain and serve with desired sauce.
Trofie
Features: Small, twisted pasta from Liguria, ideal for pesto.
Ingredients:
200 grams flour (semolina or all-purpose)
100 ml water
Method:
Combine Ingredients: Mix flour with water to form a dough.
Kneading: Knead until smooth and elastic.
Shaping: Roll small pieces of dough into thin, elongated shapes and twist each piece.
Cooking: Boil in salted water for 3-5 minutes until tender.
Chitarra
Features: Named after the guitar-like instrument used to cut it, producing spaghetti-like noodles.
Ingredients:
200 grams “00” flour
2 large eggs
Method:
Combine Ingredients: Place flour on a clean work surface, make a well, and add eggs.
Mixing and Kneading: Mix and knead as described for egg pasta.
Resting: Let the dough rest for 30 minutes.
Cutting: Roll the dough into sheets and press through the chitarra frame to cut into noodles.
Cooking: Boil in salted water for 2-4 minutes until al dente.
Tips for Making Fresh Pasta
Rest the Dough: Allow the pasta dough to rest for at least 30 minutes before rolling. This helps the gluten relax and makes the dough easier to work with.
Consistent Thickness: When rolling out pasta, ensure consistent thickness to promote even cooking.
Avoid Overcooking: Fresh pasta cooks much quicker than dried pasta, often in just 2-4 minutes.
Use Immediately: Fresh pasta is best used immediately after making. If you must store it, dust it with flour and keep it refrigerated for up to a day, or freeze for longer storage.
Generously Salt the Water: Salt pasta water generously to enhance the pasta’s flavor.
Stir Gently: When cooking, stir fresh pasta gently to prevent sticking without breaking the delicate noodles.
Basic Pasta Sauces
Pasta sauces are the heart of many Italian dishes and can transform simple pasta into a rich and flavorful meal. Understanding the basics of preparing various types of pasta sauces will enhance your culinary repertoire and provide endless delicious options. Here’s how to prepare five fundamental types of pasta sauces:
Tomato-Based Sauce
Ingredients:
1 can (28 oz) of high-quality canned tomatoes or 2 lbs fresh ripe tomatoes
2 tablespoons olive oil
1 large onion, finely chopped
3 cloves garlic, minced
Salt and pepper to taste
Fresh basil or oregano, chopped
Method:
Sauté Aromatics: Heat olive oil in a pan over medium heat. Add finely chopped onions and garlic, sautéing until translucent, about 5 minutes.
Add Tomatoes: Crush the tomatoes by hand or use canned crushed tomatoes. Add to the pan with salt, pepper, and other seasonings.
Simmer: Let the sauce simmer on low heat for at least 30 minutes to develop the flavors. Stir occasionally to prevent sticking.
Finish with Herbs: Add fresh basil or oregano towards the end of cooking for a fresh flavor.
Cream-Based Sauce
Ingredients:
1 cup heavy cream
2 tablespoons butter
2 cloves garlic, minced
1 cup grated Parmesan cheese
Salt and pepper to taste
Optional: mushrooms, peas, or cooked chicken
Method:
Melt Butter: In a pan, melt butter over medium heat. Add minced garlic and cook until fragrant, about 1 minute.
Add Cream: Pour in the heavy cream, stirring continuously. Let it simmer gently to thicken, about 5-7 minutes.
Add Cheese: Stir in grated Parmesan cheese until melted and integrated into the sauce.
Season: Adjust the seasoning with salt and pepper. Optionally, add cooked mushrooms, peas, or cooked chicken for a more substantial sauce.
Oil-Based Sauce
Ingredients:
1/2 cup extra virgin olive oil
4 cloves garlic, thinly sliced
1/2 teaspoon chili flakes
Optional: 2 anchovy fillets
Method:
Heat Oil: Heat olive oil over low heat. Add thinly sliced garlic and optional anchovies, cooking until the garlic is golden but not burnt, about 3-4 minutes.
Add Flavors: Incorporate chili flakes for a bit of heat.
Combine with Pasta: Toss the cooked pasta directly in the pan with the oil mixture, allowing it to coat the pasta evenly. Add pasta water if needed to make the sauce silky.
Pesto Sauce
Ingredients:
2 cups fresh basil leaves
1/4 cup pine nuts
1/2 cup grated Parmesan cheese
2 cloves garlic, chopped
1/2 cup olive oil
Salt to taste
Method:
Blend Ingredients: In a food processor, combine basil leaves, pine nuts, chopped garlic, and grated Parmesan. Pulse until finely chopped.
Add Olive Oil: With the processor running, slowly add olive oil until the mixture forms a thick paste.
Season: Season with salt and blend until smooth. Pesto can be used immediately or stored in the refrigerator with a layer of olive oil on top.
Vegetable Sauce
Ingredients:
2 bell peppers, chopped
1 zucchini, chopped
1 eggplant, chopped
2 tomatoes, chopped
2 tablespoons olive oil
Salt, pepper, and herbs (such as thyme or rosemary) to taste
Method:
Roast or Sauté Vegetables: Depending on preference, either roast the vegetables in the oven with olive oil until tender (about 20-25 minutes at 400°F) or sauté them in a pan.
Blend or Chop: For a smoother sauce, blend the cooked vegetables until desired consistency. For a chunkier sauce, chop them finely.
Simmer with Seasonings: Return the vegetables to a pan, add herbs and spices, and simmer to integrate the flavors, about 10 minutes.
General Tips for Pasta Sauce
Fresh Ingredients: Use the freshest ingredients possible for the best flavor.
Simmer Slowly: Allow sauces to simmer slowly to develop more depth.
Adjust Consistency: Use pasta cooking water to adjust the consistency of your sauces as needed.
Season Carefully: Taste as you go and adjust seasoning to ensure a well-balanced flavor.
Techniques for Making Pasta Sauces
Creating the perfect pasta dish involves more than just cooking pasta and topping it with sauce. The art of sauce making and pairing can elevate a simple dish to a memorable meal. Here are key techniques for making pasta sauces, including how to properly emulsify, blend, and match sauces with pasta shapes and flavors.
Simmering Pasta Sauces
Purpose: Simmering allows flavors to meld and intensifies the depth of the sauce. It also reduces the sauce to a thicker consistency, which clings better to pasta.
Technique:
Sauté Aromatics: Start by heating olive oil in a pan. Add finely chopped onions, garlic, or other base ingredients and sauté until they are soft.
Add Liquid Ingredients: Add tomatoes, broth, or cream to the pan and bring to a gentle simmer.
Simmer: Continue to cook on low heat, stirring occasionally to prevent sticking and burning, until the sauce has reduced to your desired thickness.
Emulsifying Pasta Sauces
Purpose: Emulsification combines oil and water-based liquids into a smooth and cohesive sauce. It’s crucial for creamy or buttery sauces to ensure they are silky and evenly coated on the pasta.
Technique:
Reserve Pasta Water: After cooking pasta, reserve some of the pasta water.
Add Fat: Add a fat source like butter or olive oil to your sauce, then slowly pour in the reserved pasta water while continuously stirring or whisking.
Create Emulsion: The starch in the pasta water helps the oil and water to mix, creating a smooth emulsion that binds the sauce to the pasta.
Blending Pasta Sauces
Purpose: Blending is used to achieve a smooth texture, particularly for vegetable or tomato sauces.
Technique:
Cook Ingredients: Cook all ingredients until they are tender.
Blend: Use a blender or food processor to puree the sauce until smooth. For a more rustic texture, use a hand blender or masher.
Adjust: Return the sauce to heat and adjust consistency and seasonings.
Pairing Sauces with Pasta
Importance: Matching the right sauce with the right type of pasta can enhance the dining experience by ensuring proper sauce adhesion and flavor balance.
Guidelines:
Rich, Meaty Sauces: Pair with wider noodles like pappardelle or tagliatelle which can hold more sauce.
Light, Creamy, or Oil-Based Sauces: Best with long, thin pasta like spaghetti or linguine.
Chunky Vegetable Sauces: Work well with pasta shapes that have nooks and crannies such as penne or fusilli, which capture the pieces of vegetables.
Matching Sauce with Pasta Shape
Purpose: The texture and shape of pasta impact how it holds onto sauces.
Technique:
Tube-Shaped Pastas: Such as rigatoni, are great for thick, hearty sauces because the sauce can fill the tubes.
Delicate Pastas: Such as angel hair, should be paired with delicate sauces like a light tomato basil sauce.
Complementing Pasta and Sauce Flavors
Objective: The flavor of the sauce should complement the pasta and not overpower it.
Approach:
Balance Flavors: A simple butter and herb sauce might be perfect for fresh pasta, which has a mild, egg-rich flavor.
Adjust Seasoning: Based on the intensity of the pasta’s flavor. Whole wheat and other flavored pastas may require stronger or more robust sauces.
Tips for Pasta Sauces
Creating exceptional pasta sauces involves more than just combining ingredients; it’s about technique, the right ingredients, and little culinary tricks that elevate your dish. Here are some essential tips to enhance your pasta sauce-making skills, focusing on seasoning, ingredient quality, and the strategic use of pasta water.
Seasoning Pasta Sauces
Layer Flavors: Build layers of flavor by starting with a base of aromatics like onion, garlic, or shallots, cooked until they are soft but not browned. Add herbs early for hearty sauces or at the end for fresh, delicate sauces.
Salt Wisely: Season your sauce gradually throughout the cooking process to develop depth and balance. Taste as you go and adjust accordingly. Remember, you can always add more salt, but you can’t take it away.
Acid Balance: Often overlooked, acid is crucial in balancing rich or very sweet sauces. A splash of vinegar or a squeeze of lemon juice can brighten flavors immensely, especially in tomato-based sauces.
Heat Element: For an added dimension, consider a pinch of red pepper flakes or a dash of black pepper. This can enhance the sauce’s complexity without overwhelming the palate.
Using Quality Ingredients for Pasta Sauces
Tomatoes: If your sauce is tomato-based, the quality of tomatoes can make or break your dish. Use ripe, fresh tomatoes in season, or high-quality canned San Marzano tomatoes for a rich, sweet base.
Herbs and Spices: Fresh herbs should look vibrant and smell fragrant. Dried herbs and spices should be used within six months to a year for the best flavor, as they lose potency over time.
Oils and Fats: The type of oil or fat can influence the flavor of your sauce. Extra virgin olive oil is ideal for Mediterranean dishes, while butter can be used for richer, cream-based sauces.
Cheeses: Incorporate high-quality cheeses, such as real Parmigiano-Reggiano or Pecorino Romano, for finishing sauces. Their depth of flavor is far superior to pre-grated cheeses and can enhance your sauce beautifully.
Reserving Pasta Water
Why Reserve Pasta Water: The starchy water in which pasta has been cooked is a key “secret ingredient” in sauces. It helps emulsify and thicken your sauce, allowing it to coat the pasta more effectively.
How to Use: Before draining your pasta, save a cup or two of the pasta water. Add a little of this starchy water to your sauce as you combine it with the pasta. The water’s temperature and starch content will help to integrate the sauce and pasta, giving a silky texture.
Adjusting Consistency: You can adjust the thickness of your sauce on the fly by adding small amounts of pasta water until you reach the desired consistency. It’s particularly useful for sauces that might seem too thick or rich.
Pairing Pasta Shapes with Sauces
Matching the right sauce with the right type of pasta can enhance the dining experience by ensuring proper sauce adhesion and flavor balance.
Long, Thin Pastas (e.g., Spaghetti, Linguine)
Long, thin pasta like spaghetti, linguine, and vermicelli are ideal for light, smooth sauces that coat the noodles without overwhelming them. Their delicate texture and slender shape don’t hold chunky ingredients well, so oil-based, light tomato or simple cream sauces work best. This type of pasta is also ideal for sauces that rely on emulsification, such as Aglio e Olio or Cacio e Pepe, where oil, pasta water, and cheese combine into a silky texture.
Best Sauce Pairings:
Aglio e Olio (Garlic and Olive Oil): The thin strands of spaghetti or linguine allow the garlic-infused oil to cling without pooling, delivering consistent flavor. Additions like chili flakes and fresh parsley enhance the pasta’s subtle flavor, while grated Parmesan or Pecorino Romano can add a creamy element.
Tomato-Based Sauces: Basic tomato sauces, like Marinara or Pomodoro, are perfect for long pasta, as the sauce coats each strand with a layer of fresh, acidic tomato flavor. The smooth texture of the sauce works with the pasta’s shape, making every bite balanced.
Seafood-Based Sauces (e.g., Vongole): Light seafood sauces, like Linguine alle Vongole (clam sauce), are also excellent with long, thin pasta. The pasta absorbs the seafood-infused broth, creating a balance between the pasta and the briny flavors of clams or shrimp.
Cream Sauces (Light): A thin coating of cream, as found in lighter cream sauces or lemon-cream sauces, can work well with spaghetti or linguine. The cream blends with the pasta’s starchy water, creating a delicate texture that sticks to the pasta without overwhelming its shape.
Tips for Success:
Use Tongs for Coating: When tossing long pasta in these sauces, use tongs to lift and turn the noodles, allowing for even distribution.
Reserve Pasta Water: Add a small amount of reserved pasta water to help the sauce stick, creating a lightly emulsified coating on the pasta.
Finish in the Sauce: For the best flavor and texture, cook the pasta until just shy of al dente, then finish cooking it in the sauce for a few minutes to help the flavors meld.
Ribbon Pastas (e.g., Fettuccine, Pappardelle)
Wide, flat ribbon pasta like fettuccine and pappardelle are sturdy enough to support rich, thick sauces, such as cream-based or meat sauces. Their broad surface area and thicker consistency hold heavier sauces well, allowing the flavors to spread across each bite.
Best Sauce Pairings:
Alfredo Sauce: The richness of Alfredo sauce, made from butter, cream, and Parmesan, pairs excellently with fettuccine. The wide noodles capture the creamy sauce evenly, delivering a luxurious bite.
Ragù (Meat Sauce): Hearty meat sauces, such as Bolognese, work particularly well with pappardelle. The sauce clings to the wide noodles, ensuring each bite is packed with flavor from the meat and sauce.
Mushroom Cream Sauce: Earthy mushroom sauces add depth to ribbon pasta. The wide noodles catch the mushroom pieces and cream sauce, creating a satisfying, hearty dish.
Tips for Success:
Coat Evenly: Use a ladle to add sauce gradually and toss well, ensuring each ribbon is evenly coated.
Al Dente Texture: Cooking ribbon pasta al dente is key to avoiding sogginess, especially with heavier sauces.
Layered Serving: For extra visual appeal and balanced flavor, layer the sauce over the pasta in portions rather than mixing it all at once.
Tube Pastas (e.g., Penne, Rigatoni)
Tube pasta, such as penne and rigatoni, are hollow with a ridged surface, making them ideal for hearty, chunky sauces with meat, vegetables, or beans. The sauce fills the tubes and clings to the ridges, providing a flavorful, satisfying bite.
Best Sauce Pairings:
Arrabbiata Sauce: A spicy, chunky tomato sauce with red pepper flakes, Arrabbiata works well with penne. The pasta holds the sauce within its tube and along the ridges, maximizing flavor.
Meat-Based Sauces: Heavier sauces with ground meat, like a classic Bolognese or sausage ragù, complement rigatoni well. The sauce seeps into the pasta tubes, making each bite hearty and rich.
Vegetable-Infused Sauces: Chunky vegetable sauces with zucchini, bell peppers, or eggplant cling to penne’s ridges, ensuring the flavors are distributed evenly.
Tips for Success:
Toss Gently: The ridges help capture chunky sauce, so toss gently to avoid breaking up the ingredients.
Serve with Grated Cheese: The tubes hold grated cheese well, adding another layer of texture.
Cook Al Dente: Cooking the pasta al dente ensures it holds up under heavier sauces.
Shells (e.g., Conchiglie)
Shells, such as conchiglie, have a cup-like shape that traps smaller ingredients and sauces, making them perfect for sauces with small, flavorful chunks, such as vegetables or small pieces of meat.
Best Sauce Pairings:
Cheese-Based Sauces: The concave shape of shells makes them ideal for thick, creamy sauces like cheese sauce, allowing the cheese to coat the pasta and settle inside each shell.
Vegetable Sauces: Shells pair well with vegetable-based sauces containing peas, diced tomatoes, or bell peppers, as these small pieces nestle within the shell.
Baked Dishes: Shells hold up well in baked dishes, such as a cheesy pasta bake, where sauce and cheese blend into each shell during baking.
Tips for Success:
Fill with Sauce: Toss well to fill each shell with sauce, ensuring a flavorful bite.
Use in Bakes: Shells are ideal for baking, as they retain structure and hold sauce and cheese even after prolonged cooking.
Serve Hot: Shells hold heat well, so serve immediately to enjoy the sauce-filled bites.
Twisted Pastas (e.g., Fusilli, Rotini)
Twisted pasta like fusilli and rotini have spiral shapes that effectively capture sauces with small chunks or bits, making them versatile for a variety of sauces, especially those with ingredients that need to cling.
Best Sauce Pairings:
Pesto Sauce: Twisted pasta captures pesto beautifully, with the sauce filling the spirals for even distribution. Basil, garlic, and olive oil in pesto are well-suited to fusilli’s texture.
Meat or Vegetable Sauces: Chunky sauces with ground meat, diced vegetables, or small beans get trapped in the twists, ensuring a burst of flavor in each bite.
Tomato-Based Sauces: Basic marinara or Pomodoro sauces cling to the twists, creating a satisfying texture where each bite is coated with sauce.
Tips for Success:
Toss Thoroughly: Toss twisted pasta well to allow the sauce to get into all the ridges.
Ideal for Hearty Ingredients: This shape pairs well with heavier sauces or ingredients, as the twists support the weight without losing structure.
Serve with Parmesan: The twists hold grated cheese well, enhancing the dish’s flavor.
Stuffed Pastas (e.g., Ravioli, Tortellini)
Stuffed pasta like ravioli and tortellini come with fillings such as cheese, meat, or vegetables. Light sauces complement these pastas, allowing the filling flavors to shine through without overpowering them.
Best Sauce Pairings:
Butter Sage Sauce: Melted butter with fresh sage leaves is an ideal match for stuffed pasta, adding flavor without masking the filling.
Light Tomato Cream Sauce: A delicate tomato cream sauce enhances flavors in stuffed pasta, balancing acidity and richness.
Pesto or Light Herb Sauces: Pesto or simple herb sauces like parsley or basil pesto work well, as they add flavor without overpowering.
Tips for Success:
Avoid Heavy Sauces: Use lighter sauces to let the filling stand out.
Gently Toss: Handle stuffed pasta with care to avoid breaking.
Serve Freshly Garnished: Add a sprinkle of fresh herbs or grated Parmesan before serving.
Proper pre-cooking preparation of meat is essential for achieving the best results in terms of flavor, texture, and food safety. By carefully following the necessary steps before cooking, you can significantly enhance the quality of your dishes. Below is a guide that combines both narrative explanations and practical steps to ensure you’re fully prepared.
1. Bringing Meat to Room Temperature
Allowing meat to come to room temperature before cooking is a critical step in achieving even cooking. When meat is too cold, placing it directly into a hot pan or oven can cause the exterior to cook much faster than the interior, leading to uneven results.
Purpose: Helps meat cook evenly, preventing the outside from overcooking while the inside remains undercooked.
Method: Remove the meat from the refrigerator and let it sit, covered, on the counter for 20-30 minutes before cooking. This step is particularly important for thicker cuts like steaks, roasts, or whole birds.
Consideration: Be mindful of food safety; do not leave meat out for more than two hours, or one hour if the temperature is 90°F or above.
2. Patting Dry Meat Before Cooking
Drying the meat before cooking is crucial for achieving a good sear. Surface moisture can cause the meat to steam rather than sear, resulting in a less desirable texture and flavor.
Purpose: Ensures a better sear and caramelization by removing excess moisture that could lead to steaming instead of browning.
Method: Use clean paper towels to blot the surface of the meat until it’s fully dry. Pay extra attention to previously frozen meat, which may retain more moisture.
3. Safety Tips for Meat Handling
Food safety is paramount when handling raw meat. Cross-contamination and improper handling can lead to foodborne illnesses, so it’s vital to follow strict safety protocols.
Cross-Contamination Prevention: Always use separate cutting boards and utensils for raw meat and ready-to-eat foods unless they have been thoroughly cleaned with hot, soapy water.
Hand Washing: Wash your hands with soap and water for at least 20 seconds before and after handling raw meat to remove potential pathogens.
Cooking Temperatures: Use a meat thermometer to ensure meat reaches safe internal temperatures:
145°F for whole cuts of beef, pork, lamb, and veal.
160°F for ground meats.
165°F for all poultry.
4. Proper Storage for Meat
Correct storage of meat is essential to maintain its freshness and safety. Whether refrigerating or freezing, following proper storage guidelines ensures your meat remains safe to eat and retains its quality.
Refrigeration: Store raw meat in the refrigerator, ideally on the lowest shelf to prevent juices from contaminating other foods. Use it within 3-5 days.
Freezing: If you’re not planning to use the meat within a few days, freeze it. Wrap it tightly in plastic wrap, aluminum foil, or freezer paper, or place it in freezer bags to prevent freezer burn. Label with the date so it can be used within the recommended time frame (3-12 months depending on the type of meat).
Thawing: Thaw frozen meat in the refrigerator for the safest results. If needed quickly, thaw in cold water, changing the water every 30 minutes, or in the microwave if cooking immediately. Never thaw meat at room temperature to avoid rapid bacterial growth.
A butcher’s knot is a crucial technique for butchers and chefs, used to shape larger pieces of meat into a more compact form, ensuring even cooking. The string is tied perpendicular to the grain of the meat, which also serves as a guide for slicing the meat after it’s cooked. The knot needs to be tight enough to hold the meat together during cooking but not so tight that it causes the meat to bulge excessively from the sides.
Tools Needed:
Butcher’s twine (cotton or kitchen twine)
Steps:
Cut the Twine:
Cut a length of twine long enough to wrap around the meat and tie several knots. It’s better to have more twine than you think you’ll need.
Create the First Loop:
Start by wrapping one end of the twine around the meat. Hold both ends of the twine at the top of the meat, and pull the twine tight to form a loop that securely encircles the meat.
Tie the Butcher’s Knot:
Pass the twine under the meat again, bringing it back to the top to create another loop. This time, pass one end of the twine through the loop, forming a hitch. Pull the twine tight to secure the knot around the meat.
Tighten the Knot:
Tighten the knot by pulling the twine firmly in both directions. To prevent the knot from slipping, you can make a few more loops and hitches along the length of the meat.
Trim the Twine:
Cut off any excess twine once the knot is secure. Ensure the knot is tight and the meat is held firmly in place.
Repeat if Necessary:
If you need to tie more knots to secure the meat, repeat the above steps, spacing the knots evenly along the length of the meat.
A butcher’s knot ensures that the meat maintains its shape during cooking and cooks more evenly. With this technique, your meats will always be professionally tied and ready for cooking.
Using a Vacuum Sealer to Preserve Meat
Vacuum sealing is an excellent method for preserving meat because it removes about 90 percent of the air, preventing oxidation that leads to deterioration and spoilage. This process also helps retain the juices and keeps the color bright. Here, we will vacuum seal double top blade steaks. Ground beef, one of the most perishable meat products, can stay in good condition for up to three months if vacuum sealed and kept fully frozen.
Steps for Vacuum Sealing
Preparation: Pack the meat in special precut bags or use a roll of bag material. Leave several inches (5-8 cm) of free space at the top of the bag or roll to ensure a good seal.
Choose the Right Bag Size: Use the smallest bag possible to minimize the amount of air to be removed.
Protective Layer: Ensure that the side of the bag or roll with the protective netting layer, which helps prevent sharp objects like bones from puncturing the bottom, is facing up.
Dry the Meat: Pat the meat as dry as possible with paper towels. Very liquid products are difficult to seal properly.
Vacuum and Seal: Place the meat in the bag and use the vacuum sealer to remove the air and seal the bag.
Storage: After sealing, refrigerate or freeze the meat. Always defrost the meat in the refrigerator on a tray to catch any drips.
Joining Two Portions of Meat with Transglutaminase
Transglutaminases are enzymes that bind proteins together, earning the nickname “meat glue.” Chefs use this technique to combine two or more pieces of meat, such as wrapping sliced bacon around a filet steak. Unlike gelatin, transglutaminase does not melt when heated. In this example, we will “glue” two trimmed top blade muscles and then cut them crosswise to create tender, juicy, and relatively inexpensive double top blade steaks.
Steps for Using Transglutaminase to Bind Meat
Prepare the Meat: Place two trimmed top blade muscles on a large piece of plastic wrap with their undersides facing up and the thickest portions facing in opposite directions.
Select the Appropriate Transglutaminase: Read the label carefully. Each transglutaminase is formulated for specific uses—some are designed for fish, some for meat, some for cooked products, and some for raw. Some types are sprinkled on the meat, while others are mixed with water and brushed on. In this case, we will sprinkle the transglutaminase to join the two top blade muscles.
Apply Transglutaminase: Sprinkle the transglutaminase evenly over the surfaces of the meat to be joined. Ensure even coverage for a secure bond.
Bind the Meat: Press the two pieces of meat together firmly. Wrap the combined pieces tightly in plastic wrap to hold them in place.
Rest and Refrigerate: Let the wrapped meat rest in the refrigerator for the recommended time on the transglutaminase package, usually several hours to overnight. This allows the enzyme to form a strong bond.
Cook as Desired: After the bond has formed, unwrap the meat and proceed with your recipe. The bonded meat can be cooked in any way you prefer, such as grilling, roasting, or pan-frying.
Example Recipe: Double Top Blade Steaks
Ingredients:
907 grams (2 lbs) trimmed top blade muscles
9-18 grams (1-2% of meat weight) transglutaminase powder
Instructions:
Place the trimmed top blade muscles on a sheet of plastic wrap with the undersides facing up and the thickest portions in opposite directions.
Evenly sprinkle 9-18 grams of transglutaminase powder over the surfaces of the muscles that will be joined. Make sure to cover the surfaces uniformly for effective bonding.
Press the two muscles together firmly so that they bond evenly. Wrap the pressed muscles tightly in plastic wrap to hold them in place and ensure a strong bond.
Place the wrapped meat in the refrigerator and let it rest for several hours or overnight. This allows the transglutaminase to activate and bind the muscles together.
Unwrap the bonded meat and cook it as desired—grilling, pan-searing, or roasting are all great options. Once cooked, slice the meat crosswise to create double top blade steaks.
Extracting Rib Lifter Meat from Whole Beef Rib Eye
The untrimmed beef rib primal includes the thin rib lifter muscles, which are embedded in the thick fat, or “bark,” that covers the rib. Removing the rib lifter meat provides a coarse-textured but flavorful and juicy cut that can be used in various dishes such as kabobs, Italian beef braciole, grilled slices, barbecue beef, or ground for burgers.
Tools Needed:
Sharp boning knife
Cutting board
Meat gloves (optional for better grip and safety)
Butcher’s twine (if needed to keep the ribeye intact)
Steps:
Prepare the Ribeye:
Place the whole beef ribeye on a clean cutting board. The ribeye should be well-chilled to make cutting easier and to ensure clean, precise cuts.
Locate the Rib Lifter Meat:
Identify the rib lifter meat on the ribeye. It is the topmost portion of the ribeye, running along the length of the roast. The rib cap is typically separated by a layer of fat from the main ribeye muscle (longissimus dorsi).
Begin Trimming:
Start by trimming away any excess fat from the outer surface of the ribeye to better expose the rib lifter meat. Use a sharp boning knife to make shallow cuts along the fat layer that separates the rib cap from the main muscle.
Work your knife carefully between the rib cap and the main ribeye muscle, following the natural seam between them.
Separate the Rib Lifter Meat:
Gently pull the rib lifter meat away from the ribeye as you continue to cut along the seam. Keep your knife angled towards the fat layer to avoid cutting into the main ribeye muscle.
Continue cutting until the rib lifter meat is fully separated from the ribeye. This may take several passes with the knife to ensure a clean separation.
Trim and Clean the Rib Lifter Meat:
Once separated, inspect the rib lifter meat for any remaining fat or connective tissue that needs to be trimmed away. Trim off any excess fat or sinew to prepare the rib cap for cooking.
Use or Store:
The rib lifter meat can be used immediately for cooking, or it can be portioned and stored for later use. If storing, wrap the meat tightly in plastic wrap and place it in the refrigerator or freezer.
Notes:
Preserve the Ribeye: If you plan to use the remaining ribeye roast, you can tie it with butcher’s twine to keep its shape after the rib cap has been removed.
Cook with Care: Rib lifter meat is incredibly tender and flavorful. It is excellent for grilling, roasting, or even slow-cooking, depending on your recipe.
Example Recipes: Uses for Rib Lifter Meat
Kabobs
Ingredients:
500 grams (1.1 lbs) rib lifter meat, cut into cubes
30 ml (2 tablespoons) olive oil
5 grams (1 teaspoon) salt
2 grams (1/2 teaspoon) black pepper
1 bell pepper, cut into chunks (approximately 150 grams / 5.3 ounces)
Cut the rib lifter meat into even-sized cubes, about 2.5 cm (1 inch) in size. This ensures that the meat cooks evenly. Cut the bell pepper and onion into chunks that are roughly the same size as the meat cubes. If using wooden skewers, soak them in water for at least 30 minutes before grilling to prevent them from burning.
Place the meat cubes in a large mixing bowl. Drizzle the olive oil over the meat and sprinkle with salt and pepper. Toss the meat cubes gently with your hands or a spoon to ensure that each piece is evenly coated with the oil and seasoning.
Take a skewer and begin threading the meat and vegetables onto it. Start with a piece of meat, followed by a chunk of bell pepper, then onion, and a cherry tomato. Continue alternating between meat and vegetables until the skewer is full, leaving about 2.5 cm (1 inch) of space at each end of the skewer for handling. Repeat the process for all the skewers until all the meat and vegetables are used.
Preheat your grill to medium-high heat, which is about 190-200°C (375-400°F). Ensure the grill grates are clean and lightly oiled to prevent sticking.
Place the kabobs on the preheated grill. Cook the kabobs for about 10-15 minutes, turning them every 2-3 minutes to ensure even cooking on all sides. The meat is done when it reaches an internal temperature of 63°C (145°F) for medium-rare or 71°C (160°F) for medium, and the vegetables should be tender with slight charring.
Once cooked, remove the kabobs from the grill and let them rest for a couple of minutes. Serve the kabobs hot, directly on the skewers, or slide the meat and vegetables off the skewers onto a serving platter.
In a mixing bowl, combine the minced garlic, chopped fresh herbs (parsley and basil), grated Parmesan cheese, and breadcrumbs. Mix well to create the filling.
Lay the butterflied and pounded rib lifter meat flat on a clean surface. Evenly spread the filling mixture over the surface of the meat, leaving a small border around the edges. Carefully roll the meat up tightly, starting from one end. Once rolled, secure the braciole with kitchen twine, tying it in several places to hold its shape during cooking.
In a large skillet, heat the olive oil over medium-high heat. Add the rolled braciole and sear it on all sides until browned. This should take about 8-10 minutes. The browning process adds flavor and helps seal in the juices.
Once the braciole is browned, transfer it to a pot with the tomato sauce. Cover the pot and simmer on low heat for 1-2 hours, or until the meat is tender. The longer it simmers, the more tender and flavorful the braciole will become.
After simmering, remove the braciole from the pot and let it rest for a few minutes. Carefully remove the kitchen twine before slicing the braciole into individual servings.
Barbecue Beef
Ingredients: 1 kg (2.2 lbs) rib lifter meat
240 ml (1 cup) barbecue sauce
10 grams (2 teaspoons) salt
5 grams (1 teaspoon) black pepper
Instructions:
Rub the rib lifter meat evenly with salt and pepper on all sides to ensure the seasoning penetrates the meat during cooking.
Place the seasoned meat in a slow cooker. Pour the barbecue sauce over the meat, ensuring it’s well coated. Cover the slow cooker with its lid and cook on the low setting for 6-8 hours, or until the meat is tender and easily pulls apart with a fork.
Once the meat is cooked, remove it from the slow cooker and place it on a cutting board. Using two forks, shred the meat into bite-sized pieces. Return the shredded meat to the slow cooker and mix it thoroughly with the remaining barbecue sauce.
Ground for Burgers
Ingredients:
1 kg (2.2 lbs) rib lifter meat, ground
10 grams (2 teaspoons) salt
5 grams (1 teaspoon) black pepper
Instructions:
Use a meat grinder to grind the rib lifter meat. If you don’t have a grinder, you can ask your butcher to grind it for you. Ensure the meat is evenly ground to achieve the best texture for your burgers.
Once the meat is ground, divide it into equal portions and shape each portion into a burger patty. Press the center of each patty slightly to prevent it from puffing up during cooking. Season both sides of the patties with salt and pepper.
Grill or pan-fry the patties over medium-high heat. Cook for about 3-4 minutes on each side for medium-rare, or longer if you prefer your burgers more well-done. Cook until the internal temperature reaches 71°C (160°F) for medium doneness.
Basic Beef Preparation
Trimming Meat
Trimming beef is a fundamental culinary skill that enhances the quality and presentation of the finished dish. Understanding why and how to trim meat properly can significantly impact cooking results in terms of flavor, texture, and overall appearance.
Importance of Trimming
Removes Unwanted Parts: Trimming helps remove excess fat, silver skin, and other inedible or tough parts that could affect the eating experience.
Improves Taste and Texture: By removing excess fat and connective tissues, trimming ensures that the meat cooks evenly and maintains a pleasant texture and flavor.
Enhances Presentation: Well-trimmed meat has a cleaner, more appealing look on the plate, which is important in culinary settings where presentation matters.
How Trimming Improves Texture and Flavor
Removal of Tough Connective Tissues: Connective tissues can be sinewy and tough, not breaking down easily during cooking, which can negatively impact the texture.
Balanced Fat Content: While some fat is desirable for flavor and juiciness, too much can be overwhelming and greasy. Trimming controls the fat level, enhancing the natural flavor of the beef without overpowering it.
How Trimming Promotes Even Cooking
Uniform Thickness: Trimming meat to a consistent thickness helps it cook more uniformly, preventing thinner parts from overcooking while thicker parts are still undercooked.
Removal of Uneven Excess Fat: Excess fat can cause flare-ups on a grill and lead to uneven cooking. Controlled fat levels mean more consistent heat distribution.
How Trimming Enhances Presentation
Visual Appeal: Neatly trimmed meat, with its uniform shape and clean edges, looks more appetizing and professional.
Serving Size Control: Trimming allows for precise portion control, ensuring each serving is uniform, which is particularly important in restaurant settings.
How Trimming Reduces Waste
Efficient Use of Meat: Proper trimming techniques ensure that only the necessary amount of fat and tissue is removed, maximizing the usable meat.
Repurposing Trimmings: Fat and other trimmings can often be used to make stocks, broths, or rendered fats, reducing overall waste.
Tools Needed for Trimming Meat
Effective trimming requires the right tools. Here are some essential items:
Sharp Boning Knife for Trimming Meat
Features to Look For: A boning knife typically has a thin, curved blade that makes it easier to maneuver around bones and cut away fat and sinew.
Maintenance: Keep the knife well-sharpened and clean to ensure it performs efficiently and safely.
Cutting Board for Trimming Meat
Material Preference: Use a heavy-duty plastic or wooden cutting board that won’t dull your knives. Avoid glass boards, which can be hard on knives.
Hygiene: Ensure the board is cleaned and sanitized before and after use to prevent cross-contamination.
Techniques for Trimming Meat
Trimming Excess Fat from Meat
Technique:
Initial Cuts: Place the meat on the cutting board. Identify the areas with excess fat and silver skin. Use your boning knife to make small initial cuts to get under the fat cap.
Angling the Blade: Gently slide the knife under the fat cap and angle the blade slightly upward. This helps to separate the fat from the meat without removing too much of the meat itself.
Peeling Away the Fat: As you angle the blade, allow the fat to peel away with minimal meat attached. Work slowly and steadily to ensure precision.
Leaving a Thin Fat Layer: While trimming, aim to leave a small, even layer of fat for flavor and moisture, especially if roasting or grilling. This layer helps to baste the meat as it cooks, adding juiciness and flavor.
Removing Silver Skin
Technique:
Locate the Silver Skin: Silver skin is a thin, silvery membrane found on some cuts of beef. It does not break down during cooking and can be tough and chewy.
Make a Small Cut: Insert the tip of your boning knife just under the silver skin at one end of the meat. Make a small cut to lift the edge.
Angle the Knife: Once you have a flap to hold onto, angle the knife slightly upward and keep it close to the silver skin to avoid removing too much meat.
Pull and Cut: With one hand, hold the flap of silver skin and pull it taut. With the other hand, gently cut along the length of the silver skin, keeping the blade angled slightly upward. The silver skin should peel away cleanly.
Trimming for Uniform Thickness
Technique:
Identify Uneven Areas: Place the meat on the cutting board and identify any uneven areas that may cause inconsistent cooking.
Trim High Spots: Use your boning knife to trim down any thicker areas to match the thinner sections, aiming for a uniform thickness throughout the cut.
Slicing Evenly: For steaks or other sliced cuts, use a slicing motion to cut through the meat evenly, ensuring each piece is of uniform thickness.
Maintaining Clean Tools and Work Area
Clean as You Go: Regularly clean your knife and cutting board during the trimming process to prevent cross-contamination.
Sanitize: After trimming, thoroughly sanitize all tools and surfaces to ensure food safety.
Sharpening: Regularly sharpen your boning knife to maintain precision and efficiency. A sharp knife reduces the risk of accidents and ensures clean cuts.
Removing Sinew from Meat
Sinew, also known as silver skin, is a tough membrane found on various cuts of meat. It does not break down during cooking, making it unpleasant to chew, so it’s important to remove it properly.
Locate the sinew on the meat. It typically has a silvery-white, shiny, and tough appearance, often found on the surface of cuts like tenderloin or certain roasts.
Using a sharp knife, ideally a boning or fillet knife, slide the blade under one end of the sinew. Hold that end up slightly to create tension. Angle the knife away from you, keeping the blade flat against the sinew to avoid cutting too deeply into the meat. Use a gentle sawing motion to separate the sinew from the meat. Pull on the sinew as you cut to help remove it cleanly and efficiently.
Tools Needed:
Sharp Boning or Fillet Knife: The flexibility and sharpness of these knives allow for precise cuts close to the sinew without cutting into the muscle meat excessively, ensuring the meat remains intact and the sinew is removed cleanly.
Shaping and Cutting Meat
Properly shaping and cutting meat not only ensures even cooking but also significantly enhances the flavor, texture, and presentation of your dishes. Whether you’re cooking at home or in a professional kitchen, mastering these skills is essential for achieving high-quality results.
The Importance of Shaping and Cutting Meat
Shaping and cutting meat serve different but equally important purposes. Shaping is particularly crucial for ensuring that large cuts of meat cook evenly and maintain their form during cooking. For instance, the butterflying technique allows you to thin out thick pieces of meat, promoting more uniform cooking. Additionally, trimming away excess fat, silver skin, and irregular parts helps to create a more uniform piece of meat, improving both the texture and appearance of the final dish.
Cutting meat correctly is essential for optimizing its tenderness and flavor. Slicing meat against the grain shortens the muscle fibers, resulting in a more tender and easier-to-chew bite. Consistency in portion sizes is also crucial, especially in professional kitchens, where uniformity ensures that all pieces cook at the same rate and that presentation is balanced.
Shaping Techniques
Butterflying: This technique involves slicing thick pieces of meat horizontally and opening them up like a book, creating a thinner and more uniform piece that cooks more evenly.
Trimming: Removing excess fat, silver skin, and irregular parts not only shapes the meat into a more uniform piece but also shortens cooking time and enhances presentation.
Tying: Using butcher’s twine to tie large cuts of meat helps them maintain their shape during cooking, leading to more even heat distribution and a neater appearance.
Cutting Techniques
Slicing Against the Grain: Always cut meat against the grain, which refers to the direction of the muscle fibers. This technique shortens the fibers and results in a more tender texture, especially in cuts like steaks.
Portioning: Cutting meat into equal-sized portions ensures consistent cooking times and uniform presentation, which is important for both home and professional settings.
Cubing and Dicing: For stews or kebabs, cutting the meat into uniform cubes ensures that each piece cooks evenly and has a consistent texture.
The Importance of Proper Tools
Using the right tools is crucial for successfully shaping and cutting meat. A sharp chef’s knife allows for clean and precise cuts, preventing the meat from tearing, which can affect both texture and presentation. A boning knife is ideal for trimming and shaping meat, particularly for removing bones, fat, and sinew with precision. A cutting board should be large enough to provide a stable surface for cutting and should be durable enough to withstand repeated use.
Deboning Meat
Deboning meat is a crucial skill that involves removing bones from various cuts of meat. This technique is essential for preparing certain dishes, such as stuffed roasts, or for making boneless cuts that are more manageable and appealing. Mastering deboning not only enhances the presentation of your dish but also maximizes the use of the meat, ensuring that none goes to waste.
The Importance of Deboning Meat
Deboning meat is vital for several reasons. First, it allows for more precise cooking, especially when preparing boneless cuts that cook more evenly than bone-in pieces. This is particularly important in dishes where the meat needs to be stuffed, rolled, or shaped in specific ways, as bones can interfere with these preparations. Additionally, deboning makes meat easier to carve and serve, improving both the presentation and the dining experience.
By removing the bones yourself, you also gain more control over the final product, including how much meat is left on the bone and how the meat is trimmed. This control can be crucial for achieving the perfect texture and flavor in your dish.
Technique for Deboning Meat
Identify Joints: The first step in deboning meat is to locate the joints where bones connect. These joints are often the easiest places to begin the deboning process because the bones naturally separate at these points. Finding the joints gives you a starting point to begin cutting.
Make Initial Cuts: Using a sharp, flexible boning knife, make your initial cuts around and along the bones. It’s important to keep the blade as close to the bone as possible to ensure that you leave as much meat on the cut as possible. This step requires precision and care to avoid wasting any valuable meat.
Scrape the Bone: After making your initial cuts, use the knife to scrape the meat away from the bone. This step involves carefully working the knife between the bone and the meat, moving slowly to avoid tearing the meat. Continue this process until the bone can be cleanly and fully removed from the meat.
Trim Remaining Pieces: Once the bone has been removed, the final step is to trim away any excess fat, sinew, or other unwanted pieces that were close to the bone. This trimming helps to further refine the cut, making it more uniform and appealing for cooking and serving.
Tools Needed for Deboning Meat
Flexible Boning Knife: A flexible boning knife is essential for deboning meat. Its thin, curved blade allows for precise cuts around bones and joints, making it easier to separate the meat without damaging it. The flexibility of the knife also helps in navigating the contours of the bones, ensuring that you remove the bones cleanly and efficiently.
Deboning meat is an essential technique that improves both the preparation and presentation of many dishes. Whether you’re creating a boneless roast, preparing meat for stuffing, or simply making a cut more manageable, knowing how to debone meat effectively ensures that you maximize the use of the meat while achieving the best possible flavor and texture. With the right tools and technique, deboning becomes a straightforward process that enhances your culinary skills and the quality of your dishes.
Marinating Meat
Marinating is an essential technique in culinary practices, used to enhance both the flavor and tenderness of meat before cooking. By understanding how marination works and knowing the optimal marinating times for different types of meat, you can significantly elevate the quality and enjoyment of your dishes.
How Marinating Meat Adds Flavor and Tenderness
Marinating meat involves soaking it in a mixture of herbs, spices, and a base liquid, which can be acidic or enzymatic. This process allows the marinade to infuse the meat with rich flavors and helps to tenderize it, making it juicier and more enjoyable to eat.
Flavor Infusion: The liquid component of a marinade—whether it’s vinegar, wine, citrus juice, or another ingredient—helps to distribute flavors throughout the meat. Herbs, spices, and other aromatic ingredients in the marinade are absorbed into the meat, enhancing its overall taste. This flavor infusion can be customized based on the desired profile of the dish, allowing for a wide range of culinary possibilities.
Tenderizing Action: Marinades often contain acidic or enzymatic ingredients, such as vinegar, lemon juice, pineapple, or yogurt, which help to break down the tougher muscle fibers and connective tissues in the meat. This breakdown process softens the meat, making it more tender and allowing it to retain more moisture during cooking. However, it’s important to note that too much acid or enzyme can cause the outer layer of the meat to become mushy if left for too long, so marinating times should be carefully controlled.
Chemical Changes: The acids in the marinade cause a process called denaturation, where the protein structure of the meat is altered, resulting in a more tender texture. However, balance is key—excessive marinating, especially with highly acidic ingredients, can lead to a mushy texture, particularly on the surface of the meat.
Marinating Time for Meat
The optimal marinating time varies depending on the type of meat and the ingredients in the marinade. Following these general guidelines will help you achieve the best results:
Small Cuts and Tender Meats (such as chicken breasts, steak, fish fillets): These should be marinated for shorter periods, typically between 30 minutes to 2 hours. Since these cuts are already tender, extended marinating can cause them to become overly soft, particularly in acidic marinades.
Tougher Cuts (such as brisket, pork shoulder, or lamb shanks): These meats benefit from longer marinating times, ranging from 2 hours to overnight. The longer time allows the marinade to penetrate deeper into the meat, effectively tenderizing the tougher fibers and enhancing flavor throughout.
Seafood: Due to its delicate texture, seafood requires the shortest marinating time, usually just 15 to 30 minutes. Over-marinating can cause the tissues to break down too much, leading to a mushy texture that can detract from the dish.
Tips for Effective Marinating
To ensure successful marination, follow these best practices:
Use a Non-reactive Container: Always marinate meat in glass, ceramic, or plastic containers. Avoid using metal containers, particularly aluminum, as they can react with the acidic components of the marinade and impart an undesirable flavor to the meat.
Refrigerate While Marinating: It’s crucial to marinate meat in the refrigerator to prevent bacterial growth. Never marinate at room temperature, as this can create an unsafe environment for the meat.
Turn the Meat Occasionally: While the meat is marinating, turn it occasionally to ensure that all parts are equally exposed to the marinade. This helps the flavors absorb more uniformly, resulting in a more consistent taste.
Do Not Reuse Raw Marinade: If you plan to use some of the marinade as a sauce, always set aside a portion before adding the raw meat. If you need to use marinade that has been in contact with raw meat for basting or serving, make sure to boil it for several minutes to kill any harmful bacteria.
Consider Marinade Penetration: For thicker cuts of meat, consider lightly scoring the surface before marinating. This increases the surface area and allows the marinade to penetrate deeper, enhancing both flavor and tenderness.
Tenderizing Meat
Tenderizing meat is a crucial technique in cooking, especially for improving the texture and flavor of tougher cuts. This process can be accomplished through mechanical methods or by using enzymatic tenderizers, each offering distinct advantages depending on the type of meat and the desired result.
Mechanical Tenderizing of Meat
Mechanical tenderization involves physically breaking down the tough muscle fibers and connective tissues in meat. This can be done using several techniques:
Pounding: Pounding involves using a meat mallet to flatten the meat, creating a uniform thickness. This method is commonly used for cuts like chicken breasts or veal in dishes such as scallopini, where even cooking is essential.
Benefits: Pounding not only tenderizes the meat but also helps it cook evenly, ensuring that all parts reach the same level of doneness simultaneously.
Cubing: Also known as needling, cubing uses a specialized tool with sharp blades that pierce the meat, breaking up the muscle fibers and making it more tender.
Benefits: This method is particularly effective for tougher cuts of meat, transforming them into tender pieces that are suitable for quicker cooking methods like grilling or pan-frying.
Scoring: Scoring involves making shallow cuts across the surface of the meat. This technique helps break down tough fibers, allows marinades to penetrate more deeply, and prevents the meat from curling during cooking.
Benefits: Scoring is ideal for thicker cuts of meat, enhancing flavor absorption and improving the overall tenderness of the meat.
Rolling: For dishes like roulades, the meat is first flattened, then filled and rolled. This process stretches the muscle fibers, helping to tenderize the meat.
Benefits: Rolling is particularly useful for creating stuffed dishes and ensures that the meat is uniformly tender throughout.
Mechanical tenderizing methods are quick, easy to apply immediately before cooking, and do not require much preparation time.
Enzymatic Tenderizers for Meat
Enzymatic tenderizers use natural enzymes found in certain fruits to break down the tough fibers in meat, significantly enhancing its tenderness.
Types of Enzymatic Tenderizers:
Papain: Derived from raw papaya, papain is one of the most effective enzymes for tenderizing meat. It is often available in powdered form and used as a seasoning or marinade ingredient.
Bromelain: Sourced from pineapples, bromelain not only tenderizes meat but also imparts a subtle sweetness. It is effective at breaking down proteins, making it ideal for use in marinades.
Ficin: Extracted from figs, ficin works similarly to papain and bromelain, though it is less commonly used. It is effective in tenderizing meat and is used in the same way as the other enzymes.
Using Enzymatic Tenderizers:
Marinades: Enzymatic tenderizers can be used by creating a marinade with the fruit itself (such as mashed papaya, pineapple, or fig) or by using commercial powdered forms of these enzymes.
Application: Apply the marinade to the meat and allow it to sit in the refrigerator for several hours, depending on the toughness of the meat and the potency of the enzyme.
Considerations: It’s important to monitor the marinating time closely. Enzymatic tenderizers can cause the meat to become overly soft or mushy if left too long, particularly with delicate meats like fish or chicken.
Tips for Effective Tenderizing
Choose the Right Method: Select the tenderizing technique based on the type of meat and the desired outcome. Mechanical methods are best for thin cuts and quick preparations, while enzymatic methods are more suitable for thicker, tougher cuts that require deeper tenderization.
Avoid Over-Tenderizing: When using enzymatic tenderizers, be mindful of the marinating time. Overexposure to the enzymes can result in a texture that is too soft, detracting from the meat’s quality.
Clean Tools and Safe Practices: Regardless of the method used, always ensure that your tools are clean and that the meat is handled safely to prevent any risk of contamination.
Tenderizing meat is an essential technique that enhances both the texture and flavor of your dishes. Whether using mechanical methods to quickly prepare thin cuts or enzymatic tenderizers for deeper penetration into tougher cuts, choosing the right approach will significantly improve your cooking results. With proper techniques and precautions, you can transform even the toughest cuts into delicious, tender, and flavorful meals.
Brining Meat
Brining is a culinary technique designed to enhance the moisture and flavor of meats by soaking them in a saltwater solution. This method is particularly beneficial for lean cuts of meat, such as turkey, chicken breasts, and pork loin, which tend to dry out during cooking. By understanding how brining works, you can improve both the juiciness and flavor of your dishes.
Brining Meat for Moisture Retention
How It Works: Brining helps retain moisture in meat through a process called osmosis. When meat is submerged in a brine solution, the salt in the brine draws water and flavor compounds into the meat fibers. This extra moisture is retained during cooking, resulting in meat that is juicier and more tender.
Brine Solution Basics: A basic brine consists of water and salt, typically at a ratio of about 1 cup of salt to 1 gallon of water. This ratio can be adjusted depending on the recipe and personal taste preferences.
Process:
Dissolve the Salt: Start by heating a portion of the water, which helps dissolve the salt and any other seasonings or sugars you might want to add. Make sure the brine cools completely before you use it.
Submerge the Meat: Place the meat in a non-reactive container, such as glass or stainless steel, and pour the cooled brine over it. Ensure that the meat is completely submerged in the brine.
Refrigerate: Cover the container and refrigerate it. The duration of the brining process depends on the size and type of meat. For smaller cuts, a few hours may suffice, while whole birds like turkey may require 24 hours or more.
Tips for Success:
Keep it Cold: Always brine meat in the refrigerator to prevent bacterial growth and maintain food safety.
Avoid Over-Brining: Leaving meat in the brine for too long can result in an overly salty flavor. It’s important to follow recommended brining times to achieve the best results.
Brining Meat for Flavor Infusion
Enhancing Flavor: While salt is the main component in a brine, additional flavors can be infused into the meat by including herbs, spices, sugars, and even fruit juices. These ingredients are absorbed into the meat along with the salt, enhancing its natural flavor and adding complexity.
Ingredients for Flavor Brining:
Sugars: Brown sugar, honey, or maple syrup can add a subtle sweetness that balances the saltiness of the brine.
Aromatics: Ingredients like garlic, onion, bay leaves, and peppercorns are commonly used to add depth to the flavor.
Herbs and Spices: Fresh herbs such as thyme, rosemary, and dill, or spices like cloves and cinnamon sticks, introduce aromatic and complex flavors.
Acidic Components: Adding apple cider vinegar, citrus juice, or wine can help tenderize the meat while adding a zesty, tangy flavor.
Process:
Prepare the Brine: Combine all the ingredients and heat the mixture if needed to dissolve solids like salt and sugar. Make sure the brine is completely cooled before using it.
Brine the Meat: Submerge the meat in the prepared brine, ensuring it is fully covered. Refrigerate the meat for the duration of the brining period.
After Brining: Once the brining process is complete, remove the meat from the brine and pat it dry. Depending on the recipe, you may need to rinse the meat to remove excess salt, especially if it will be cooked quickly.
Seasoning Meat
Properly seasoning meat is crucial for developing its flavor and enhancing the overall taste of your dishes. Salt, pepper, herbs, and spices are the cornerstone ingredients used to season meats effectively. Understanding how to use these seasonings can make a significant difference in your culinary results.
Salt and Pepper for Meat
Basic Seasoning: Salt and pepper are fundamental for enhancing the natural flavors of meat. Salt, in particular, is essential as it not only seasons the meat but also helps break down proteins, making the meat more tender.
When to Season: For most meats, seasoning with salt and pepper before cooking is ideal as it gives the surface a great flavor boost. For thicker cuts, consider seasoning a few hours ahead of time to allow the salt to penetrate deeper into the meat.
Types of Salt: Use kosher salt or sea salt for a cleaner, purer taste than table salt. These salts have larger grains and don’t contain the additives found in regular table salt.
Pepper: Freshly ground black pepper is preferred over pre-ground pepper for its superior flavor. The timing of adding pepper can vary; some prefer adding it before cooking to enhance flavor development, while others add it after cooking to preserve the pepper’s volatile aromas.
Herbs and Spices for Meat
Customizing Flavors: Herbs and spices allow you to customize the flavor profile of your dishes and can be tailored to complement the type of meat and the cuisine you are preparing.
Common Herbs:
Rosemary: Robust and aromatic, excellent for beef and lamb.
Thyme: Versatile and earthy, pairs well with beef, pork, and chicken.
Sage: Strong and slightly bitter, great for pork and poultry.
Oregano: Pungent and slightly peppery, ideal for beef and lamb.
Spices: Depending on the cuisine, a variety of spices can be used. For instance:
Cumin, Coriander, and Paprika: Often found in Middle Eastern and Latin American dishes.
Clove and Cinnamon: Used in some Asian recipes.
Marinating with Herbs and Spices: Creating a marinade with oil, herbs, spices, and acidic ingredients (like vinegar or lemon juice) can infuse the meat with intense flavors and also help tenderize it. Allow the meat to marinate in the refrigerator for several hours or overnight for the best results.
Application Techniques
Dry Rubs: Combine dried herbs and ground spices and rub them onto the meat before cooking. This method is excellent for roasting or grilling and helps create a flavorful crust.
Herb Pastes: Blend fresh herbs with oil and garlic to form a paste that can be rubbed onto the meat before cooking. This is particularly good for roasting or slow-cooking.
Layering Flavors: Don’t be afraid to layer flavors by using both a marinade and a dry rub, or by basting the meat with fresh herbs and spices during cooking.
Tips for Seasoning Meat
Balance Flavors: It’s important to balance the strength of your herbs and spices with the natural flavor of the meat. Delicate meats like chicken or fish can be overpowered by too many strong spices.
Freshness Matters: Use fresh herbs and spices whenever possible, as they will impart more vibrant flavors. Make sure dried spices aren’t too old, as they lose potency over time.
Taste and Adjust: Always taste and adjust seasoning as needed. Consider the other components of your dish and how the flavors will blend when the dish is complete.
Examples Recipe of Seasoning Techniques:
Classic Beef Rub:
Ingredients:
30 grams (2 tablespoons) kosher salt
7 grams (1 tablespoon) freshly ground black pepper
7 grams (1 tablespoon) paprika
3 grams (1 teaspoon) garlic powder
3 grams (1 teaspoon) onion powder
1 gram (1 teaspoon) dried thyme
1 gram (1 teaspoon) dried rosemary
Instructions:
Combine all ingredients in a small bowl, mixing well to ensure even distribution of the spices and herbs.
Generously rub the mixture onto the surface of the beef, covering all sides thoroughly.
Let the beef sit at room temperature for at least 30 minutes before cooking to allow the flavors to begin penetrating the meat. For a deeper flavor, refrigerate the rubbed beef for several hours or overnight.
Herb-Garlic Paste for Roasting:
Ingredients:
15 grams (1/4 cup) fresh rosemary leaves
10 grams (1/4 cup) fresh thyme leaves
4 cloves garlic (approximately 12 grams)
60 ml (1/4 cup) olive oil
5 grams (1 teaspoon) kosher salt
1.5 grams (1/2 teaspoon) freshly ground black pepper
Instructions:
Combine the rosemary, thyme, garlic, olive oil, salt, and pepper in a food processor.
Process the mixture until it forms a smooth paste. Scrape down the sides of the processor as needed to ensure everything is evenly blended.
Rub the herb-garlic paste all over the meat, making sure to cover all sides for even flavor distribution.
Allow the meat to marinate in the refrigerator for at least an hour before roasting. For more intense flavor, you can marinate the meat for several hours or overnight.